
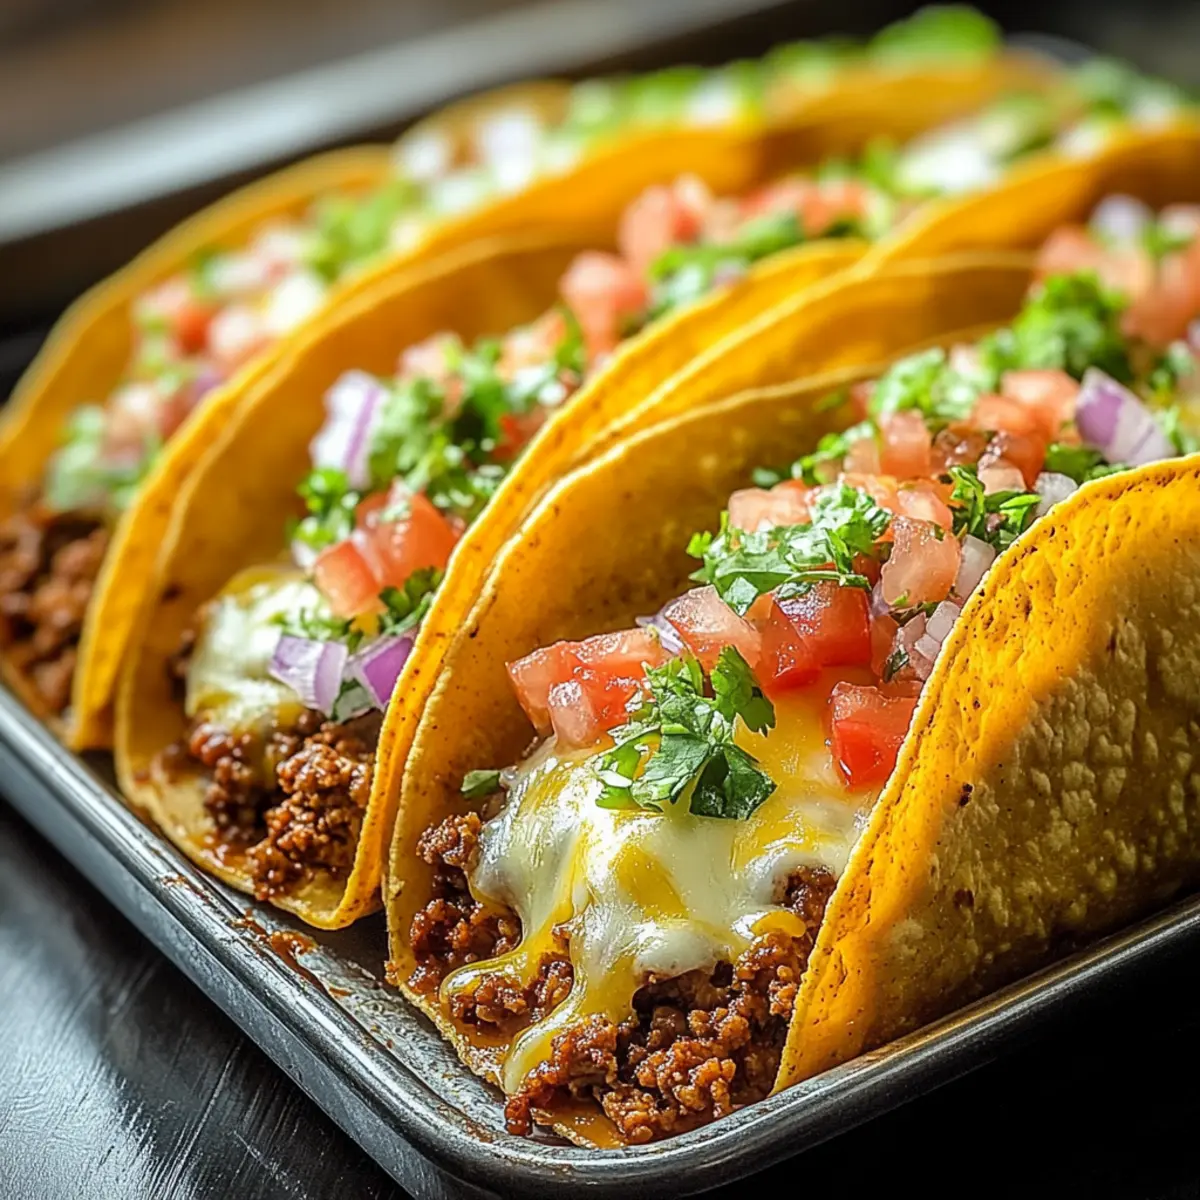
As the delicious aroma of baked tortillas fills the kitchen, my mouth waters in anticipation of the crunch to come. Today, I’m thrilled to share my go-to recipe for Oven-Baked Cheesy Tacos (Crispy & Loaded)—a true crowd-pleaser that transforms weeknight dinners into vibrant gatherings. Customizable with your choice of protein, from savory ground beef to hearty lentils, these tacos are not only gluten-free but also packed with flavors that bring everyone together. In just 35 minutes, you’ll have a satisfying dish that delights both kids and adults alike, leaving fast food behind in the dust. Are you ready to take taco night to the next level? Let’s dive into this quick, fun recipe that’s sure to impress!
Why You’ll Love Oven-Baked Cheesy Tacos?
Quick preparation: In just 35 minutes, you can whip up a satisfying taco feast, perfect for busy weeknights or spontaneous gatherings.
Flavorful filling: The combination of seasoned meat or hearty lentils with gooey cheese creates a mouthwatering experience in every bite!
Customizable options: Whether you prefer ground beef, chicken, or a vegetarian delight, there’s a protein to suit everyone’s taste.
Crispy texture: These baked tacos deliver a satisfying crunch that rivals traditional frying without the added guilt!
Health-conscious choice: Naturally gluten-free and loaded with fresh toppings like tomatoes and cilantro, they’re a nutritious alternative to fast food.
These Oven-Baked Cheesy Tacos will surely become a family favorite, just like my Ooey Gooey Cheesy Garlic Chicken Wraps!
Oven-Baked Cheesy Tacos Ingredients
For the Filling
- Olive Oil – Enhances flavor and provides a cooking medium; can substitute with canola oil for a lighter option.
- Onion – Adds sweetness and depth to the filling; use yellow, white, or red onions based on preference.
- Garlic – Provides aromatic richness; substitute with garlic powder (about 1/4 teaspoon) if fresh garlic is unavailable.
- Ground Beef (or Turkey/Chicken) – Main protein component; for vegetarian options, use black beans or lentils.
- Taco Seasoning – Provides spices for flavor; feel free to use homemade seasoning or adjust the spice levels according to taste.
- Tomato Sauce – Adds moisture and acidity; you can substitute with crushed tomatoes or salsa for a different twist.
For Assembling
- Taco Shells – The base for the dish; choose corn or flour tortillas depending on dietary preferences.
- Shredded Cheese (e.g., Cheddar) – Melts beautifully to create a cheesy texture; can substitute with dairy-free cheese for vegan options.
For Toppings
- Lettuce – Provides freshness and crunch; feel free to use a mix of greens for variety.
- Tomatoes – Adds juiciness and color; diced tomatoes or cherry tomatoes work beautifully.
- Red Onion – Contributes a burst of flavor; can swap out for green onions for a milder taste.
- Cilantro – Delivers a fresh, herbaceous note; optional based on personal preference.
Get ready to enjoy your Oven-Baked Cheesy Tacos loaded with flavor and customizable to your liking!
Step‑by‑Step Instructions for Oven-Baked Cheesy Tacos (Crispy & Loaded) You’ll Love
Step 1: Preheat the Oven
Begin by preheating your oven to 375°F (190°C). This step is crucial for achieving perfectly crunchy taco shells. Once the oven reaches temperature, you’ll create an ideal environment for baking the tacos and ensuring that the cheese melts beautifully without overcooking the fillings, leaving them juicy and flavorful.
Step 2: Sauté Aromatics
In a large skillet, heat 1 tablespoon of olive oil over medium heat. Once hot, add diced onion and minced garlic, sautéing for about 2-3 minutes or until translucent. Stir frequently to prevent burning and allow the sweet aroma to fill your kitchen. This step sets the flavorful base for your delicious Oven-Baked Cheesy Tacos.
Step 3: Cook the Protein
Add your choice of ground meat, such as beef, turkey, or chicken, into the skillet. Use a wooden spoon to break apart the meat as it cooks for about 5-7 minutes, or until browned and fully cooked. Stir in taco seasoning, tomato sauce, and season with salt and pepper, mixing well until all ingredients are integrated and flavors meld together.
Step 4: Prepare Taco Shells
While the filling simmers, warm your taco shells slightly in the microwave for about 30 seconds. This makes them easier to fill and helps prevent breakage. Fill each taco shell generously with the meat mixture from the skillet, then top with a hearty layer of shredded cheese, ensuring you achieve that gooey goodness in your Oven-Baked Cheesy Tacos.
Step 5: Bake the Tacos
Arrange the filled taco shells upright in a greased baking dish, ensuring they stand straight and secure. Place the dish in the preheated oven, baking for 10-15 minutes or until the cheese is fully melted and the edges of the taco shells become golden and crispy. Keep a close eye on them to prevent over-browning.
Step 6: Add Fresh Toppings
Once the Oven-Baked Cheesy Tacos are out of the oven, allow them to cool slightly. Customize with your favorite fresh toppings, such as shredded lettuce, diced tomatoes, red onion, and cilantro. Adding these ingredients creates layers of flavor and freshness, making your tacos an even more vibrant and tasty meal!
What to Serve with Oven-Baked Cheesy Tacos (Crispy & Loaded)?
The perfect accompaniment can elevate a delicious taco night into a memorable feast filled with colors and flavors.
-
Spanish Rice: This savory side is a traditional favorite that absorbs the taco’s bold flavors, adding a comforting touch.
-
Refried Beans: Creamy and rich, they offer a delightful contrast to the crispy tacos, making every bite even more satisfying.
-
Guacamole: Fresh, creamy, and packed with flavor, this dip enhances the taco experience with its coolness and zest.
-
Chips and Salsa: Crunchy tortilla chips paired with zesty salsa create the perfect appetizer, setting the stage for a fun fiesta.
-
Mexican Street Corn: Sweet, smoky, and slathered with cheese, this dish adds an irresistible twist that brightens up your taco night.
-
Fresh Salad: A crisp salad with mixed greens, tomatoes, and avocado balances the richness of the tacos, offering a refreshing burst of flavors.
-
Margaritas: For a drink that perfectly complements the meal, a tangy margarita ensures a festive atmosphere that pairs beautifully with each bite.
Elevate your mealtime with these delightful sides, and let your Oven-Baked Cheesy Tacos shine!
How to Store and Freeze Oven-Baked Cheesy Tacos
Fridge: Store leftover Oven-Baked Cheesy Tacos in an airtight container for up to 3 days. This keeps them fresh and ready for a quick meal.
Freezer: For longer storage, freeze uncooked taco shells filled with your mixture for up to 2 months. Just bake them directly from frozen when you’re ready to enjoy!
Reheating: To preserve the crunchy texture, reheat baked tacos in the oven at 350°F (175°C) for about 10-15 minutes. Avoid the microwave to keep them crispy!
Wrapping: If you’ve stored assembled tacos, ensure they’re tightly wrapped or placed in a sealed container to prevent drying out in the refrigerator or freezer.
Make Ahead Options
These Oven-Baked Cheesy Tacos (Crispy & Loaded) are perfect for meal prep enthusiasts! You can prepare the filling—ground meat, onions, garlic, and seasonings—up to 3 days in advance and store it in an airtight container in the refrigerator. To maintain quality, ensure the filling is completely cooled before refrigerating. You can also assemble the tacos by filling the shells with the prepped filling and cheese, covering them tightly before refrigerating up to 24 hours. When ready to serve, simply bake them in the preheated oven for 10-15 minutes until bubbly and crispy. This way, you’ll enjoy restaurant-quality results with minimal effort, making taco night a breeze!
Oven-Baked Cheesy Tacos: Variations & Substitutions
Feel free to make these Oven-Baked Cheesy Tacos uniquely yours with delightful twists and substitutions that suit your taste!
-
Lean Protein: Swap ground beef for turkey or chicken for a lighter dish that still satisfies. The swap brings lighter flavors while keeping the taco experience hearty and enjoyable.
-
Vegetarian Option: Replace meat with cooked black beans or lentils for a delicious meat-free taco version. The earthy flavors of beans blend beautifully with cheese and spices, ensuring flavor remains the focus.
-
Dairy-Free Delight: Use dairy-free cheese for a vegan taco option; it melts just like traditional cheese, allowing everyone to enjoy the creamy goodness without dairy.
-
Spicy Kick: Add jalapeños to your filling or on top of your tacos for an extra kick of heat. Balance the spice with a dollop of sour cream for the perfect flavor harmony.
-
Cheesy Variations: Experiment with cheeses like Monterey Jack or Pepper Jack instead of cheddar for a different flavor profile. These alternatives can add an exciting twist, perfect for cheese lovers!
-
Crunchy Toppings: Toss in crushed tortilla chips for added crunch before serving. This unexpected ingredient gives your tacos an exciting texture and delightful crunch.
-
Fresh Greens: Consider adding baby spinach or arugula as a topping for extra nutrients and a peppery bite. These greens can brighten up the dish and add added freshness.
-
Salsa Swap: Instead of tomato sauce, use your favorite salsa for an added kick and flavor complexity. The variety of salsas available can bring an entirely new character to your tacos!
With these ideas, you can customize your Oven-Baked Cheesy Tacos to fit every mood, just like I do with my Cheesy Root Vegetable Gratin!
Expert Tips for Oven-Baked Cheesy Tacos
Preheat is Key: Ensure you preheat the oven to avoid soggy taco shells, which can ruin the intended crispy texture.
Choose Your Protein: Don’t hesitate to swap proteins; ground turkey or lentils can provide different flavors and nutritional benefits for your Oven-Baked Cheesy Tacos.
Store Properly: For optimal leftovers, store tacos in airtight containers. Reheat in the oven to maintain crispiness instead of using a microwave.
Experiment with Toppings: Customize with various toppings, such as sour cream or jalapeños, to elevate your Oven-Baked Cheesy Tacos and suit different palates.
Watch the Bake Time: Keep an eye on the tacos as they bake; overcooking can lead to burnt edges and tough shells, which we want to avoid!
Oven-Baked Cheesy Tacos (Crispy & Loaded) Recipe FAQs
How do I choose the right protein for my tacos?
Absolutely! You can select from a variety of proteins according to your preference. For a classic option, ground beef offers rich flavors, while ground turkey and chicken are lighter alternatives. If you’re looking for a vegetarian option, consider using black beans or lentils, which are packed with protein and stay deliciously hearty. The more the merrier when it comes to experimenting with proteins to find your family’s favorite!
How should I store leftover tacos to keep them fresh?
To store your leftover Oven-Baked Cheesy Tacos, place them in an airtight container and refrigerate for up to 3 days. Make sure the container is well-sealed to keep the tacos moist and flavorful. When you’re ready to enjoy them again, I recommend reheating them in the oven at 350°F (175°C) for about 10-15 minutes for the best texture—this way, they’ll stay crispy, unlike microwaving, which tends to make them soggy.
Can I freeze the tacos before baking?
Yes, you can! To freeze your Oven-Baked Cheesy Tacos, assemble them with the filling and unbaked taco shells. Wrap them tightly in plastic wrap or place them in a freezer-safe container for up to 2 months. When you’re ready to enjoy, bake them directly from frozen at 375°F (190°C) for 15-20 minutes, until heated through and golden. This method is perfect for meal preps or busy nights!
What should I do if my taco shells break while filling?
Very often, breaking taco shells can happen, but no worries! If you find that some shells are breaking when you fill them, try warming them slightly in the microwave for about 30 seconds before filling. This softens them up, making them more pliable and less prone to cracks. Also, be gentle while filling; a light touch goes a long way!
Are there any dietary considerations I need to be aware of?
Yes, definitely! While this recipe can be gluten-free depending on the type of taco shells you use, always check the packaging to ensure they meet your dietary needs. Additionally, be mindful of any allergens; for instance, children might be sensitive to dairy, so consider substituting regular cheese with a dairy-free option. For added safety, always let your guests know what ingredients are used.
How long does it take to prepare these tacos?
These Oven-Baked Cheesy Tacos are incredibly quick to prepare! From start to finish, you’re looking at just 35 minutes. This includes prep time for chopping and assembling, so it’s perfect for those busy weeknights when you want something satisfying yet speedy. Enjoy the simple pleasure of homemade tacos in no time!
Oven-Baked Cheesy Tacos (Crispy & Loaded) You'll Adore
Ingredients
Equipment
Method
- Preheat your oven to 375°F (190°C).
- In a large skillet, heat olive oil over medium heat and sauté diced onion and minced garlic for about 2-3 minutes or until translucent.
- Add your choice of ground meat, cooking for about 5-7 minutes until browned. Stir in taco seasoning and tomato sauce.
- Warm taco shells in the microwave for about 30 seconds, then fill each taco shell with the meat mixture and top with shredded cheese.
- Arrange filled taco shells in a greased baking dish and bake for 10-15 minutes or until the cheese is melted and taco edges are golden.
- Allow to cool slightly, then customize with fresh toppings such as lettuce, tomatoes, red onion, and cilantro.
Leave a Reply