
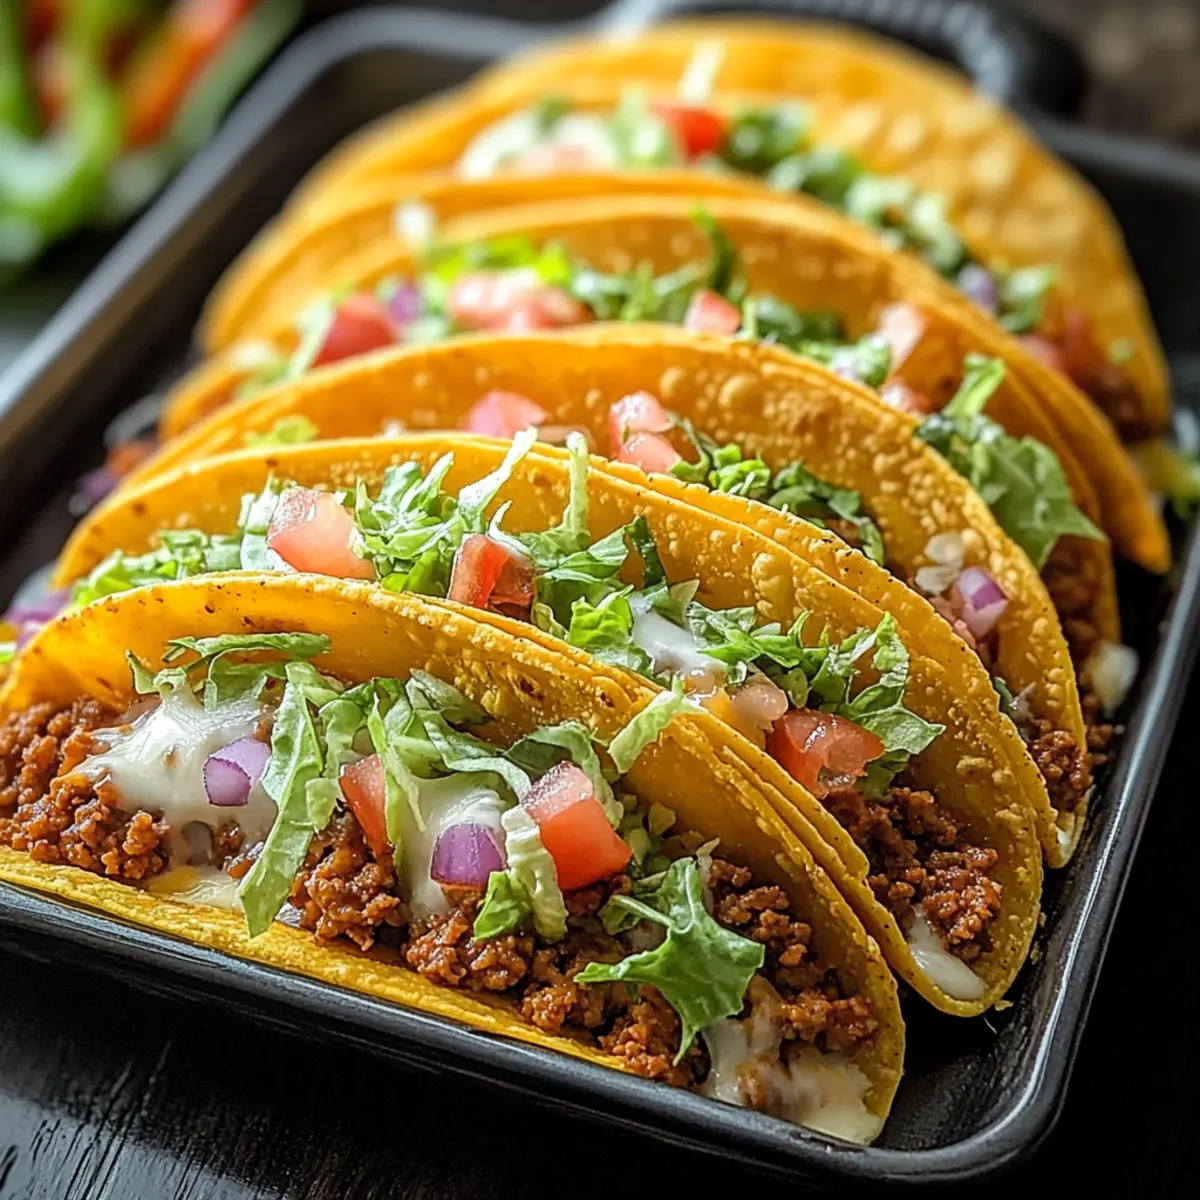
The aroma wafting through my kitchen had me reminiscing about those lively taco nights with family and friends. Today, I’m excited to share my go-to recipe for Oven-Baked Cheesy Tacos—crispy on the outside and loaded with savory goodness on the inside. This easy recipe not only fits into a busy weeknight schedule, taking just 35 minutes from prep to plate, but it’s also a crowd-pleaser that gets everyone involved in customizing their own taco creations. Enjoy the comforting flavors of seasoned ground beef and gooey cheese, all baked to golden perfection. Are you ready to dive into a taco experience that combines your favorite toppings with warm, crispy shells? Let’s get cooking!
Why Are These Tacos So Irresistible?
Crispy Delight: The oven-baking method ensures that each taco shell achieves the perfect crunch, making every bite satisfying.
Customizable Experience: Whether you’re a meat lover or a vegetarian, these tacos can easily be tailored with your favorite fillings and toppings. Think of our delicious Cheesy Root Vegetable Gratin for a hearty veggie option!
Family Fun: Everyone can join in on the fun by assembling their own loaded tacos, creating a lively atmosphere at the dinner table.
Quick and Easy: Ready in just 35 minutes, these Oven-Baked Cheesy Tacos fit perfectly into your busy week while delivering comfort food satisfaction.
Crowd-Pleaser: Perfect for gatherings, game nights, or family dinners, these tacos are sure to impress guests and loved ones alike!
Pair them with your favorite sides, and you have a winning meal that will make any occasion special.
Oven-Baked Cheesy Tacos Ingredients
For the Filling
- Ground Beef – The main protein source; swap with turkey, chicken, or black beans for a vegetarian option.
- Olive Oil – Used to sauté aromatics; any neutral cooking oil works in a pinch.
- Onion – Adds a flavorful base; shallots or green onions can be good substitutes.
- Garlic – Enhances aroma and flavor; granulated garlic can work as an alternative.
- Taco Seasoning – Infuses the meat with flavor; consider using homemade seasoning for a personal touch.
- Tomato Sauce – Adds moisture and richness to the filling; salsa or diced tomatoes can be substituted.
For Assembly
- Shredded Cheese – The star topping for creaminess; feel free to mix different cheeses for a flavor boost.
- Taco Shells – Holds the delicious filling; ensure they’re ready for baking—corn or flour tortillas are great options.
For Fresh Toppings
- Fresh Toppings (lettuce, tomatoes, onions, cilantro) – Adds freshness and color; customize based on your cravings and preference.
Enjoy these Oven-Baked Cheesy Tacos as a delightful comfort food that’s quick to prepare and sure to please the whole family!
Step‑by‑Step Instructions for Oven-Baked Cheesy Tacos
Step 1: Preheat the Oven
Start by preheating your oven to 375°F (190°C). This step is crucial for achieving that perfect crispy texture in your taco shells. While the oven heats, gather your ingredients and have your baking dish ready; greasing it lightly with cooking spray or olive oil will help prevent sticking.
Step 2: Sauté the Aromatics
In a skillet over medium heat, pour in a splash of olive oil. Add chopped onions and minced garlic, sautéing for about 2-3 minutes until they’re fragrant and translucent. This aromatic base will enrich the flavor of your filling. Stir continuously to prevent burning, allowing the warm scents to fill your kitchen.
Step 3: Cook the Ground Beef
Next, add the ground beef to the skillet, breaking it apart with a spatula as it cooks. Stir in taco seasoning, tomato sauce, salt, and pepper, letting the mixture simmer for about 5 minutes until the beef is browned and cooked through. You’re aiming for a rich and flavorful filling that will perfectly complement your crispy taco shells.
Step 4: Fill the Taco Shells
Once your beef filling is ready, take slightly warmed taco shells and carefully fill them with the meat mixture. Don’t overstuff, as you want the shells to hold their shape. Sprinkle a good amount of shredded cheese on top of each filled shell, allowing it to melt beautifully as they bake.
Step 5: Bake to Perfection
Arrange the filled taco shells in your greased baking dish, ensuring they are snug but not overly packed. Place the dish in the preheated oven and bake for 10-15 minutes, or until the cheese is bubbly and the taco shells are crispy and golden brown. Keep an eye on them to avoid overcooking.
Step 6: Add Fresh Toppings
When the Oven-Baked Cheesy Tacos are ready, remove them from the oven and let them cool for a minute. This brief resting time allows the cheese to set slightly. Serve the tacos hot with your favorite fresh toppings like lettuce, tomatoes, onions, and cilantro, inviting everyone to customize their own crispy treat.
How to Store and Freeze Oven-Baked Cheesy Tacos
-
Fridge: Store leftovers in an airtight container for up to 3-4 days. Reheat in the oven at 350°F (175°C) until warmed through, preserving that crispy texture.
-
Freezer: Assembled but uncooked Oven-Baked Cheesy Tacos can be wrapped tightly and frozen for up to 3 months. Bake directly from frozen, adding 5-10 minutes to the cooking time.
-
Meal Prep: For a quick weeknight dinner, prepare the filling ahead of time. Store it in the fridge for up to 3 days, then assemble and bake when ready.
-
Reheating: For best results, reheat tacos in the oven. This keeps the shells crispy, while the filling warms up evenly, avoiding sogginess.
Expert Tips for Oven-Baked Cheesy Tacos
-
Preheat Securely: Ensure your oven is fully preheated to 375°F (190°C) to get that perfect crunchy taco shell every time.
-
Watch the Time: Baking for too long can lead to burnt shells. Keep an eye on them, aiming for a golden color, usually around 10-15 minutes.
-
Meal Prep Magic: Prepare the filling ahead of time to make weeknight dinners even quicker. Store it in the fridge for up to 3 days before assembly.
-
Diverse Fillings: Don’t hesitate to swap out the ground beef for turkey or a vegetarian option like black beans to cater to everyone’s tastes while enjoying your Oven-Baked Cheesy Tacos.
-
Cheese Blends: Using a mix of cheeses can elevate the flavor profile; consider cheddar, Monterey Jack, or pepper jack for an extra kick!
-
Freezer Friendly: Assembled but uncooked tacos can be frozen for later enjoyment. Just bake directly from frozen, adjusting the bake time as needed.
What to Serve with Oven-Baked Cheesy Tacos
Pair your tasty tacos with delicious sides that enhance the meal experience and bring fresh flavors to your table.
-
Guacamole: This creamy dip adds a rich, buttery texture that complements the crispy tacos wonderfully. A perfect balance of flavors and textures!
-
Mexican Street Corn Salad: A sweet and tangy fiesta of corn, cotija cheese, and lime that brightens the meal while keeping it fresh and lively.
-
Pico de Gallo: Fresh tomatoes, onions, and cilantro create a vibrant topping that adds extra freshness and crunch. It’s an essential accompaniment!
-
Refried Beans: Creamy and flavorful, refried beans give a satisfying warmth to your meal, providing a protein-packed side that feels like home.
-
Spicy Rice: A fragrant, seasoned rice dish that delivers a tasty kick, it’s ideal for soaking up any extra taco fillings or toppings.
-
Chips and Salsa: Keep it classic with crispy tortilla chips paired with zesty salsa for a munchable side that everyone loves. It’s the best appetizer before diving into tacos!
-
Margaritas: A refreshing cocktail with a hint of citrus that complements the spiced flavors of the tacos. Makes for a festive dinner!
-
Churros: End your meal on a sweet note with cinnamon-dusted churros. Their crunch and soft interior are the perfect sweet contrast to the savory tacos.
Oven-Baked Cheesy Tacos: Variations & Substitutions
Feel free to put your personal twist on these Oven-Baked Cheesy Tacos and make them uniquely yours!
- Gluten-Free: Opt for corn tortillas instead of flour to ensure your tacos are gluten-free without sacrificing taste.
- Dairy-Free: Substitute dairy cheese with vegan cheese or simply skip the cheese entirely for a lighter option. You can still enjoy the delicious taco filling!
- Spice It Up: Add chopped jalapeños or a sprinkle of cayenne pepper to the filling for a kick of heat that elevates the flavor.
- Extra Crunch: Mix in some crushed tortilla chips with the filling for added texture. This not only boosts crunchiness but also provides a delightful surprise in each bite.
- Vegetarian Delight: Replace the ground beef with black beans, lentils, or quinoa for a hearty vegetarian option that’s still satisfying. Consider pairing this with our Cheesy Root Vegetable Gratin for a fulfilling meal.
- Flavor Fusion: Experiment with different seasoning blends in your filling—think taco seasoning mixed with a dash of smoked paprika or even a hint of cumin for a deeper flavor.
- Loaded Variations: Go crazy with toppings! Add avocado, a dollop of sour cream, or your favorite salsa for a loaded taco experience everyone will love.
- Fresh Herbs: Bring a burst of freshness by adding chopped cilantro or green onions to the top before serving. They brighten up the dish beautifully!
These variations are here to guide you as you create your own version of Oven-Baked Cheesy Tacos. Enjoy deliciously customizing this comforting family favorite!
Make Ahead Options
These Oven-Baked Cheesy Tacos are an ideal choice for meal prep, saving you time on busy nights! You can prepare the flavorful beef filling up to 3 days in advance; simply cook and cool the mixture, then store it in an airtight container in the refrigerator. The taco shells can also be filled and assembled up to 24 hours before baking; just cover them with plastic wrap to keep them fresh. When you’re ready to serve, preheat your oven and bake the assembled tacos for 10-15 minutes until the cheese is bubbly and the shells are crispy. This way, you’ll enjoy delicious homemade tacos without the last-minute rush!
Oven-Baked Cheesy Tacos Recipe FAQs
How do I choose the best ground beef for my tacos?
Absolutely! Look for ground beef with a fat content of around 80/20 for the best flavor and moisture. The leaner options (like 90/10) can lead to a drier filling. Also, check for a bright red color and a firm texture—avoid any that appears discolored or has a strange smell.
What’s the best way to store leftovers of Oven-Baked Cheesy Tacos?
Leftovers should be stored in an airtight container in the fridge, where they’ll last for 3-4 days. To reheat, place the tacos on a baking sheet in a preheated oven at 350°F (175°C) until heated through, ensuring the shells regain their crunch.
Can I freeze assembled, uncooked tacos?
Yes, you can! Simply wrap the assembled tacos tightly in plastic wrap or aluminum foil, and then place them in a freezer-safe bag. They can be frozen for up to 3 months. When you’re ready to enjoy them, bake them directly from the freezer, adding an additional 5-10 minutes to the cooking time for them to reach that perfect bubbly cheese bliss!
What should I do if my taco shells are breaking when I fill them?
Very! To prevent breakage, warm the taco shells slightly before filling. This makes them more pliable. If you’re using corn tortillas, you can even briefly heat them on a stovetop or in the microwave for about 15 seconds. This will soften them, making them easier to fill without falling apart.
Are there any dietary considerations I should be aware of with this recipe?
When preparing Oven-Baked Cheesy Tacos, keep in mind any allergies related to dairy (from the cheese) or gluten (if you’re using flour tortillas). For gluten-free options, ensure your taco shells are certified gluten-free. You can easily substitute the cheese with dairy-free alternatives for a lactose-free meal option.
How long can I keep the taco filling in the fridge?
You can store the cooked taco filling in the fridge for up to 3 days. To maintain optimal flavor and quality, store it in an airtight container. If you plan to reheat it, simply warm it in a skillet or microwave until it reaches a safe temperature, stirring occasionally to ensure it heats evenly.
Oven-Baked Cheesy Tacos: Crispy Comfort in Every Bite
Ingredients
Equipment
Method
- Preheat your oven to 375°F (190°C). Grease your baking dish lightly with cooking spray or olive oil.
- In a skillet over medium heat, pour in olive oil and add chopped onions and minced garlic. Sauté for 2-3 minutes until fragrant and translucent.
- Add ground beef to the skillet, breaking it apart with a spatula. Stir in taco seasoning, tomato sauce, salt, and pepper. Simmer for about 5 minutes until browned and cooked through.
- Fill slightly warmed taco shells with the meat mixture without overstuffing. Sprinkle shredded cheese on top of each filled shell.
- Arrange the filled taco shells in the greased baking dish. Bake for 10-15 minutes until cheese is bubbly and shells are crispy and golden brown.
- Remove tacos from the oven, let cool for a minute, then serve hot with your favorite fresh toppings.
Leave a Reply