
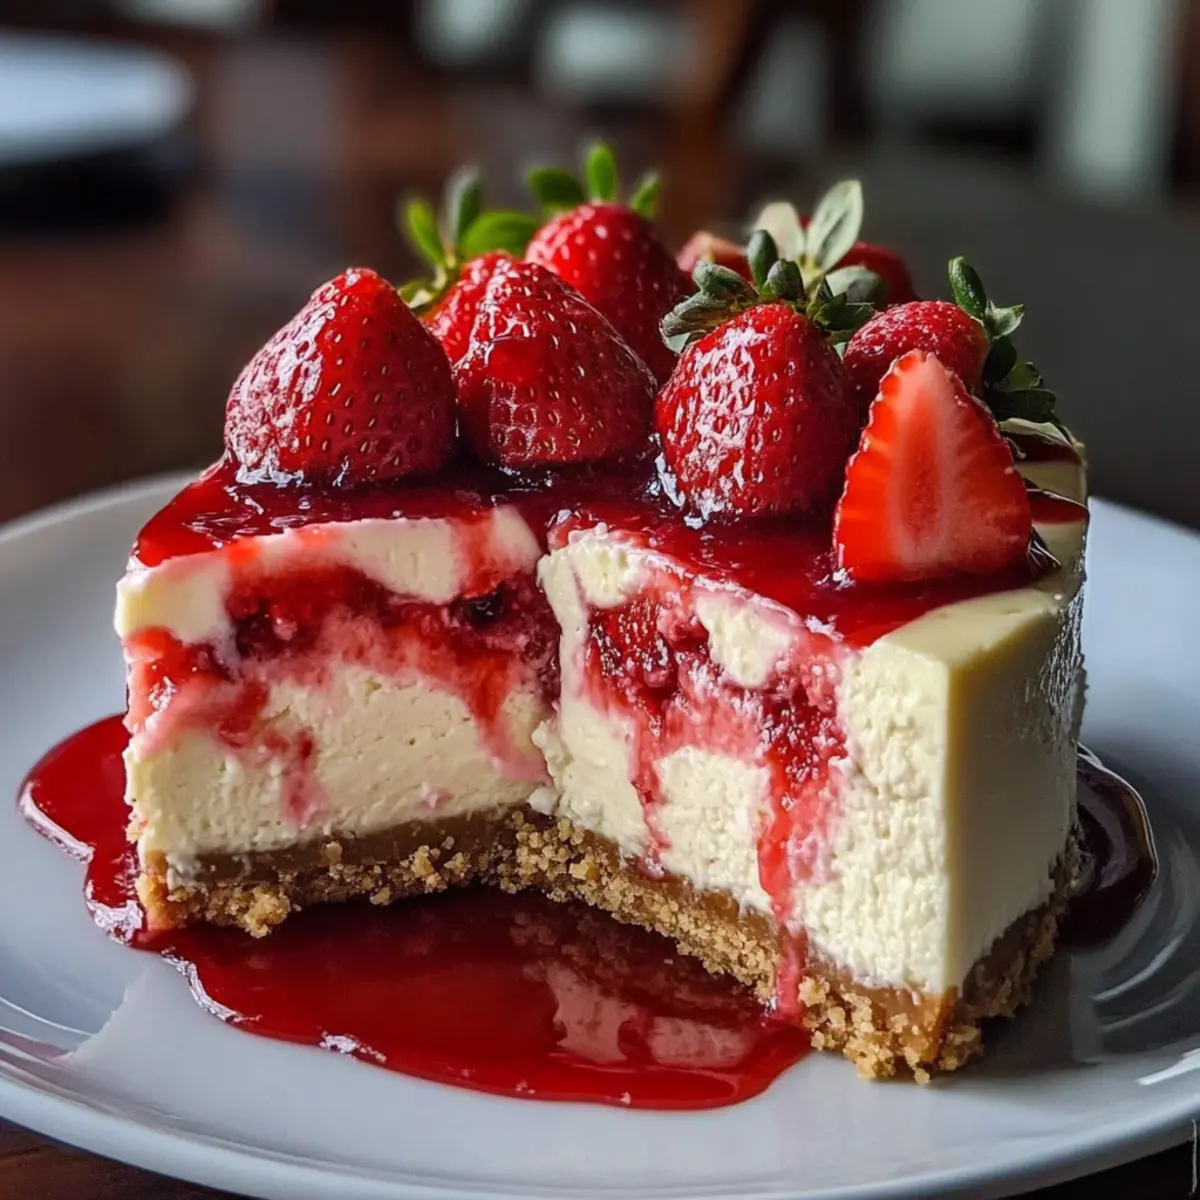
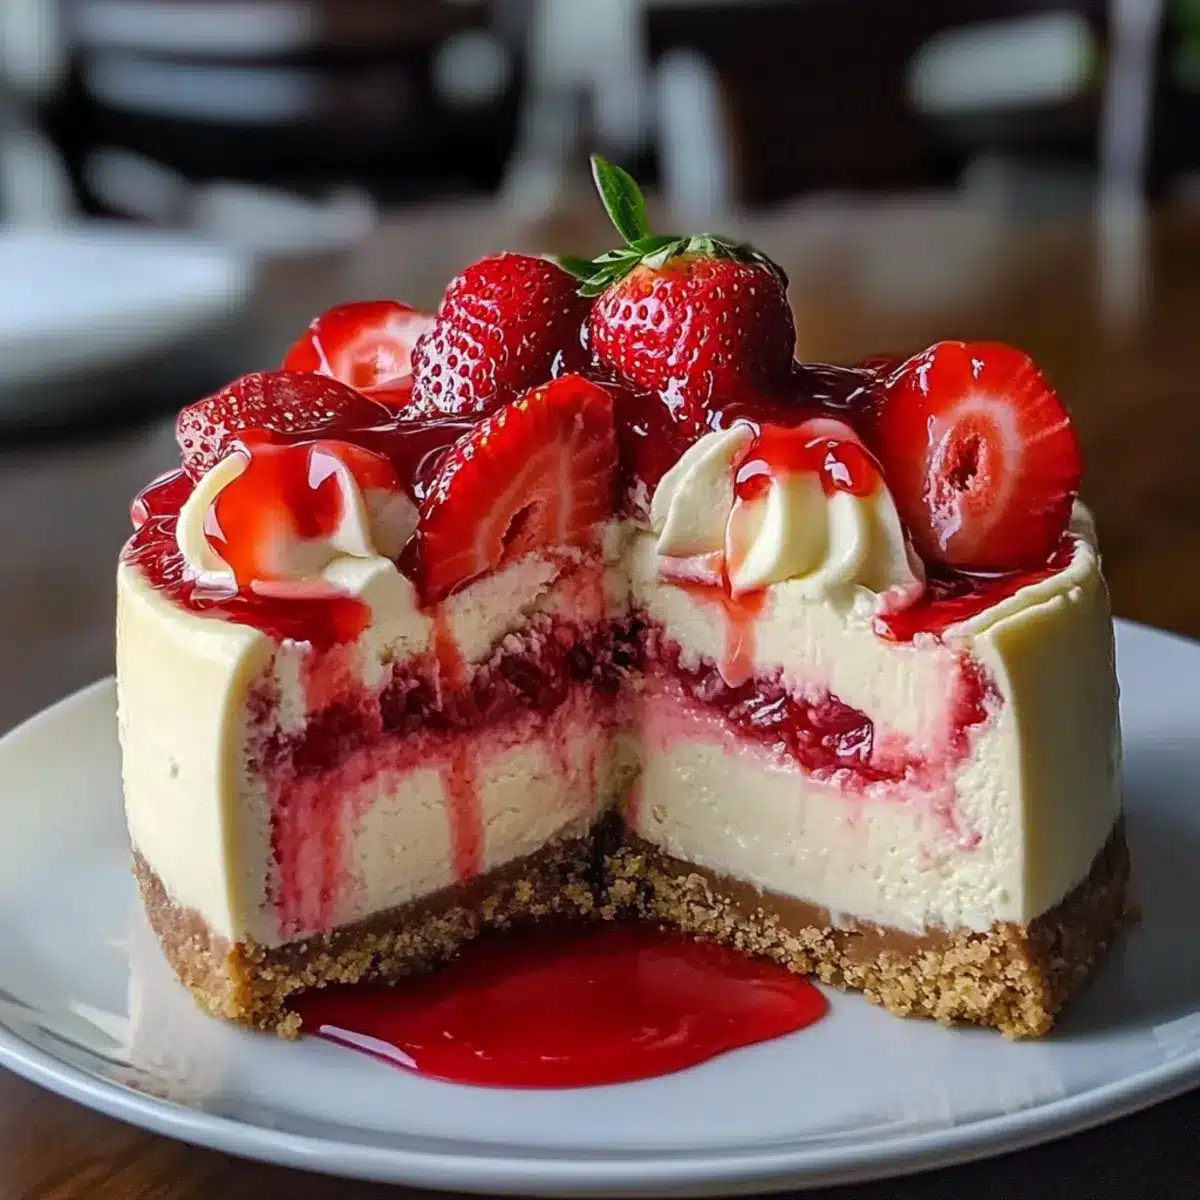
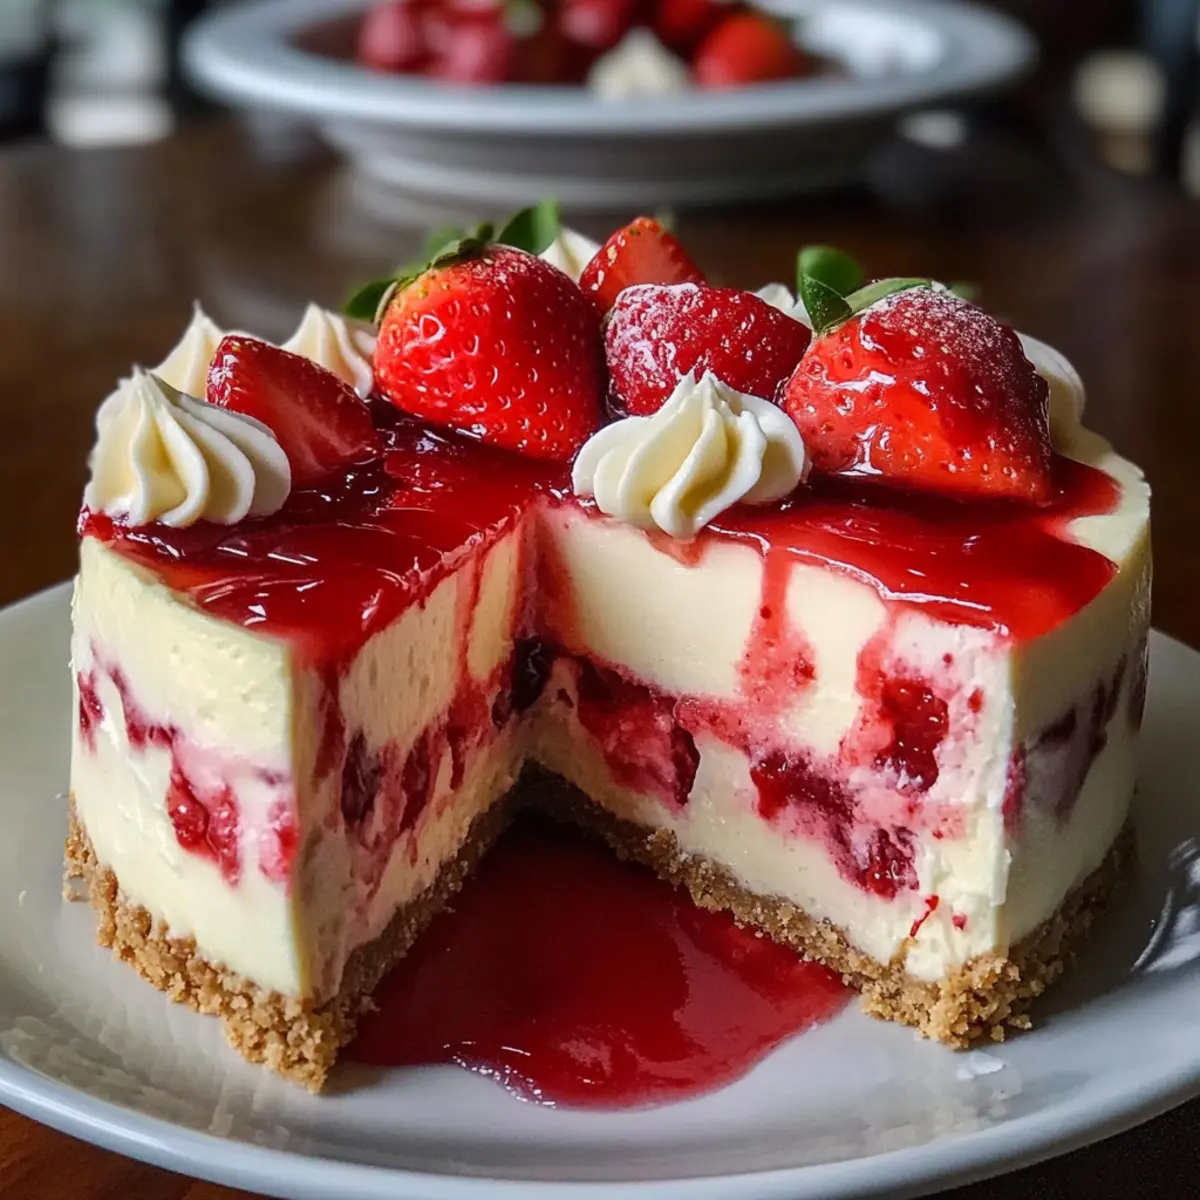
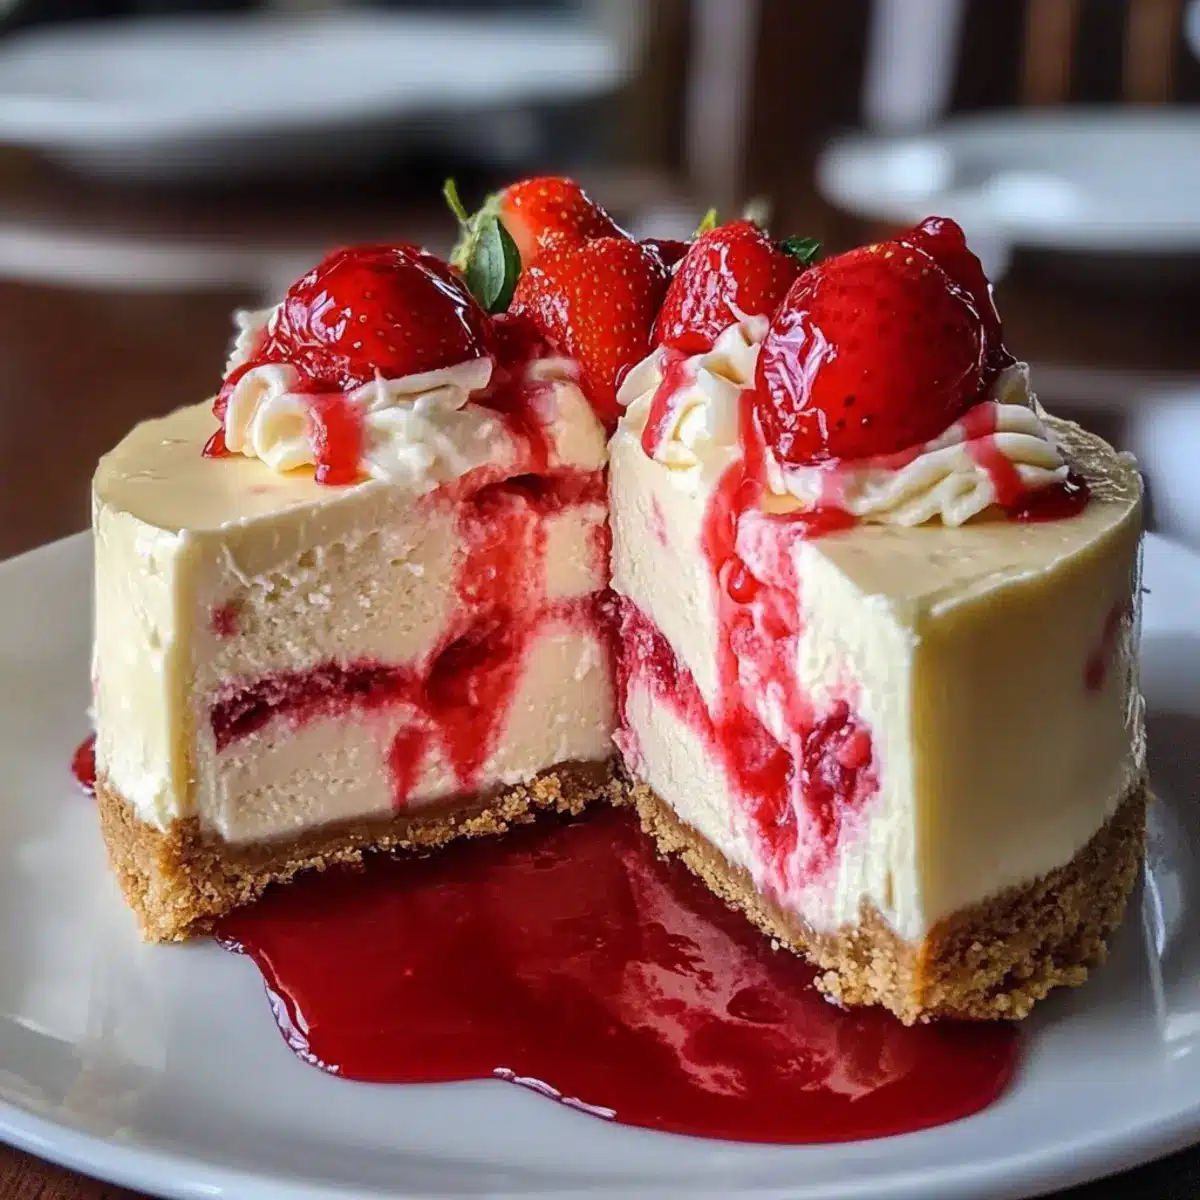
The aroma of freshly baked cheesecake wafted through my kitchen, instantly transporting me back to sun-soaked summers spent indulging in sweet treats. This Indulgent White Chocolate Strawberry Cheesecake is a sublime blend of smooth white chocolate and succulent strawberries, perfectly captivating both heart and palate. As I prepared to slice into this luscious dessert, the anticipation was palpable—I knew this creamy delight would be the centerpiece of my next gathering! Not only is it an indulgent dessert, but it also boasts a make-ahead quality, ensuring your celebrations are stress-free and delicious. Each bite offers a delightful contrast of silky texture and the brightness of fresh fruit, making this cheesecake an unforgettable choice for any occasion. Are you ready to elevate your dessert game and impress your loved ones with this ultimate treat?
Why Is This Cheesecake So Irresistible?
Decadence in Every Bite: The creamy blend of white chocolate and fresh strawberries creates a luxurious dessert experience.
Make-Ahead Magic: Prepare this cheesecake a day in advance and let the flavors deepen, making it perfect for stress-free entertaining.
Versatile Enjoyment: Feel free to switch up the berries or crust! Try incorporating dark chocolate or lemon zest for creative twists.
Crowd-Pleasing Delight: Whether it’s a family gathering or a picnic, this cheesecake is bound to charm your guests, much like my Christmas Cookies Butterscotch do during the holidays.
Simple Steps, Big Flavors: Achieve impressive results without complicated techniques, ensuring even beginner bakers can shine!
Get ready to impress; with your own homemade indulgent delight, you’ll be the star of any occasion!
Cookie Monster Cookies Ingredients
Indulge in the vibrant world of Cookie Monster Cookies—a fun and creative treat for all!
-
For the Cookies
-
All-purpose flour – Provides the essential structure for delightful cookies.
-
Cornstarch – Enhances chewiness; can be omitted for a denser texture.
-
Baking soda – Essential for rising and keeping cookies soft; ensure it’s fresh for best results.
-
Salt – Balances sweetness beautifully; opt for fine sea salt for optimal flavor.
-
Unsalted butter – Adds richness and moisture; make sure it’s at room temperature for proper creaming.
-
Brown sugar – Contributes to moistness and chewiness; can use light brown sugar for a milder taste.
-
Granulated sugar – Sweetens and assists in cookie spread; adjust according to your sweetness preference.
-
Large eggs – Help bind the mixture together; room temperature eggs mix better.
-
Vanilla extract – Imparts depth of flavor; feel free to substitute with almond extract for a twist.
-
Gel food coloring (royal blue, electric blue, violet) – Creates that iconic blue hue; adjust for your desired intensity.
-
For the Mix-Ins
-
White chocolate chips – Adds a creamy, sweet touch; substitute with milk or dark chocolate if desired.
-
Chopped Chips Ahoy cookies – Offers a delightful crunch and flavor contrast; any chocolate chip cookie can work too.
-
Chopped Oreos – Introduces contrasting flavors and textures; try flavored Oreos for something different.
Get ready to bake and surprise your loved ones with these charming Cookie Monster Cookies—they’re sure to bring smiles all around!
Step‑by‑Step Instructions for Cookie Monster Cookies
Step 1: Prep the Oven and Sheet
Preheat your oven to 350°F (175°C) and prepare a baking sheet by lining it with parchment paper or a silicone mat. This will ensure your vibrant Cookie Monster Cookies bake evenly and don’t stick, giving you the chewy texture you desire.
Step 2: Mix Dry Ingredients
In a medium bowl, thoroughly whisk together 2 cups of all-purpose flour, 1 teaspoon of cornstarch, 1 teaspoon of baking soda, and a pinch of salt. This blend will create a balanced structure for your cookies. Set the bowl aside as you move on to the next steps, making sure everything is well-combined.
Step 3: Cream Butter and Sugars
In a large mixing bowl, beat ¾ cup of unsalted butter with ¾ cup packed brown sugar and ¼ cup granulated sugar using a hand mixer on medium speed. Continue mixing for about 2 minutes or until the mixture is light and fluffy, appearing paler in color. This creates a lovely base, ensuring your Cookie Monster Cookies are moist and chewy.
Step 4: Add Wet Ingredients
Incorporate 2 large room-temperature eggs and 1 teaspoon of vanilla extract into your butter and sugar mixture. Beat everything together for an additional 30 seconds until fully integrated. This will help bind your ingredients and create a smooth, cohesive dough for your cookies.
Step 5: Incorporate Food Coloring
Gradually mix in your dry ingredients until just combined, being careful not to overmix. Next, add gel food coloring (royal blue, electric blue, or violet) until the desired vibrant hue is achieved. The fun blue color is a signature of these Cookie Monster Cookies and adds to their playful appeal.
Step 6: Fold In Chunks
With a spatula or wooden spoon, gently fold in 1 cup of white chocolate chips, along with ½ cup of chopped Chips Ahoy cookies and ½ cup of chopped Oreos. Ensure that these mix-ins are evenly distributed throughout the dough, adding little surprises in every bite of your colorful cookies.
Step 7: Shape Cookies
Using a cookie scoop or your hands, form 2-tablespoon-sized dough balls, rolling them to make them smooth. If desired, press additional toppings like more chocolate chips or cookie pieces onto the surface of each ball for extra crunch and visual appeal.
Step 8: Bake the Cookies
Place about 8 of your dough balls on the prepared baking sheet, ensuring they have enough space to spread. Bake in the preheated oven for 10-12 minutes, or until the edges are just set but the centers still look slightly soft. This helps maintain that perfect chewy texture central to Cookie Monster Cookies.
Step 9: Cool the Cookies
Once baked, remove the sheet from the oven and let the cookies cool for about 15 minutes on the baking sheet. This allows them to firm up slightly; then, transfer them carefully to a wire rack to cool completely. Enjoy the delightful transformation of your Cookie Monster Cookies as they settle!
Make Ahead Options
These Cookie Monster Cookies are a fantastic choice for meal prep! You can prepare the cookie dough up to 24 hours in advance by mixing all the ingredients, then shaping the dough into balls. Simply refrigerate the dough in an airtight container to maintain freshness. When you’re ready to bake, take the dough out, let it sit at room temperature for about 10 minutes, and then pop them in the oven for a joyful treat that tastes just as delicious as if made fresh! This method saves you time on busy weeknights while still delivering those vibrant, chewy cookies everyone loves.
Expert Tips for Cookie Monster Cookies
-
Silicone Mats Work Wonders: Using a silicone mat instead of parchment paper helps prevent sticking and promotes even baking, ensuring your cookies come out perfectly chewy.
-
Watch the Bake Time: Keep a close eye on your cookies while baking; remove them when the edges are set but the centers look slightly underbaked for that ideal chewy texture in your Cookie Monster Cookies.
-
Boost the Color: For the most vibrant blue, combine royal blue and electric blue gel food coloring, adjusting until you achieve your desired shade; little adjustments can make a big difference.
-
Add Fun Toppings: Consider pressing candy eyeballs or extra cookie pieces onto the dough balls before baking to enhance the whimsical look of your treats!
-
Room Temperature Routine: Ensure your butter and eggs are at room temperature before mixing; this step helps create a smooth, cohesive dough that bakes beautifully.
Cookie Monster Cookies Variations
Feel free to explore these delightful twists on your Cookie Monster Cookies for a customized touch that ignites your taste buds!
-
Dairy-Free: Swap the butter for coconut oil and use dairy-free chocolate for a tasty option that’s just as indulgent.
This alternative keeps the chewy texture intact while catering to those avoiding dairy. -
Nutty Delight: Toss in some chopped walnuts or pecans for added crunch and a nutty flavor twist.
The crunchy texture of nuts will complement the soft cookie perfectly, creating a delightful contrast. -
Spicy Kick: Add a pinch of cayenne pepper or chili powder to the dough for a surprising spicy kick that balances the sweetness.
This unexpected twist adds depth and excitement, making your cookies truly stand out. -
Choco-Matcha: Replace half of the flour with matcha powder for a vibrant green cookie that’s both delicious and visually striking.
This swap creates a delightful fusion of flavors while adding an antioxidant boost! -
Fruity Surprise: Incorporate dried fruits like cranberries or cherries for a burst of tangy sweetness in every bite.
The chewy fruit adds a lovely contrast to the richness of the white chocolate, elevating your cookie experience. -
S’mores Theme: Mix in mini marshmallows, chocolate chunks, and crushed graham crackers to create a s’mores-inspired cookie.
The smoky, sweet elements will transport you to campfire memories with every chewy bite! -
Chocolate Everywhere: Use both white chocolate chips and a rich dark chocolate for a double-chocolate treat that chocolate lovers will adore.
This variation simply amplifies the chocolate experience, delivering richness in every mouthful. -
Flavorful Sprinkles: Fold in colorful sprinkles along with the mix-ins to bring an extra festive vibe to your cookies.
With sprinkles, these treats become even more enticing, ideal for birthday celebrations or special occasions.
For even more cookie inspiration, try adding some zesty notes by checking out my Kiss Chocolate Cookies and delightful Monster Cookie Dough recipes!
Storage Tips for Cookie Monster Cookies
- Room Temperature: Store cookies in an airtight container at room temperature for up to 3 days to maintain their delightful chewiness.
- Fridge: For longevity, you can refrigerate your Cookie Monster Cookies, but make sure they are properly wrapped to avoid drying out.
- Freezer: Freeze cookies in an airtight container or freezer bag for up to 3 months; layers of parchment paper can help keep them from sticking together.
- Reheating: If you prefer warm cookies, reheat them in the oven at 350°F for 5-7 minutes, allowing them to regain their soft and chewy texture.
What to Serve with Cookie Monster Cookies
Delightful and colorful, these playful cookies can make the perfect centerpiece for a fun-filled gathering or a cozy family treat!
- Milkshakes: A rich, creamy milkshake pairs beautifully with the sweet flavors of these cookies and adds a nostalgic touch.
- Fruity Parfaits: Layering yogurt, granola, and fresh berries creates a refreshing contrast to the rich cookies, balancing sweetness and texture delightfully.
- Chocolate Dipping Sauce: For an extra indulgent experience, serve warm chocolate sauce alongside your warm cookies, inviting dipping fun for all ages.
- Ice Cream Sundae: Top scoops of vanilla ice cream with a crumbled cookie sprinkling for a whimsical twist on dessert that highlights the chewy cookie texture.
- Sparkling Lemonade: A zesty, refreshing sparkling lemonade cuts through the sweetness, providing a fun and fizzy drink option that everyone will love.
- Sweet Coffee: A cup of sweetened coffee or latte complements the cookies’ flavors, making it a comforting pairing for those cozy treats.
- Rainbow Fruit Skewers: Bright and colorful fruit skewers add a fresh pop and are a fun way to balance the richness of the cookies for a playful platter.
Cookie Monster Cookies Recipe FAQs
How do I choose ripe ingredients for my Cookie Monster Cookies?
Absolutely! For your Cookie Monster Cookies, selecting fresh, high-quality ingredients is essential. Make sure your eggs are clean and stored at room temperature for the best emulsification. Choose unsalted butter that is soft yet firm, and fresh baking soda for optimal leavening. Keep an eye on the date for your chocolate chips; they should smell sweet and have no signs of bloom or discoloration.
How should I store my Cookie Monster Cookies, and how long do they last?
I recommend storing your cooled Cookie Monster Cookies in an airtight container at room temperature, where they’ll stay fresh and chewy for up to 3 days. If you’d like them to last longer, you can refrigerate them—just be sure they’re wrapped properly to maintain moisture. For even more longevity, freeze the cookies for up to 3 months. When you’re ready to enjoy them, simply reheat in the oven for about 5-7 minutes at 350°F.
Can I freeze Cookie Monster Cookies, and if so, how?
Definitely! Freezing these charming Cookie Monster Cookies is a fabulous option. Start by cooling them completely. Then, line a baking sheet with parchment paper and arrange the cookies in a single layer. Freeze for about 1 hour until solid, then transfer them to an airtight container or a freezer bag. You can layer parchment paper in between to prevent sticking. They’ll be ready to thaw or reheat whenever the cookie cravings hit!
What should I do if my Cookie Monster Cookies turn out too hard or dry?
Very good question! If your cookies turn out too hard, it’s often a result of overbaking or not enough moisture. Keep a close eye on the baking time—remove them when the edges are set but the centers look slightly underbaked. To salvage dry cookies, try adding a slice of bread to the airtight container; it helps maintain moisture. You can also warm them slightly in the microwave with a cup of water for extra softness!
Are these cookies safe for children or those with allergies?
I often make these cookies for gatherings, and they’re generally kid-friendly! However, keep in mind that they contain common allergens such as eggs, dairy, and gluten from flour. Always double-check for any specific allergies among your guests. If you need to accommodate dietary restrictions, consider using gluten-free flour blends or dairy-free alternatives for butter and chocolate chips.
Can I make substitutions for any ingredients in my Cookie Monster Cookies?
Absolutely! If you’re looking to mix things up, feel free to substitute the all-purpose flour with a 1:1 gluten-free flour blend for those avoiding gluten. You can also swap the white chocolate chips for milk or dark chocolate for different flavor profiles—each variation brings its own charm! If you desire a lighter flavor, light brown sugar works beautifully in place of dark brown sugar. Enjoy experimenting!
Cookie Monster Cookies: The Ultimate Chewy Indulgence
Ingredients
Equipment
Method
- Preheat your oven to 350°F (175°C) and prepare a baking sheet by lining it with parchment paper or a silicone mat.
- In a medium bowl, whisk together the flour, cornstarch, baking soda, and salt.
- In a large mixing bowl, beat the butter with brown sugar and granulated sugar until light and fluffy.
- Add in the eggs and vanilla extract, mixing until fully integrated.
- Gradually mix in the dry ingredients until just combined and add food coloring to reach desired hue.
- Fold in the white chocolate chips, chopped Chips Ahoy cookies, and Oreos.
- Form 2-tablespoon-sized dough balls and place them on the baking sheet.
- Bake for 10-12 minutes, or until edges are set and centers look slightly soft.
- Allow to cool on the baking sheet for 15 minutes before transferring to a wire rack.
Leave a Reply