
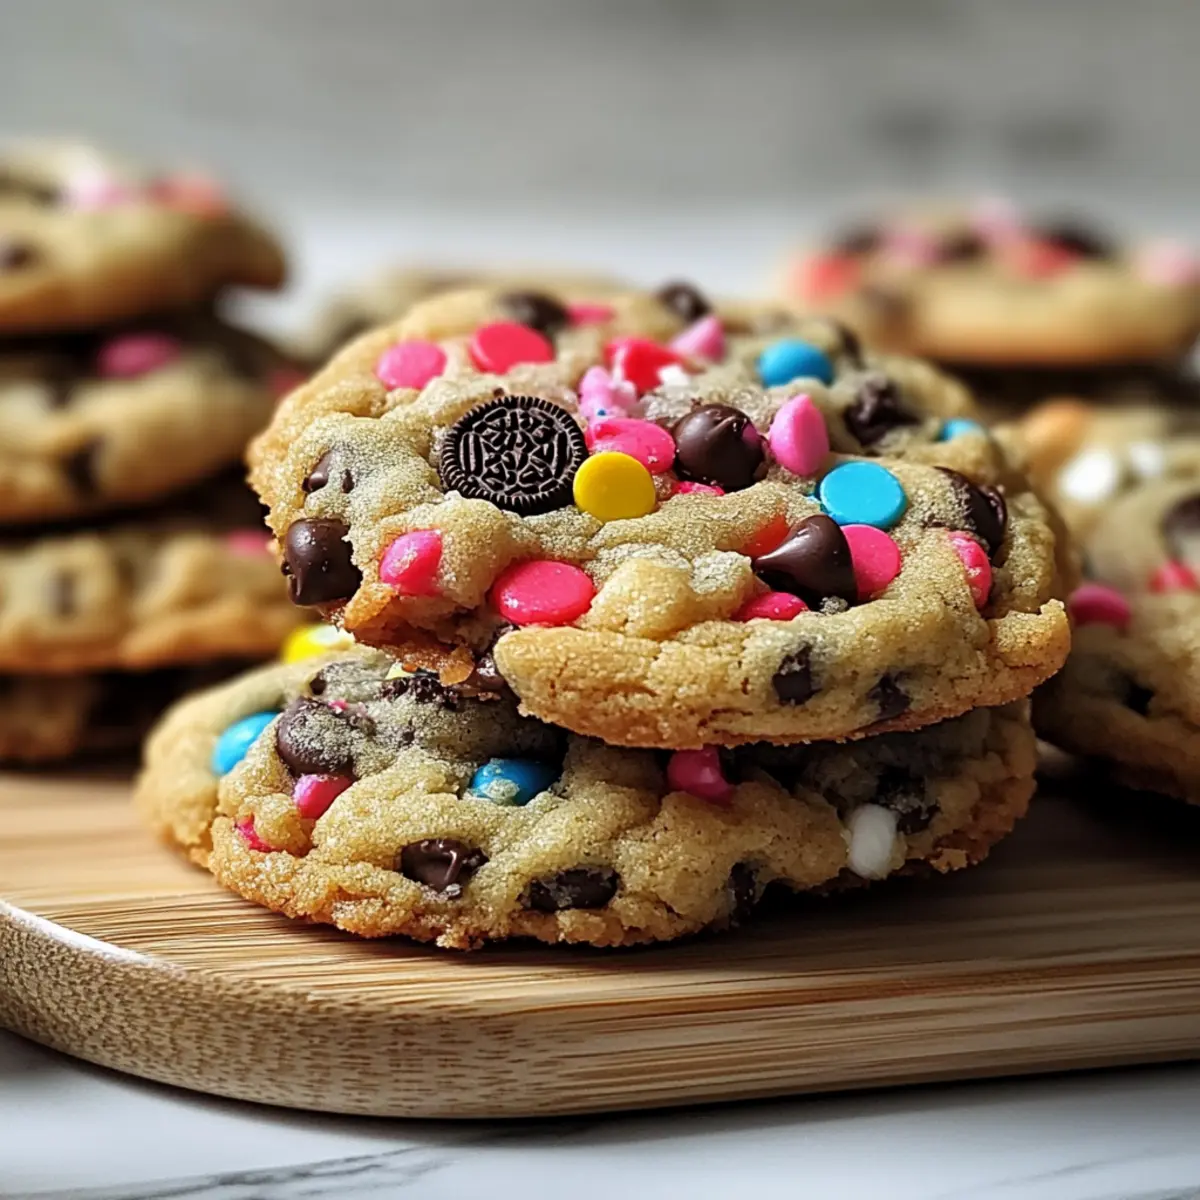
There’s something magical about the aroma of freshly baked cookies wafting through the kitchen, isn’t there? When I first tackled Bakery-Style Loaded Cookies (Thick & Gooey), I never imagined I’d end up with a batch so thick and indulgent that they’d rival those from my favorite local bakery. These cookies feature a delightfully crispy edge encasing a soft, gooey center, making them irresistible to anyone who walks by. One of my favorite perks? They come together in just one bowl, eliminating any stress and mess—perfect for those busy days when you crave a homemade treat. Whether you’re in the mood to impress friends or simply satisfy your sweet tooth, these loaded cookies are a surefire hit for all baking levels. Curious about how to create these delightful treats yourself? Let’s dive in!
Why Are These Cookies So Irresistible?
Indulgent flavors overwhelm your senses: Each bite is packed with chocolate, colorful candies, and cookie pieces that bring joy. Effortlessly made in one bowl, these cookies save both time and effort while delivering bakery-style goodness. Crowd-pleasing treats: Perfect for sharing at parties or gifts—everyone will ask for your secret! For even more indulgence, consider trying Christmas Cookies Butterscotch or Kiss Chocolate Cookies, which also offer delightful flavors. Customizable to suit your preferences, mix and match your favorite ingredients and enjoy a unique cookie every time!
Bakery-Style Loaded Cookies Ingredients
When you’re ready to indulge in these thick and gooey creations, make sure you have the following ingredients on hand!
For the Dough
- Softened Butter – Provides richness and moisture; do not melt it, keep it cool yet soft.
- Brown Sugar – Adds moisture and a deeper sweetness that enriches the flavor profile.
- Granulated Sugar – Perfect for enhancing sweetness and contributes to the chewy texture.
- Eggs – Essential for binding the ingredients together and adding moisture.
- Vanilla Extract – A must-have to elevate and deepen the overall flavor.
- Flour – Provides structure; weigh or spoon and level for airy, thick cookies.
- Salt – Balances the sweetness, taking your cookies to the next level!
- Baking Powder – Helps with leavening, ensuring that they rise beautifully.
- Cornstarch – Keeps the cookies tender and soft, contributing to that gooey texture.
- Baking Soda – Another leavening agent for the perfect rise.
For the Mix-ins
- Chocolate Chips – Adds rich chocolatey goodness and sweetness in every bite.
- White Chocolate Chunks – Provides a lovely contrast in flavor and texture.
- Smarties or M&Ms – Brings color, crunch, and an extra layer of sweetness.
- Chopped Oreos – Infuses additional flavor and delightful crunch.
- Sprinkles – Optional, but adds a fun, decorative touch to these indulgent cookies.
These Bakery-Style Loaded Cookies (Thick & Gooey) are sure to make your baking experience a joyous one!
Step‑by‑Step Instructions for Bakery-Style Loaded Cookies (Thick & Gooey)
Step 1: Cream the Butters and Sugars
In a large mixing bowl, beat the softened butter with brown sugar and granulated sugar using an electric mixer for 1-2 minutes, until the mixture is creamy and smooth. You should see a light, fluffy texture forming that looks like whipped clouds—this is the foundation for your Bakery-Style Loaded Cookies (Thick & Gooey), so take your time to incorporate air.
Step 2: Add Eggs and Vanilla
Next, crack in the eggs one at a time, alongside the vanilla extract. Mix slowly until just combined, being cautious not to overmix. The batter will become glossy and slightly thicker; this indicates you’re on the right track for creating those delightful cookies. Scrape the sides of the bowl as needed to ensure everything is well incorporated.
Step 3: Mix in Dry Ingredients
Now, gently add the flour, salt, baking powder, cornstarch, and baking soda into the wet mixture. Using a spatula or wooden spoon, stir until a thick dough starts to form. This step shouldn’t take long; you want to see flour fully combined without over-mixing. Look for a dense, cohesive dough, which is key to achieving that gooey center.
Step 4: Fold in Loaded Mix-ins
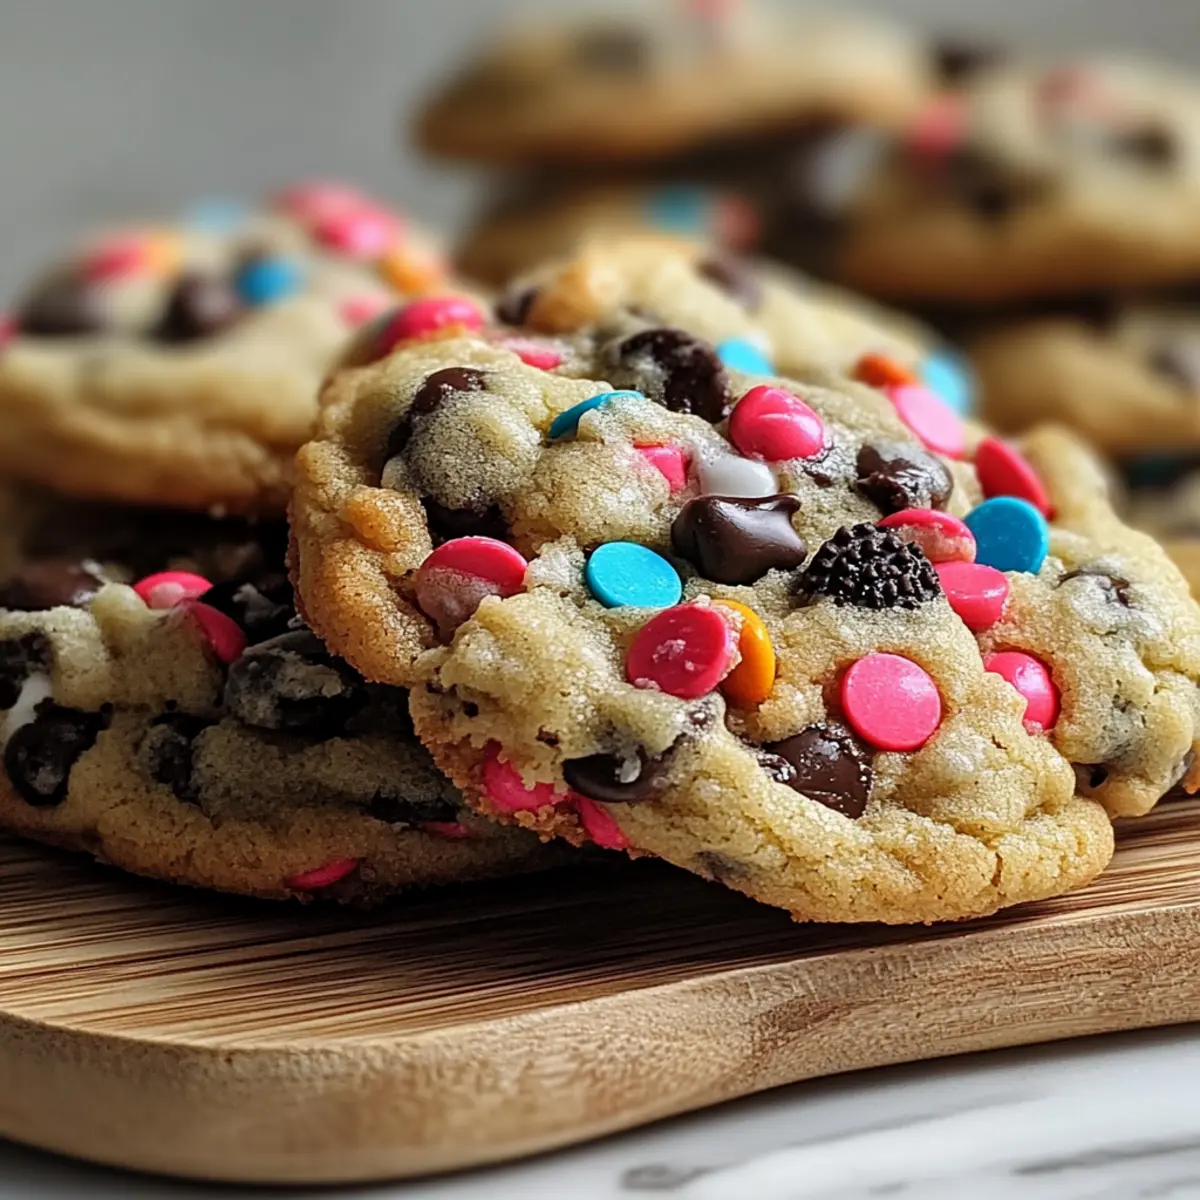
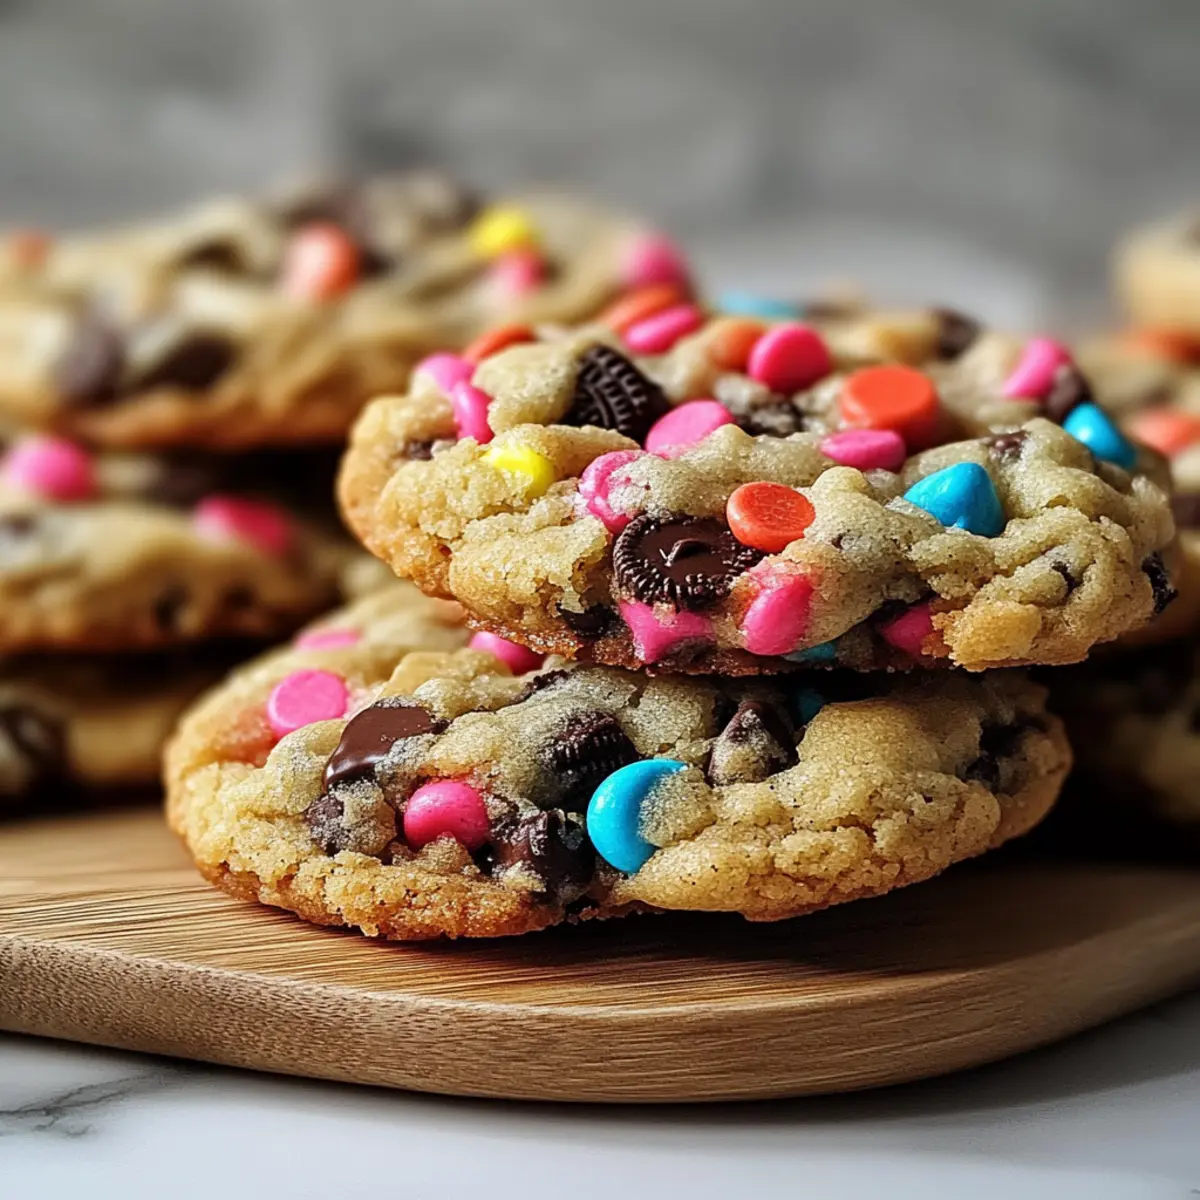
Carefully fold in the chocolate chips, white chocolate chunks, Smarties or M&Ms, chopped Oreos, and sprinkles until evenly distributed throughout the dough. Make sure every morsel is nestled within—this variety of mix-ins adds not only flavor but also vibrant colors to your Bakery-Style Loaded Cookies (Thick & Gooey), making them visually irresistible.
Step 5: Shape the Dough
Divide the dough into 8 equal portions, approximately 157 grams each. Roll each portion into a ball and gently flatten it to create ridges on the surface, enhancing its texture. You’ll want these dough balls to be large, as they’ll spread and puff up beautifully during baking, resulting in thick cookies that everyone will adore.
Step 6: Chill the Dough Balls
Place the dough balls on a lined baking tray and pop them into the freezer for 15-20 minutes. Chilling the dough is essential for maintaining thickness during baking, ensuring your cookies come out just right. While the dough chills, you can preheat your oven to get ready for the next step.
Step 7: Preheat the Oven
While your dough is chilling, preheat the oven to 350°F (180°C). Line additional baking trays with parchment paper to prepare for the cookies you’ll be baking. The preheating ensures that when these Bakery-Style Loaded Cookies (Thick & Gooey) go in, they will bake evenly and achieve that perfect balance of gooey and crisp.
Step 8: Bake the Cookies
Remove the dough from the freezer and place 6 cookies onto each prepared baking tray, giving them space to spread. Bake for 14 minutes until they’re lightly golden around the edges but still appear pale and soft in the center. Trust your instincts—these cookies should look slightly underbaked to achieve that gooey texture when they cool.
Step 9: Shape and Decorate
As soon as the cookies come out of the oven, use a cookie ring or round cutter to refine the edges while they are still warm. Feel free to sprinkle extra toppings on top for added flair! Taking this extra step right after baking will give your cookies that professional touch and ensure they look as fantastic as they taste.
Step 10: Cool Completely
Transfer the cookies to a wire rack to cool completely before serving. As they cool, their gooey centers will set slightly, creating the perfect texture balance. Allow them to rest for at least 10-15 minutes, making it tough to resist the aroma of your freshly baked Bakery-Style Loaded Cookies (Thick & Gooey) wafting through your kitchen!
Storage Tips for Bakery-Style Loaded Cookies
Room Temperature: Store baked cookies in an airtight container at room temperature for up to 4 days to maintain their gooey texture.
Fridge: If you live in a very warm climate, consider refrigerating the cookies in an airtight container for up to 1 week to keep them fresh.
Freezer: Freeze raw dough balls for up to 3 months. Bake from frozen, adding an extra 2 minutes to the baking time for the ultimate Bakery-Style Loaded Cookies (Thick & Gooey).
Reheating: To enjoy warm cookies, gently microwave them for 10-15 seconds or pop them in the oven at 350°F (175°C) for a few minutes, reviving that fresh-out-of-the-oven experience!
Make Ahead Options
These Bakery-Style Loaded Cookies (Thick & Gooey) are perfect for meal prep, allowing you to enjoy freshly baked goodness with minimal effort during busy weeknights! You can prepare the cookie dough up to 24 hours in advance, storing it tightly covered in the refrigerator to maintain its freshness and texture. For longer storage, roll the dough into balls and freeze them for up to 3 months—just bake from frozen, adding an extra 2 minutes to the baking time. When you’re ready to enjoy, simply pop the chilled or frozen dough balls onto a baking tray and follow the final baking steps for cookies that are just as delicious as when freshly made!
Bakery-Style Loaded Cookies Variations
Feel free to unleash your creativity and customize these delicious cookies to suit your taste buds!
- Nuts: Swap out chocolate chips for your favorite nuts like walnuts or pecans for added crunch and a buttery flavor.
- Dried Fruits: Incorporate dried cranberries, cherries, or raisins for a delightful, chewy texture and burst of natural sweetness. They pair beautifully with the rich chocolate.
- Peanut Butter: Substitute half the butter with creamy or crunchy peanut butter for a nutty twist that adds depth and richness.
- Minty Fresh: Add a few drops of peppermint extract into the dough for a refreshing mint chocolate flavor that’s perfect for the holidays.
- Spicy Kick: Introduce a hint of chili powder or cayenne pepper for a surprising heat that perfectly balances the sweetness.
- Oatmeal Twist: Mix in some rolled oats for a heartier cookie with a chewy texture that adds extra satisfaction. Oats can enhance the overall taste and make them feel a bit healthier.
- Caramel Drizzle: Drizzle melted caramel over baked cookies for an indulgent touch—just imagine those gooey, rich tones complementing the chocolate!
- Coconut Delight: Fold in sweetened shredded coconut for a tropical flair that adds both texture and flavor to your cookies.
No matter how you choose to customize, I guarantee these Bakery-Style Loaded Cookies (Thick & Gooey) will still end up as delightful treats that everyone loves!
Expert Tips for Bakery-Style Loaded Cookies
-
Butter Matters: Always ensure that your butter is softened, not melted. Overly melted butter will lead to cookies that spread too much during baking.
-
Chill for Thickness: Don’t skip the chilling step! Freezing the dough balls helps maintain thickness and ensures that your Bakery-Style Loaded Cookies are nice and gooey.
-
Measure with Care: Use the spoon-and-level method when measuring flour to prevent dense cookies. Improperly measured flour can ruin the texture!
-
Perfect Timing: Keep an eye on your cookies while they bake. When they look pale and slightly soft, they’re likely perfect for that gooey center, which will firm up as they cool.
-
Creative Mix-Ins: Feel free to get creative with your mix-ins. Substitute Smarties or M&Ms for your favorite nuts, or even try incorporating caramel for a unique twist!
-
Cookie Ring Magic: After baking, using a cookie ring or round cutter to shape the cookies enhances their appearance and ensures uniform edges.
What to Serve with Bakery-Style Loaded Cookies (Thick & Gooey)
There’s nothing like pairing indulgent cookies with delightful sides to create the perfect treat experience.
- Glass of Milk: A classic pairing that balances the sweetness and enhances the gooey chocolate flavors in your cookies.
- Warm Coffee: The rich, bold flavors of freshly brewed coffee complement the cookies’ sweetness, making for a comforting treat.
- Ice Cream Sundae: Top a scoop of vanilla or chocolate ice cream with a warm cookie for an unforgettable dessert fusion.
- Fresh Berries: Their tartness cuts through the richness of the cookies, adding a refreshing contrast that’s absolutely delightful.
- Chocolate Sauce Drizzle: A smooth, rich drizzle adds an indulgent touch that elevates your cookies even further. Cookie lovers will rejoice!
- Caramel Sauce: Just like the chocolate sauce, caramel adds a sweet touch, bringing a delightful gooeyness to pair with your gooey cookies.
- Chocolate Milkshake: This creamy, luscious drink mirrors the cookie’s flavors, creating an epic treat worthy of any occasion.
- Chai Latte: The warm spices in chai blend beautifully with the cookie’s sweet, gooey goodness for a cozy afternoon snack.
- Dessert Wine: A light dessert wine pairs nicely for a sophisticated touch. Its sweetness compliments the cookie’s flavors without overpowering them.
- S’mores Dip: A side of s’mores dip provides an interactive dessert experience, as you can scoop the sticky goodness with pieces of your cookies!

Bakery-Style Loaded Cookies (Thick & Gooey) Recipe FAQs
What should I look for when selecting ripe ingredients?
Absolutely! When choosing your butter, it should be softened but not melted—think cool to the touch, which is ideal for incorporating air. For your eggs, fresh is best! Check expiration dates to ensure they are at peak quality for the best flavor in your Bakery-Style Loaded Cookies.
How should I store my baked cookies, and for how long do they last?
You can store your baked cookies in an airtight container at room temperature for up to 4 days. If you want them to last longer, consider refrigerating them, which will help keep them fresh for up to 1 week. Just remember, the gooey goodness is best enjoyed fresh!
Can I freeze the raw cookie dough? If so, how?
Definitely! To freeze the raw dough, first divide it into equal portions and roll each into a ball. Place them on a baking tray lined with parchment paper and freeze for about 1-2 hours until solid. Then, transfer the dough balls to a resealable freezer bag or container for up to 3 months. When ready to bake, pop them directly into the oven, adding an extra 2 minutes of baking time.
What if my cookies spread too much during baking?
Very good question! If your cookies spread excessively, ensure that your butter isn’t overly melted before mixing. Chilling the dough for 15-20 minutes, as detailed in the instructions, is crucial for achieving that thick texture. If cookies are already in the oven, a tip is to use a cookie ring just after they come out to reshape them—this helps regain a nice rounded appearance!
Are there any dietary considerations I should keep in mind when making these cookies?
Certainly! When using mix-ins like Smarties or M&Ms, be aware of any allergies, as they may contain nuts or dairy. If you need alternatives, consider replacing chocolate with dairy-free chips or experimenting with nut-free candies. Enjoying delicious treats while being cautious of dietary needs is very doable when you customize your recipe!
Bakery-Style Loaded Cookies That Are Thick & Gooey Goodness
Ingredients
Equipment
Method
- Cream the butter with brown and granulated sugar for 1-2 minutes until fluffy.
- Add eggs one at a time and mix with vanilla extract until just combined.
- Gently mix in flour, salt, baking powder, cornstarch, and baking soda until a thick dough forms.
- Fold in chocolate chips, white chocolate chunks, Smarties or M&Ms, chopped Oreos, and sprinkles.
- Divide dough into 8 portions, roll into balls, and flatten slightly.
- Chill dough balls in the freezer for 15-20 minutes.
- Preheat the oven to 350°F (180°C) and line baking trays.
- Bake cookies for 14 minutes until lightly golden but still soft in the center.
- Use a cookie ring to shape cookies while warm and sprinkle extra toppings if desired.
- Allow cookies to cool completely on a wire rack before serving.
Leave a Reply