
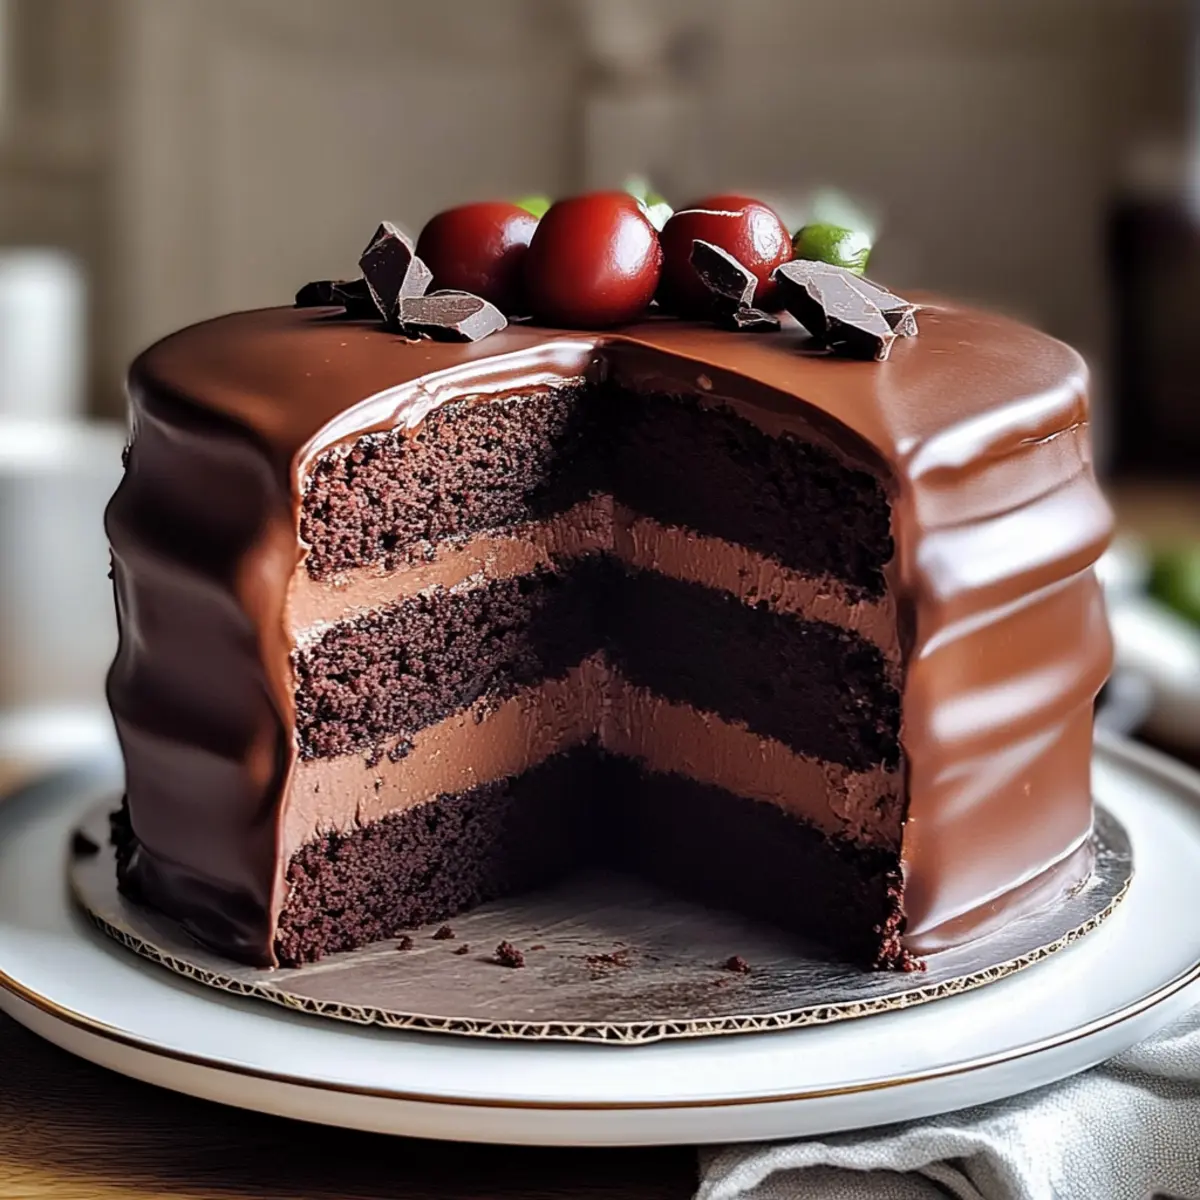
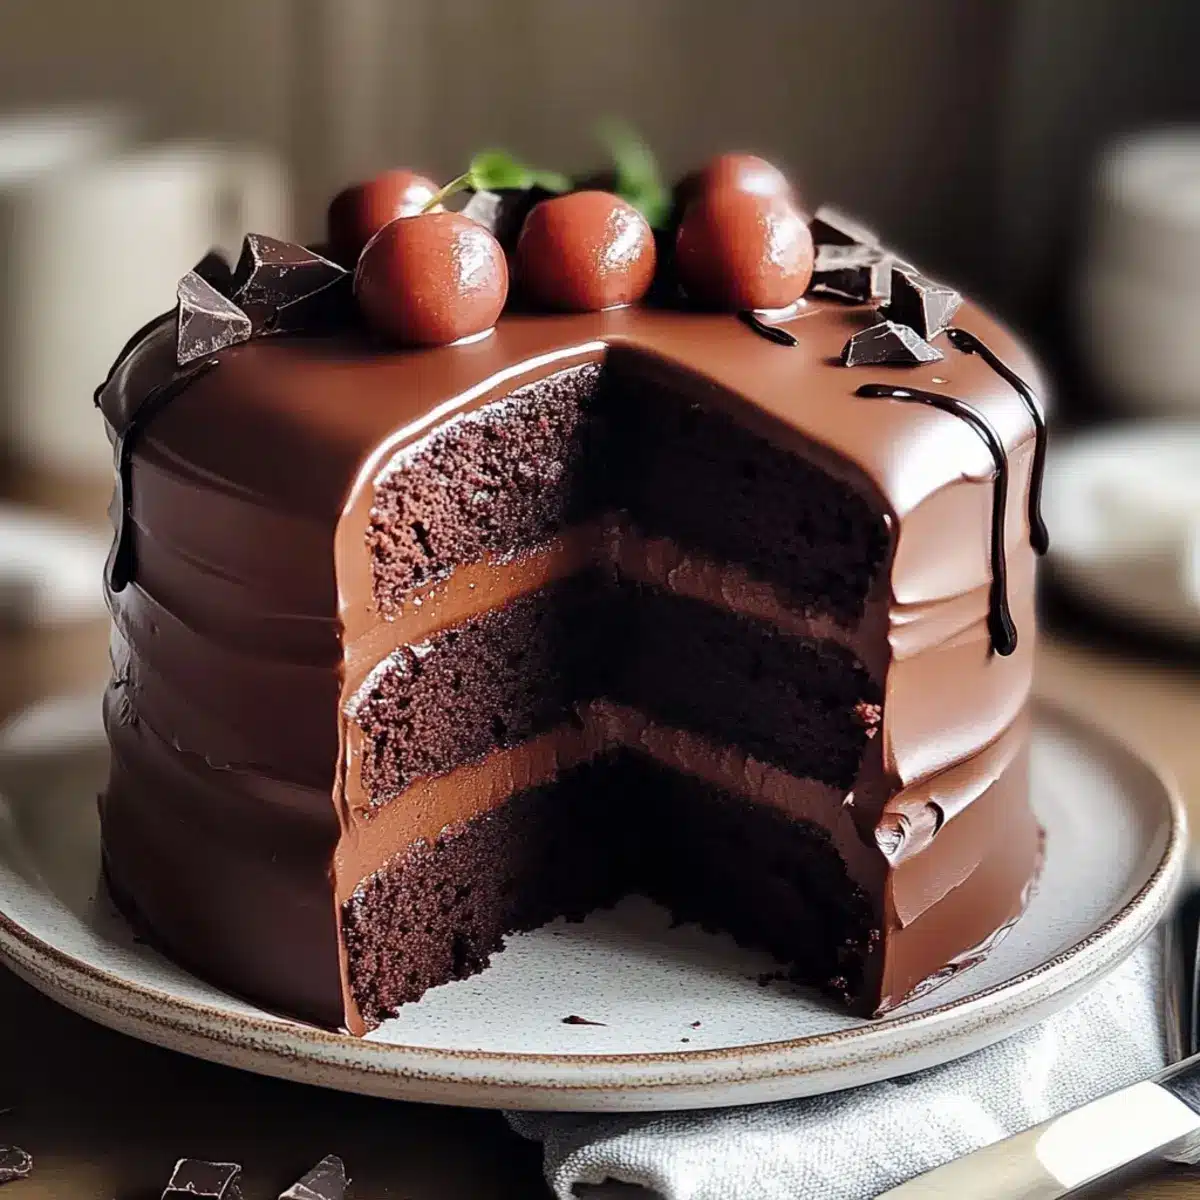
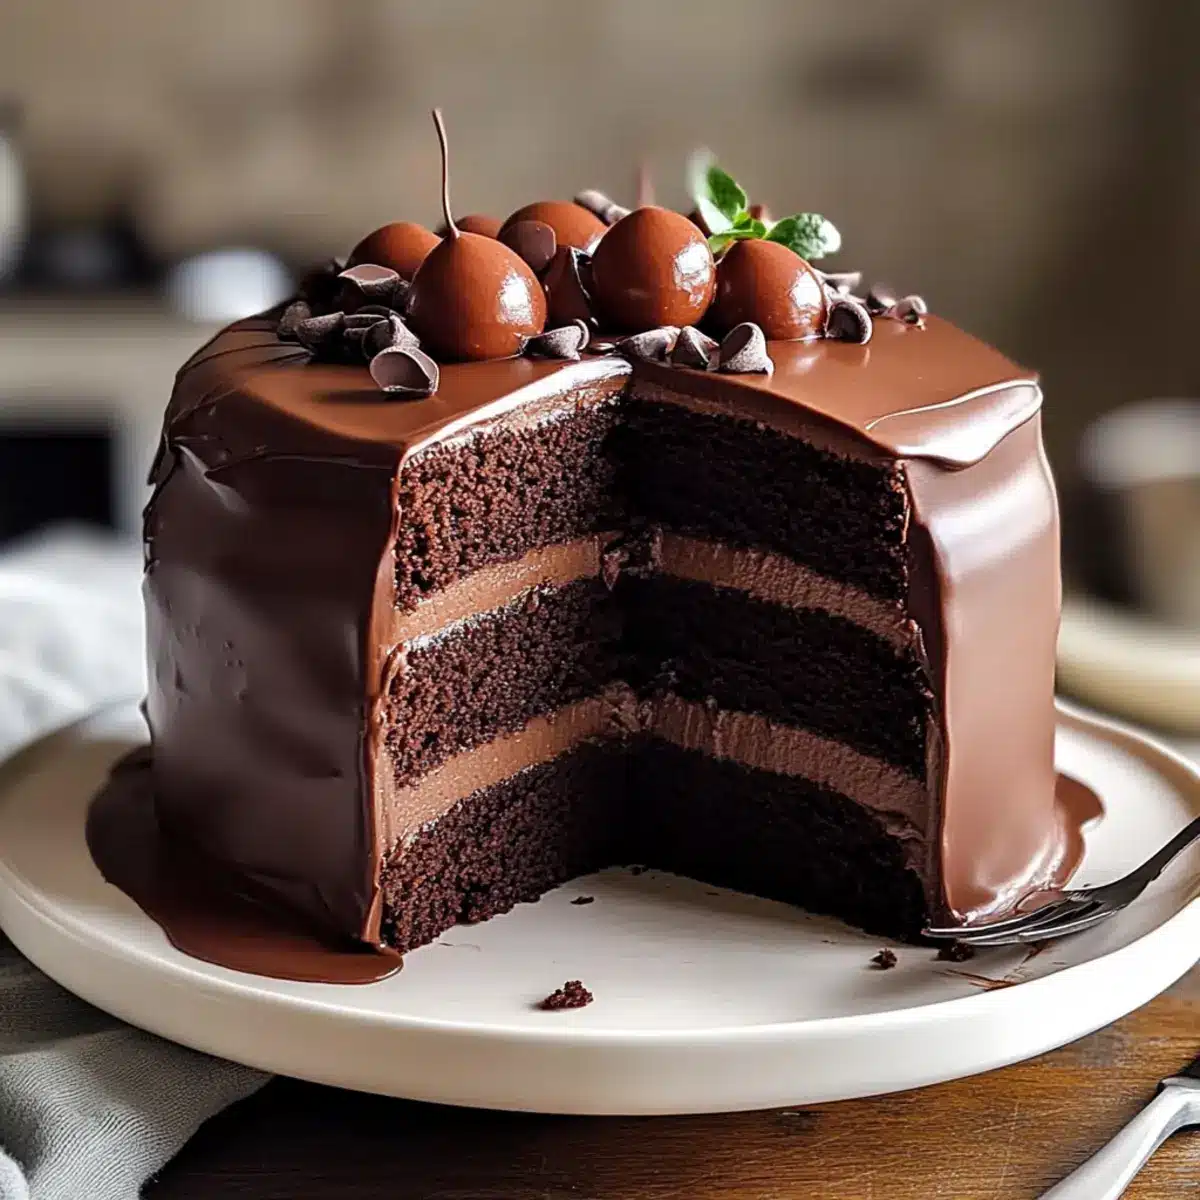
You won’t believe the temptation that comes from a simple bowl of batter! This Killer Chocolate Cake Recipe: Tempting Chocolatey Perfection! is a heartfelt tribute to all chocolate lovers and a must-have for your dessert repertoire. What makes this cake truly stand out is its moist, fluffy texture paired with a rich chocolate flavor—thanks to the magic of boiling water. Not only is it a show-stopper at birthdays and special gatherings, but its quick prep time also turns it into your go-to indulgence for those unexpected sweet cravings. Ready to explore how a few humble ingredients can come together to create chocolate bliss? Let’s dive into the details of baking this delightful masterpiece!

Why is this cake a chocolate lover’s dream?
Moist, Fluffy Texture: Each slice of this cake melts in your mouth, thanks to the unique addition of boiling water.
Rich Chocolate Flavor: The intense cocoa creates a depth of flavor that is bound to impress, reminiscent of your favorite chocolate indulgences.
Quick Prep Time: This recipe doesn’t require hours in the kitchen, making it perfect for when those chocolate cravings hit unexpectedly.
Versatile and Customizable: Want to mix things up? Add in chocolate chips or a sprinkle of espresso powder for an elevated taste experience!
Crowd-Pleasing Delight: Whether it’s a birthday party or a cozy dessert night, this cake appeals to everyone—making it the star of any dessert table!
Dive deeper into more delightful treats like our Caramel Apple Cheesecake or enjoy the festive flavors of Peppermint Kiss Chocolate to satisfy your sweet tooth!
Killer Chocolate Cake Ingredients
Get ready to bake!
For the Cake
- Sugar – Sweetness to balance the rich flavors; feel free to use organic for a healthier touch.
- All-Purpose Flour – Provides structure; substitute with a gluten-free blend if needed.
- Hershey’s Cocoa – For that deep chocolate flavor; any quality unsweetened cocoa will do beautifully.
- Baking Powder – A leavening agent; always check freshness for best results.
- Baking Soda – Another leavening agent; avoid direct substitution with baking powder.
- Salt – Balances sweetness and enhances flavors significantly.
- Eggs – Acts as a binder for moisture; room temperature eggs mix better.
- Milk – Adds moisture; almond milk works as a perfect dairy-free alternative.
- Vegetable Oil – Keeps the cake moist; melted coconut oil can be a delightful swap.
- Vanilla Extract – An essential flavor enhancer; opt for pure vanilla for the best results.
- Boiling Water – Elevates the chocolate flavor and moisture; don’t skip this!
For the Icing
- Butter – Creates a creamy texture; can be substituted with dairy-free margarine.
- Powdered Sugar – For sweetness and smooth icing texture; sift beforehand to avoid lumps.
With these ingredients in hand, you’re well on your way to crafting the ultimate Killer Chocolate Cake! Get ready for a treat that is sure to impress!
Step‑by‑Step Instructions for Killer Chocolate Cake Recipe: Tempting Chocolatey Perfection!
Step 1: Preheat the Oven
Start by preheating your oven to 350°F (175°C) to ensure it reaches the perfect baking temperature. While the oven heats, grease two 9-inch round cake pans with a little vegetable oil or butter to prevent sticking. You can also line the bottom with parchment paper for extra assurance.
Step 2: Mix the Dry Ingredients
In a large mixing bowl, combine the granulated sugar, all-purpose flour, Hershey’s cocoa powder, baking powder, baking soda, and salt. Whisk these dry ingredients thoroughly for about a minute until well blended and free of any lumps. This step is crucial for achieving an even chocolate flavor in your Killer Chocolate Cake.
Step 3: Incorporate Wet Ingredients
Add in the eggs, milk, vegetable oil, and vanilla extract to the bowl of dry ingredients. Using an electric mixer, beat the mixture on medium speed for 2 minutes until smooth and well combined. The batter will be thick and rich at this stage, building the foundation for your indulgent chocolate cake.
Step 4: Add Boiling Water
Carefully stir in the boiling water—this will thin out your batter, creating an ultra-moist texture. Be cautious as the batter will be hot. Mix just until the water is fully combined, and the batter looks glossy; it should be quite runny at this point, which is perfectly normal for the Killer Chocolate Cake recipe.
Step 5: Pour Batter into Pans
Evenly distribute the batter between the two prepared cake pans, ensuring each is filled about halfway to allow room for rising. Tap the pans lightly on the counter to release any air bubbles trapped in the batter. This action will help achieve a tender crumb in your cakes.
Step 6: Bake the Cakes
Place the pans in your preheated oven and bake for 30 to 35 minutes. You’ll know the cakes are done when a wooden pick inserted in the center comes out clean. Keep an eye on them towards the end of baking to avoid overcooking, which can lead to dryness.
Step 7: Cool the Cakes
Once baked, carefully remove the pans from the oven and allow the cakes to cool in the pans for about 10 minutes. This cooling period makes it easier to remove the cakes without breaking them. Then, gently run a knife around the edges and turn the cakes out onto wire racks to cool completely.
Step 8: Prepare the Icing
For the icing, melt the butter in a medium saucepan over low heat. Once melted, stir in the cocoa powder, and then alternate adding the powdered sugar and milk until you achieve a smooth consistency. The icing should be rich and glossy, perfectly suited to top your delicious Killer Chocolate Cake.
Step 9: Ice the Cake
Once the cakes are completely cooled, place one layer on a serving plate. Spread a generous amount of icing on top, then place the second layer on top of that. Finish by spreading icing over the top and sides of the entire cake. This silky icing will enhance the tempting chocolatey perfection of your creation.
Step 10: Serve and Share
Finally, slice the Killer Chocolate Cake into generous pieces and serve immediately, or let it sit for a bit to allow the icing to set. We recommend pairing it with a scoop of vanilla ice cream or fresh berries for added indulgence. Enjoy every slice of this delectable chocolate masterpiece!
How to Store and Freeze Killer Chocolate Cake
Fridge: Store leftovers in an airtight container in the fridge for up to 3 days to maintain freshness and moisture.
Freezer: Wrap individual slices in plastic wrap followed by aluminum foil, or place the whole cake in an airtight container. It can be frozen for up to 3 months.
Thawing: To enjoy your frozen Killer Chocolate Cake, thaw in the fridge overnight before serving for the best texture.
Reheating: If desired, warm slices in the microwave for 10-15 seconds, just until slightly warm—it enhances the chocolatey goodness!
Killer Chocolate Cake Recipe Variations
Feel free to get creative with this delightfully rich cake, and don’t hesitate to explore new flavors and textures!
- Espresso Twist: Add 1-2 teaspoons of espresso powder to the dry ingredients to amplify the chocolate richness.
- Chocolate Chip Surprise: Fold in 1 cup of semi-sweet or dark chocolate chips for an extra chocolatey experience with melted pockets of goodness.
- Nutty Indulgence: Mix in 1 cup of chopped nuts, like walnuts or pecans, to enhance both texture and flavor for a delightful crunch.
- Dairy-Free Option: Swap the milk for almond or coconut milk and use dairy-free butter in the icing to cater to dairy-free friends.
- Fruity Fusion: Add 1 cup of fresh raspberries or strawberries into the batter for a subtly fruity twist that pairs beautifully with chocolate.
- Zesty Chocolate: Stir in the zest of one orange or lemon to the batter for a refreshing citrus note that balances the richness of the cake.
- Decadent Frosting: Replace the butter in the icing with coconut cream for a rich, dairy-free frosting that’s smooth and delicious.
- Spicy Kick: Add a pinch of cayenne pepper to the batter for a warm spice that beautifully complements the chocolate flavor.
Once you’ve mastered this cake, you might also enjoy our sweet Strawberry Shortcake Bars or treat yourself to the indulgent Chocolate Pretzel Cupcakes!
Make Ahead Options
This Killer Chocolate Cake is a fantastic option for meal prep, allowing you to save time on busy days! You can bake the cake layers up to 3 days in advance; just ensure they have cooled completely before wrapping them tightly in plastic wrap. This keeps them moist and prevents any drying out. If you want to make it even earlier, feel free to freeze the unwrapped cake layers for up to 3 months; simply thaw them overnight in the refrigerator before serving. When ready to enjoy, just prepare the icing fresh, and finish by icing the layers as directed. You’ll have a deliciously chocolaty dessert ready to impress with minimal last-minute effort!
Expert Tips for Killer Chocolate Cake
• Room Temperature Ingredients: Ensure your eggs, milk, and butter are at room temperature; this promotes better mixing and a lighter cake.
• Sift Dry Ingredients: Always sift your dry ingredients to avoid lumps, preventing a dense cake texture in your Killer Chocolate Cake.
• Don’t Overmix: Mix only until combined. Overmixing will lead to a tough texture, which is not what we want for a fluffy cake!
• Boiling Water is Key: Don’t skip the boiling water; it enhances the chocolate flavor and keeps the cake moist.
• Cool Completely Before Icing: Let your cake layers cool completely to avoid melting the icing; a warm cake can ruin your beautiful presentation!
What to Serve with Killer Chocolate Cake
Indulging in a slice of this decadent cake deserves a thoughtfully curated meal to complement its rich flavors.
- Vanilla Ice Cream: The creamy sweetness contrasts beautifully with the moist cake, elevating your dessert experience to new heights.
- Fresh Berries: A medley of strawberries, raspberries, and blueberries adds a refreshing brightness that balances the chocolate’s intensity.
- Whipped Cream: Light and airy, it enhances the cake’s richness without overpowering it, perfect for a touch of elegance.
- Coffee: A warm cup brings out the deep chocolate notes, creating a delightful harmony as you savor each bite.
- Chocolate Ganache: Going double chocolate? A drizzle of silky ganache takes indulgence to a whole new level, for the truly devoted chocolate fan.
- Mint Sprigs: A vibrant garnish offers a fresh and aromatic finish that brightens the rich flavors, enhancing presentation and palate alike.
Pair these options with the Killer Chocolate Cake to create an unforgettable dessert experience that will leave everyone smiling.
Killer Chocolate Cake Recipe FAQs
What type of cocoa powder should I use for this cake?
Absolutely! For the best results, it’s recommended to use good-quality unsweetened cocoa powder like Hershey’s. Brands like Ghirardelli also offer wonderful flavor profiles. If you’re looking for a more decadent taste, try Dutch-process cocoa, which has a slightly milder flavor and a deep, dark color.
How should I store my leftover Killer Chocolate Cake?
Very simply! Store any leftover cake slices in an airtight container at room temperature for up to 3 days. For longer storage, wrap slices tightly in plastic wrap, then aluminum foil, or place the entire cake in an airtight container. This method helps maintain moisture and can keep it fresh for up to 3 months in the freezer!
Can I freeze the Killer Chocolate Cake?
Yes, you can! To freeze, wrap individual slices in plastic wrap followed by aluminum foil for extra protection. Alternatively, you can freeze the whole cake in an airtight container. When it’s time to enjoy, simply thaw in the fridge overnight for the best texture—it’s even delicious when warmed slightly in the microwave!
What should I do if my cake comes out dense?
If your cake is dense, it might be due to overmixing the batter. When combining wet and dry ingredients, mix just until they’re incorporated. Additionally, ensure your leavening agents (baking powder and baking soda) are fresh, as expired products can affect rising. Always remember to sift your dry ingredients to promote even mixing and avoid lumps!
Are there any allergy considerations with this cake?
Certainly! This cake contains common allergens like eggs, dairy, and gluten. For a gluten-free version, substitute all-purpose flour with a gluten-free blend. You can also use almond milk or another non-dairy milk to make it dairy-free. Always check labels for specifics if you’re catering to someone with allergies.
Can I add extra ingredients for variation?
Absolutely! The more the merrier! You can mix in chocolate chips for extra chocolatey goodness or a spoonful of espresso powder to intensify the chocolate flavor. Feel free to get creative by adding your favorite flavorings or toppings to personalize your Killer Chocolate Cake experience!
Killer Chocolate Cake Recipe: Irresistibly Rich Delight
Ingredients
Equipment
Method
- Preheat your oven to 350°F (175°C) and grease two 9-inch round cake pans.
- Mix the dry ingredients: sugar, flour, cocoa, baking powder, baking soda, and salt in a large bowl.
- Incorporate wet ingredients: eggs, milk, vegetable oil, and vanilla extract. Beat on medium speed.
- Add boiling water carefully to thin the batter.
- Pour batter into prepared pans, filling halfway and tap to remove air bubbles.
- Bake for 30 to 35 minutes until a wooden pick comes out clean.
- Cool the cakes in pans for about 10 minutes, then remove to cool completely.
- Melt butter for icing and stir in cocoa, alternating with powdered sugar and milk.
- Ice the cooled cakes, placing one layer on a plate and icing between layers.
- Serve immediately or let icing set, optionally pairing with ice cream.
Leave a Reply