
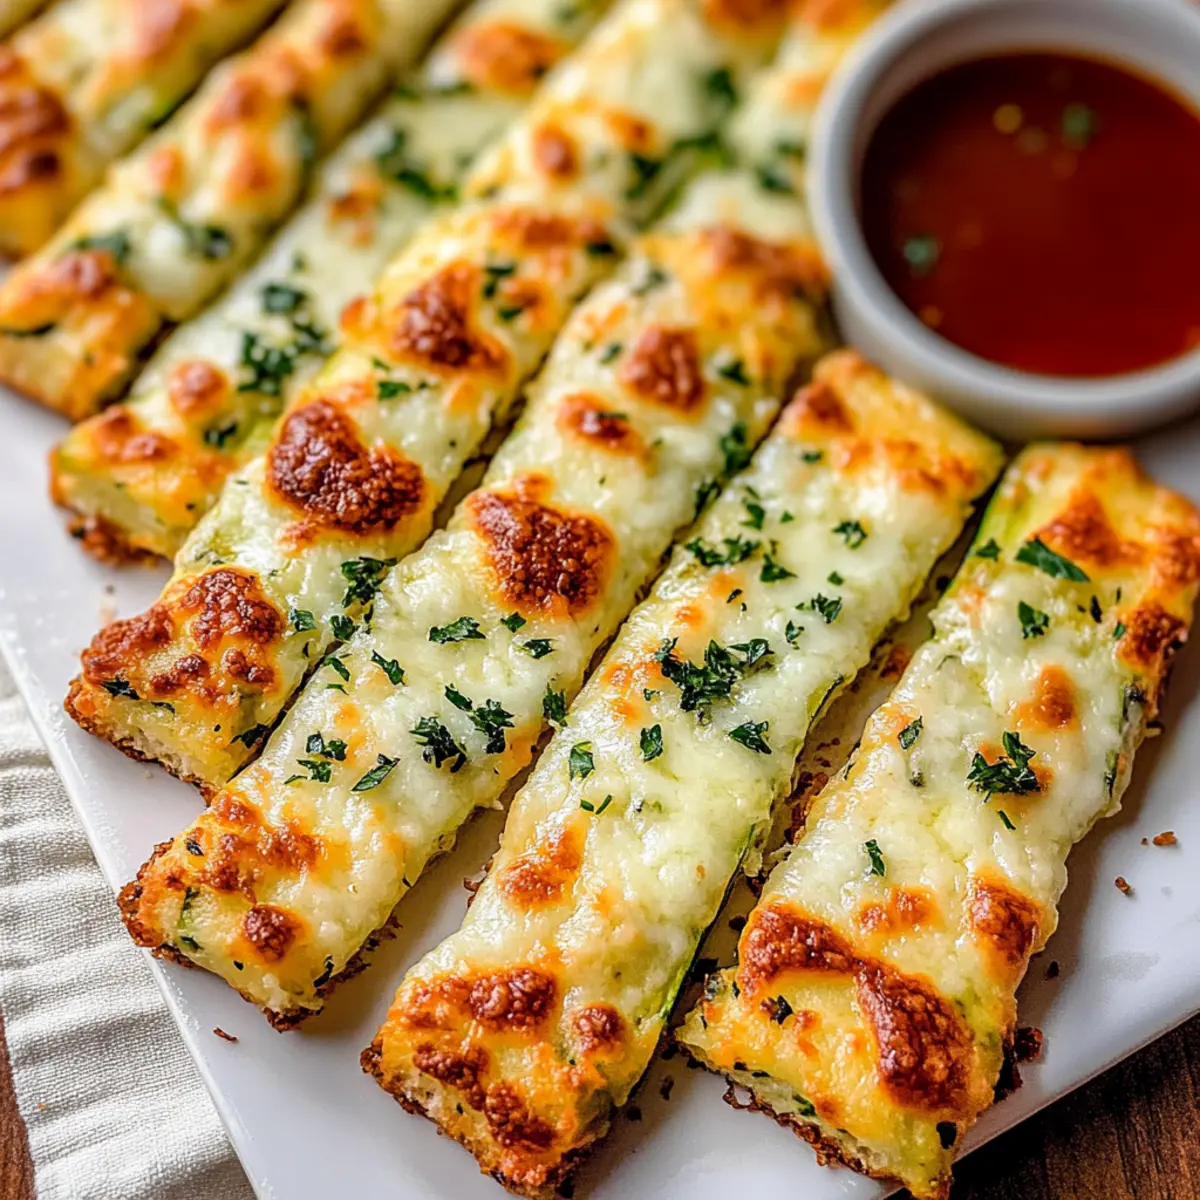
As I rummaged through my fridge, my eyes landed on a pile of summer zucchinis, each glistening with promise. Suddenly, inspiration struck! What if I transformed these vibrant veggies into something savory and oh-so-cheesy? Enter my Cheesy Zucchini Breadsticks—your new go-to low-carb, veggie-packed snack that’s both delicious and gluten-free. With their golden, crispy edges and gooey, cheesy centers, these breadsticks make an ideal appetizer or an after-school treat for the kids that even you will love. They offer not just a way to sneak in those nutritious greens but also come together in a snap, perfect for those busy weeknights. Curious how to whip up this guilt-free indulgence? Let’s dive in!
Why are Cheesy Zucchini Breadsticks irresistible?
Flavorful, Savory Goodness: These breadsticks combine the rich taste of cheese with the freshness of zucchini, proving that healthy can be delicious!
Quick and Easy: With only a few simple ingredients and an effortless prep process, these breadsticks come together in no time—perfect for busy weeknights.
Versatile Ingredients: Feel free to mix and match toppings from marinara sauce to fresh herbs—each variation brings a new twist to the table!
Health-Conscious Choice: Low-carb and gluten-free, this recipe ensures you don’t have to compromise on your dietary goals while enjoying a delightful snack.
Family-Friendly Appeal: Kids and adults alike will adore these cheesy bites, making them an excellent addition to any gathering or casual dinner. Just like my Cheesy Root Vegetable Gratin, these breadsticks are destined to be a hit!
Cheesy Zucchini Breadsticks Ingredients
For the Breadstick Base
• Zucchini – Adds moisture and structure; use fresh medium zucchinis for best results.
• Eggs – Acts as a binder for the mixture; large eggs ensure optimal texture.
• Mozzarella Cheese – Provides a stretchy, cheesy pull; shredded low-moisture mozzarella is recommended.
• Parmesan Cheese – Enhances flavor with a nutty taste; freshly grated is preferable.
• Garlic Powder – Depicts the classic garlic bread flavor; fresh minced garlic can be substituted if desired.
• Italian Seasoning – A blend of dried basil, oregano, and thyme complements the dish beautifully.
• Salt & Pepper – Typical seasonings to balance flavors without overpowering the zucchini base.
For the Cheese Topping
• Extra Mozzarella Cheese – Sprinkle on top for that gooey finish; use a combination with cheddar for extra richness if desired.
These Cheesy Zucchini Breadsticks are not only a delicious way to celebrate summer zucchini but also a guilt-free snack you’ll crave again and again!
Step‑by‑Step Instructions for Cheesy Zucchini Breadsticks
Step 1: Prepare Zucchini
Preheat your oven to 425°F (220°C) to ensure a perfect bake. While it’s heating, take fresh medium zucchinis, shred them using a box grater, and place the shredded zucchini in a clean kitchen towel or cheesecloth. Squeeze out excess moisture until it feels dry to the touch; this is crucial for achieving the ideal crispy texture in your Cheesy Zucchini Breadsticks.
Step 2: Make the Crust
In a large mixing bowl, combine the dried shredded zucchini with ½ cup of low-moisture mozzarella cheese, freshly grated Parmesan cheese, and two large eggs. Add garlic powder, Italian seasoning, salt, and pepper. Mix everything thoroughly until well combined, ensuring the eggs evenly bind the mixture, creating a cohesive base that’s packed with flavor and ready for baking.
Step 3: Shape and Bake
Line a baking sheet with parchment paper to prevent sticking, then spread the zucchini mixture out evenly onto the sheet, forming a thin rectangle about ½ inch thick. Smooth the top with a spatula for an even bake. Place it in your preheated oven and bake for 20–25 minutes, or until the edges turn golden and the center feels firm to the touch.
Step 4: Add Cheese Topping
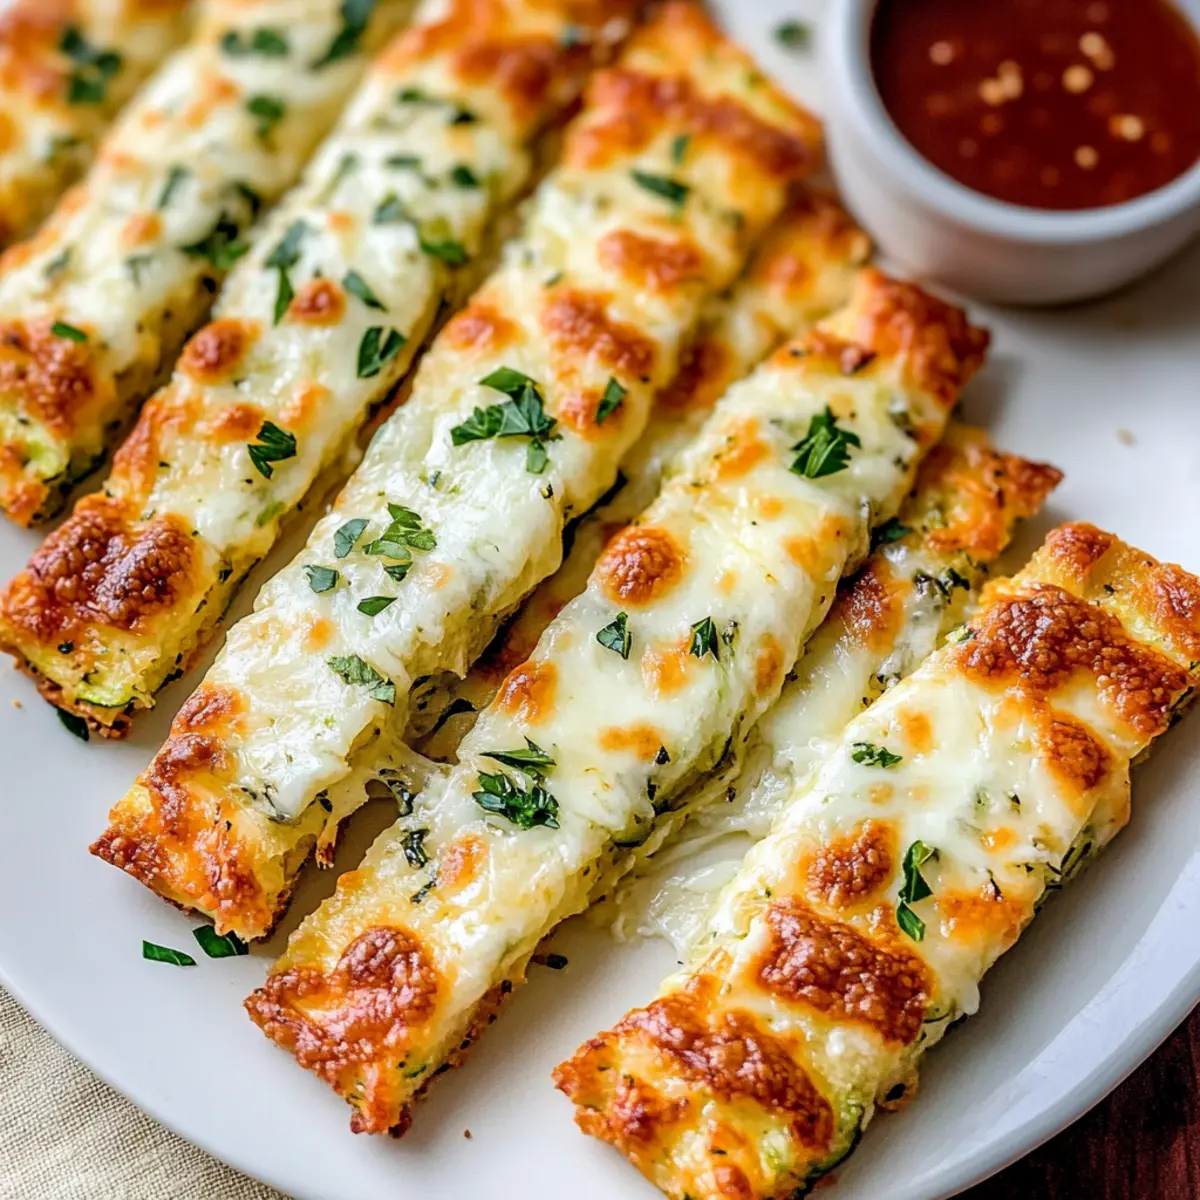
Once the crust has baked to perfection, carefully remove it from the oven and sprinkle the remaining mozzarella cheese generously on top. This will create that irresistible gooey layer. Return the baking sheet to the oven and bake for an additional 5–7 minutes, or until the cheese is completely melted and bubbly, creating an enticingly cheesy finish.
Step 5: Slice and Serve
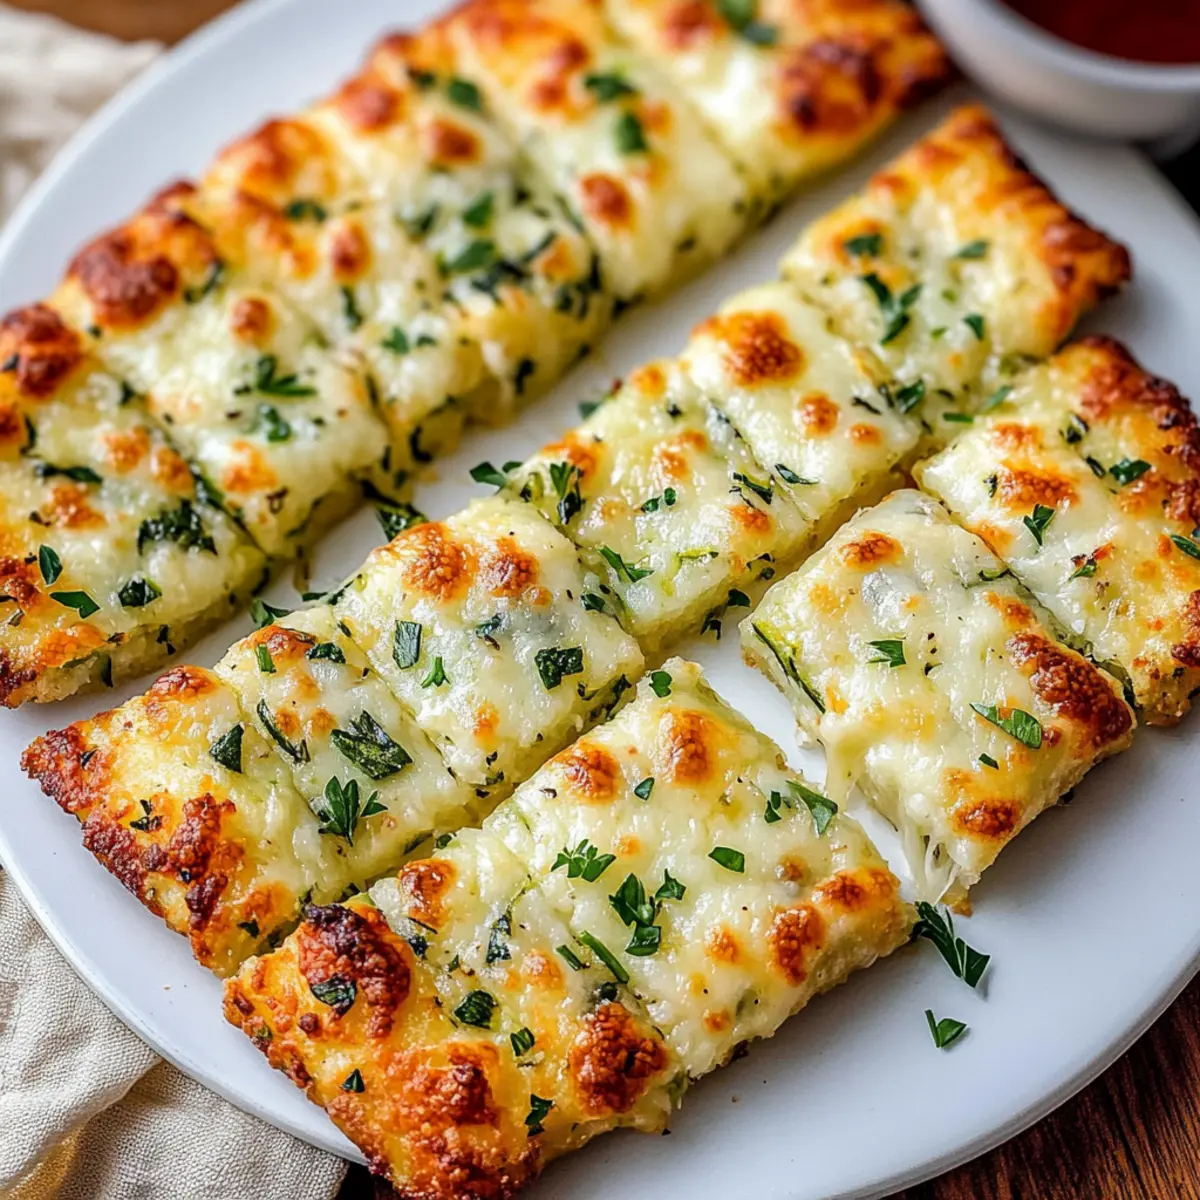
After baking, let the Cheesy Zucchini Breadsticks cool for a few minutes on the baking sheet. This allows for easier slicing and keeps them from falling apart. Cut them into desired breadstick shapes, garnish with fresh parsley or basil for a pop of color, and serve warm alongside your favorite dipping sauce.
How to Store and Freeze Cheesy Zucchini Breadsticks
Fridge: Keep leftover Cheesy Zucchini Breadsticks in an airtight container for up to 3 days. To reheat, place them in the oven or air fryer to restore their crispiness.
Freezer: You can freeze the baked breadsticks for up to 2 months. Wrap them tightly in plastic wrap and then in aluminum foil for optimal freshness.
Before Serving: When ready to enjoy, simply reheat the frozen breadsticks in the oven at 350°F (175°C) for about 10-15 minutes, or until heated through and crispy again.
Make-Ahead Tip: If you’re short on time, consider freezing the uncooked crust. Prepare the mixture, spread it out on a baking sheet, freeze until solid, then transfer to a zip-top bag. Thaw and bake when you’re ready for a quick snack!
What to Serve with Cheesy Zucchini Breadsticks
Picture a delightful spread that pairs seamlessly with these golden, cheesy delights, bringing warmth and flavor to your table.
-
Marinara Sauce: A classic pairing! The sweet and tangy notes of marinara beautifully complement the cheesy flavor, creating a satisfying dip perfect for your breadsticks.
-
Ranch Dressing: Creamy and herbaceous, ranch dressing adds a cool contrast to the savory zest of the breadsticks. It’s a crowd-pleaser that your family will love.
-
Garlic Aioli: This rich dip enhances the garlic flavor in the breadsticks and takes every bite to a gourmet level. The creaminess of aioli is an indulgent match!
-
Caprese Salad: Diced tomatoes, fresh mozzarella, and basil bring a fresh texture that beautifully balances the rich flavors of the cheesy breadsticks. It’s vibrant and utterly refreshing!
-
Stuffed Peppers: With a hearty filling, stuffed peppers add substance to your meal while the spices mingle nicely with the Italian herbs in the breadsticks.
-
Sparkling Water with Lemon: A bubbly, refreshing drink that cleanses the palate between bites, allowing the cheesy goodness to shine through without overpowering flavors.
-
Chocolate-Covered Strawberries: For those with a sweet tooth, these offer a perfect ending to your meal, creating a delightful contrast with the savory, cheesy breadsticks.
Combine just a few of these options for an unforgettable meal your family will ask for again and again!
Make Ahead Options
These Cheesy Zucchini Breadsticks are perfect for meal prep enthusiasts, allowing you to savor deliciousness even on your busiest days! You can prepare the zucchini crust up to 24 hours in advance by following steps 1 and 2—just be sure to refrigerate the mixture in an airtight container to keep it fresh. Alternatively, the baked breadsticks can be made up to 3 days ahead and stored in an airtight container in the refrigerator. When you’re ready to enjoy them, simply reheat the breadsticks in the oven at 350°F (175°C) for about 10 minutes until warmed through and crispy. This way, you’ll enjoy restaurant-quality Cheesy Zucchini Breadsticks with minimal effort!
Cheesy Zucchini Breadsticks Variations
Feel free to get creative and tailor these Cheesy Zucchini Breadsticks to suit your taste buds!
-
Spicy Kick: Add red pepper flakes or chopped jalapeños to give your breadsticks some heat. The spice pairs beautifully with the cheesy goodness, creating an exciting contrast.
-
Marinara Layer: For a pizza-style twist, spread a thin layer of marinara sauce before adding cheese on top. It transforms the breadsticks into a delightful fusion of flavors that everyone will love.
-
Herbal Infusion: Mix in fresh herbs like basil or parsley for a fragrant touch. These fresh additions elevate the dish, making it feel even more vibrant and delightful.
-
Cheese Medley: Use a blend of mozzarella, cheddar, and provolone for a richer cheese flavor. This combination creates a tantalizingly gooey and flavorful experience that’s simply irresistible.
-
Mediterranean Flair: Add feta cheese and olives to the zucchini mixture for a Mediterranean-inspired twist. The tangy feta and briny olives add depth, making every bite more exciting.
-
Smoky Flavor: Incorporate smoked paprika or chipotle powder for a lovely smoky essence. This twist enhances the overall flavor profile and adds an intriguing layer.
-
Veggie Boost: Toss in finely chopped bell peppers or spinach for extra nutrition and color. These vibrant veggies not only elevate the taste but also provide a beautiful visual appeal.
For more cheesy creations, check out my Ooey Gooey Cheesy Garlic Chicken Wraps and Cheesy Christmas Lasagna!
Tips for the Best Cheesy Zucchini Breadsticks
-
Squeeze Well: Make sure to remove as much moisture as possible from the zucchini. This prevents soggy breadsticks and ensures a perfect crispy texture.
-
Choose Quality Cheese: Opt for low-moisture mozzarella for that classic stretchy pull. Freshly grated Parmesan adds depth, making your cheesy zucchini breadsticks truly irresistible.
-
Spice It Up: Don’t hesitate to add your favorite spices or herbs. A pinch of chili flakes can change the flavor profile entirely, giving a little kick to the savory goodness.
-
Even Thickness: When spreading the zucchini mixture on the baking sheet, aim for an even thickness to ensure uniform baking. This helps all breadsticks cook evenly, avoiding undercooked centers.
-
Dipping Delight: Serve your cheesy zucchini breadsticks with delicious sauces like marinara or ranch dressing. This adds fun and flavor, making them even more enjoyable for the whole family!
-
Store Wisely: If you have leftovers, store them in an airtight container for up to 3 days. Reheating in an oven will keep the breadsticks crispy—just like fresh!

Cheesy Zucchini Breadsticks Recipe FAQs
What type of zucchini should I use?
Absolutely! For the best results, choose fresh medium zucchinis. Look for those that are firm and have a vibrant green skin. Avoid zucchinis with dark spots all over, as they may be past their prime and affect the texture and flavor of your Cheesy Zucchini Breadsticks.
How should I store leftovers?
Very! You can store leftover Cheesy Zucchini Breadsticks in an airtight container in the fridge for up to 3 days. When you’re ready to enjoy them again, reheat them in the oven or air fryer to bring back that delightful crunch!
Can I freeze the Cheesy Zucchini Breadsticks?
Definitely! To freeze, wrap baked breadsticks tightly in plastic wrap and then in aluminum foil for additional protection. They can be frozen for up to 2 months. When you’re ready to eat, simply reheat them in the oven at 350°F (175°C) for about 10-15 minutes, or until they’re heated through and crispy.
What can I do if my breadsticks turn out soggy?
Don’t worry! If your Cheesy Zucchini Breadsticks are soggy, it may be due to excess moisture in the zucchini. Always make sure to squeeze out as much water as possible after shredding. If they are still too soft after baking, you can return them to the oven for a few more minutes to help firm them up.
Are there any dietary considerations for this recipe?
Absolutely! These Cheesy Zucchini Breadsticks are not only low-carb and gluten-free, making them a perfect option for various diets, but always double-check the labels on your ingredients to ensure they meet your dietary needs. If you have specific allergies, you can also substitute the cheese with vegan options or omit it for a dairy-free snack.
Cheesy Zucchini Breadsticks: A Guilt-Free Flavorful Treat
Ingredients
Equipment
Method
- Preheat your oven to 425°F (220°C). Shred the zucchinis and squeeze out excess moisture using a kitchen towel.
- Combine the dried shredded zucchini with mozzarella cheese, Parmesan cheese, and eggs. Add garlic powder, Italian seasoning, salt, and pepper. Mix thoroughly.
- Spread the zucchini mixture evenly onto a parchment-lined baking sheet, forming a thin rectangle and bake for 20–25 minutes.
- Sprinkle the remaining mozzarella cheese on top and bake for an additional 5–7 minutes until melted and bubbly.
- Let cool for a few minutes, slice into desired shapes, garnish with herbs, and serve warm.
Leave a Reply