
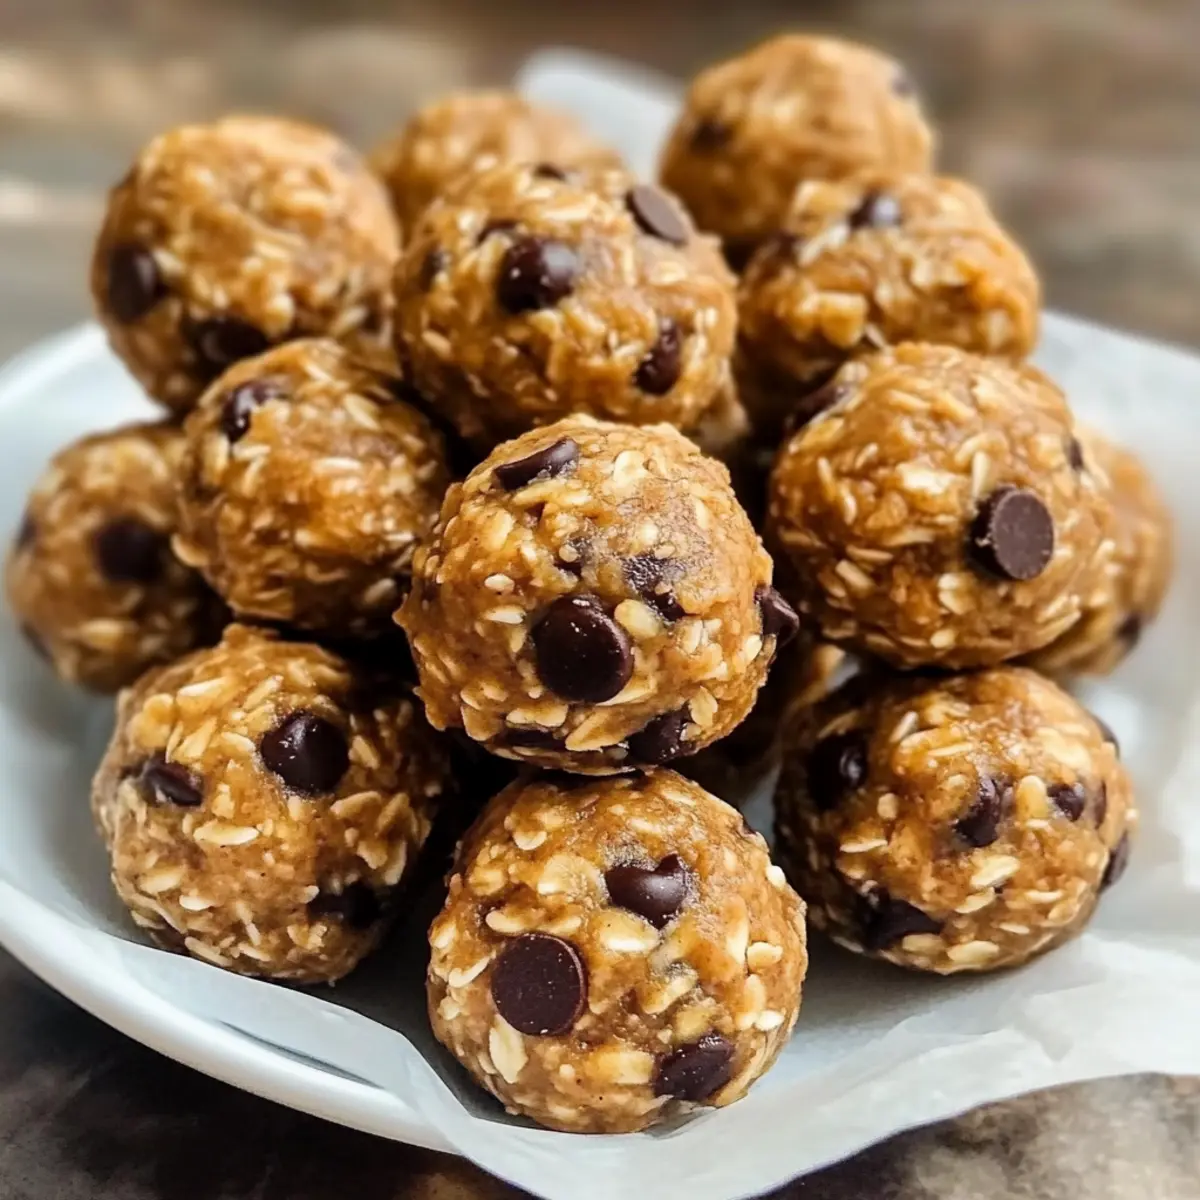
With life running at full speed, finding time for healthy snacks can feel like a race against the clock. Enter my Quick & Easy No Bake Energy Bites—these delightful little morsels are here to save the day! In just ten minutes, you can whip up a batch that not only satisfies those sweet cravings but also fuels your busy lifestyle. Whether you’re a parent juggling school schedules or a professional navigating back-to-back meetings, these No Bake Energy Bites are a perfect on-the-go companion. Plus, they’re vegetarian and can easily be customized with your favorite add-ins or sweeteners. Ready to add some delicious energy to your day? Let’s dive into this easy, no-fuss recipe that will have you reaching for a second bite in no time!
Why are No Bake Energy Bites a Must-Try?
Convenience is key—ready in just ten minutes, these bites are perfect for your hectic lifestyle. Wholesome ingredients like quick oats and peanut butter offer a balance of flavor and nutrition. Customizable to fit your taste, feel free to mix in dried fruits or swap honey for maple syrup. Family-friendly, these snacks will be a hit with everyone from kids to adults. For a savory touch, try them alongside my Broccoli Chicken Bake or whip up some French Onion Chicken for dinner! Enjoy these delightful bites anytime, and say goodbye to fast food cravings!
No Bake Energy Bites Ingredients
For the Batter
- Quick Cooking Oats – Provide structure and bulk; essential for a chewy texture.
- Peanut Butter – Adds creaminess and healthy fats; can substitute with almond or cashew butter for nut allergies.
- Honey – Acts as a natural sweetener and binds the mixture; can replace with maple syrup for a vegan option.
- Mini Chocolate Chips – Enhance flavor and sweetness; consider using dark chocolate or dried fruits for variation.
- Vanilla Extract – Adds depth of flavor; optional but recommended for enhanced taste.
Step‑by‑Step Instructions for No Bake Energy Bites
Step 1: Combine the Base Ingredients
In a large mixing bowl, add 2 cups of quick cooking oats, 1 cup of peanut butter, and 1/2 cup of honey. Use a wooden spoon or spatula to mix everything together thoroughly for about 2–3 minutes. You want a cohesive and sticky mixture that holds well together, ensuring the oats are nicely coated and evenly distributed with the peanut butter and honey.
Step 2: Add Flavor and Sweetness
Next, fold in 1/2 cup of mini chocolate chips and a teaspoon of vanilla extract into the mixture. Stir gently for another minute to evenly disperse the chocolate chips throughout the batter, making sure that each bite of your No Bake Energy Bites will be delightfully sweet and chocolatey. The dough should now be slightly shiny and fully combined.
Step 3: Shape the Energy Bites
Using a cookie scoop or your hands, portion out the mixture and roll it into 1-inch balls. Place the formed energy bites on a parchment-lined baking sheet, ensuring they are spaced about an inch apart for ease of storage later. This step typically takes about 5 minutes, and you’ll notice how the mixture can hold its shape without any baking!
Step 4: Chill to Set
Once all the energy bites are shaped and on the baking sheet, cover it with plastic wrap and refrigerate for approximately 30 minutes. This chilling time allows the No Bake Energy Bites to firm up, making them easier to handle and giving them that perfect chewy texture when you take a bite.
Step 5: Store for Enjoyment
After the cooling period, transfer the energy bites to an airtight container. If you’re storing them in the fridge, they can last up to two weeks. For longer preservation, consider freezing them with parchment paper between layers to prevent sticking, ensuring you always have a healthy snack on hand whenever you need an energy boost.
How to Store and Freeze No Bake Energy Bites
Fridge: Store your No Bake Energy Bites in an airtight container in the fridge for up to 2 weeks. This keeps them fresh and ready for snacking!
Freezer: For longer storage, freeze bites for up to 3 months. Layer them with parchment paper to prevent sticking, ensuring easy access when you crave a quick treat.
Thawing: When you’re ready to enjoy the frozen bites, simply transfer them to the fridge for a few hours or leave at room temperature for about 30 minutes.
Reheating: There’s no need for reheating here; just grab and go! Enjoy them straight from the fridge or at room temperature.
Make Ahead Options
These No Bake Energy Bites are perfect for meal prep, saving you time on those busy days! You can prepare the batter up to 24 hours in advance by rolling the mixture into balls and storing them in an airtight container in the refrigerator. This allows the flavors to meld beautifully while keeping them fresh. If you’re looking to prepare even further ahead, consider freezing the rolled bites for up to three months—just make sure to use parchment paper between layers to prevent sticking. When you’re ready to enjoy, simply let them sit at room temperature for a few minutes or grab them directly from the freezer for an instant energy boost! You’ll find they’re just as delicious and satisfying, ready to fuel your day!
Expert Tips for No Bake Energy Bites
-
Mixing Order Matters: Start by adding wet ingredients like peanut butter and honey to your mixing bowl first. This helps the dry oats blend seamlessly into the mixture, yielding well-coated energy bites.
-
Adjusting Consistency: If your mixture feels too sticky to roll into balls, don’t worry! Simply add a little more quick cooking oats or a splash of water to achieve the right texture for your No Bake Energy Bites.
-
Uniform Size: Use a cookie scoop for consistent-sized bites. This not only enhances their appearance but ensures they’re all equally delicious and ready for snacking.
-
Customize to Your Taste: Feel free to swap out mini chocolate chips for alternatives like dark chocolate or dried fruits. This customization allows you to tailor your No Bake Energy Bites to suit your flavor preferences!
-
Chill for Best Results: Allowing the energy bites to chill in the fridge for at least 30 minutes is crucial. This step improves their texture, making them more enjoyable to snack on!
No Bake Energy Bites Variations
Feel free to get creative with these delightful bites for a twist that suits your taste!
- Vegan Swap: Replace honey with agave nectar for a delicious vegan alternative.
- Nut-Free Option: Swap peanut butter for sunflower seed butter to make these bites nut-free and just as tasty!
- Protein Boost: Add a scoop of your favorite protein powder to the mixture for an extra nutritious kick. Just reduce the oats slightly to maintain consistency.
- Flavor Burst: Toss in a teaspoon of cinnamon or cocoa powder for a delicious flavor variation that will make your taste buds sing.
- Berrylicious: Mix in dried cranberries or chopped dates to enhance the sweetness and add a chewy texture.
- Crunchy Texture: Add chopped nuts or seeds for a satisfying crunch that takes these bites to the next level.
- Chocolate Lovers: Swap mini chocolate chips for dark chocolate chunks or even chocolate-covered raisins for a richer cocoa hit.
- Heat Things Up: If you’re feeling adventurous, a pinch of cayenne pepper can add an unexpected kick to your energy bites!
Mix and match these variations while enjoying your No Bake Energy Bites alongside a refreshing High Protein Berry Bake or indulge in a creamy Baked Lemon Butter Chicken for a meal that’s both satisfying and energizing!
What to Serve with No Bake Energy Bites
These delightful snacks pair beautifully with many dishes, creating a full meal experience.
- Fresh Fruit Platter: The sweetness and acidity of fresh fruits like apples and strawberries add a refreshing contrast to the chewy bites.
- Creamy Yogurt: A side of vanilla Greek yogurt not only enhances the flavor but adds a protein punch that complements the energy bites perfectly.
- Nutty Trail Mix: A handful of mixed nuts or seeds provides a crunchy texture that beautifully contrasts the softness of the bites while keeping you fueled.
- Vegetable Sticks with Hummus: Crisp vegetable sticks like carrots or celery dipped in creamy hummus make for a nutritious and satisfying snack plate alongside the bites.
- Iced Herbal Tea: A cool, refreshing herbal tea can provide a soothing balance to the sweetness of the energy bites, making for a delightful afternoon treat.
- Chocolate Milkshake: For a little indulgence, serve with a chocolate milkshake, playing up the chocolatey goodness of the energy bites for a special treat.
- Peanut Butter Banana Smoothie: Blend a creamy smoothie with banana and peanut butter that mirrors the nutty flavors in the bites, making it a wholesome drink to enjoy.
No Bake Energy Bites Recipe FAQs
How do I choose ripe ingredients for my No Bake Energy Bites?
Absolutely! Use fresh, creamy peanut butter without added sugar for the best flavor. When using honey, go for raw or local varieties for enhanced taste and nutrition. Since mini chocolate chips can be sweeter, pick high-quality brands for the best results.
What’s the best way to store No Bake Energy Bites?
For optimal freshness, store your No Bake Energy Bites in an airtight container in the fridge. They can last for up to 2 weeks. To prevent sticking, layer them with parchment paper. Always remember to keep the lid tightly closed to maintain their chewiness!
Can I freeze No Bake Energy Bites, and if so, how?
Yes! You can freeze your No Bake Energy Bites for up to 3 months. Here’s how to do it:
- Roll the mixture into balls and place them on a baking sheet lined with parchment paper.
- Freeze them in a single layer for about 1-2 hours until firm.
- Once frozen, transfer them into a freezer bag or an airtight container, adding a piece of parchment paper between layers to prevent sticking.
- When you’re ready to enjoy, simply thaw them in the fridge for a few hours or let them sit at room temperature for about 30 minutes.
What if my mixture is too sticky while making No Bake Energy Bites?
Very likely! If you find the mixture stickier than expected, it’s an easy fix. Start by adding a bit more quick cooking oats—about 1-2 tablespoons at a time—until it reaches a more manageable consistency. You can also add a splash of water if needed, but be careful not to make it too wet!
Are No Bake Energy Bites safe for people with allergies or pets?
Of course! Just be attentive to nut allergies; you can substitute peanut butter with sunflower seed butter or soy nut butter to make these snacks allergy-friendly. Always keep No Bake Energy Bites out of reach from pets, as ingredients like chocolate can be harmful to them. Additionally, check labels to confirm the absence of any allergens before making them for others.
What’s the best time to enjoy No Bake Energy Bites?
These chewable delights are great for any time of the day! Enjoy them as a quick breakfast, an afternoon pick-me-up, or a post-workout snack. They are not only versatile but also perfect for satisfying sweet cravings without the guilt.
Deliciously Chewy No Bake Energy Bites for Anytime Snacking
Ingredients
Equipment
Method
- In a large mixing bowl, combine quick cooking oats, peanut butter, and honey. Mix thoroughly for about 2–3 minutes.
- Fold in mini chocolate chips and vanilla extract into the mixture, stirring gently for another minute.
- Roll the mixture into 1-inch balls and place on a parchment-lined baking sheet, spaced about an inch apart.
- Cover with plastic wrap and refrigerate for approximately 30 minutes to firm up.
- Transfer to an airtight container. Store in the fridge for up to two weeks or freeze for longer storage.
Leave a Reply