
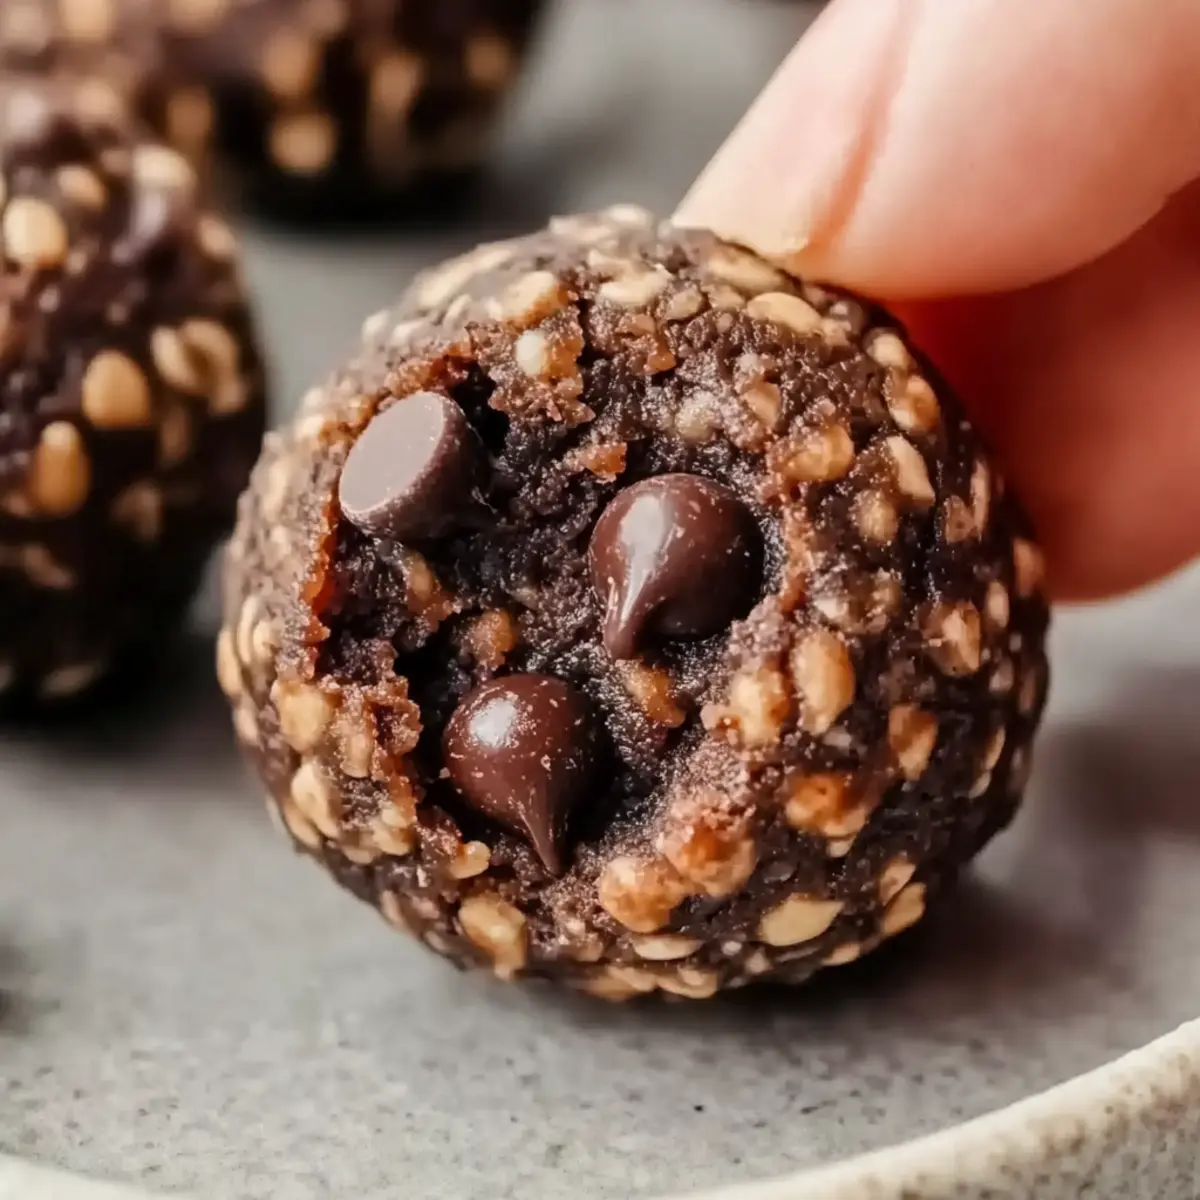
As I rummaged through my pantry on a lazy afternoon, the sight of my nearly empty chocolate stash sparked a sweet idea: No-Bake Brownie Protein Balls. With all the ease of whipping up a simple batter, these little treasures can be your go-to healthy snack! Packed with protein and full of fudgy goodness, they’re an incredible way to satisfy that chocolate craving without a side order of guilt. Plus, they take mere minutes to prepare, making them a lifesaver for busy days when you just need a little something quick. Whether you’re a passionate home-chef or a kitchen novice, these adaptable bites allow you to mix and match ingredients to suit your taste. Curious how to whip up this guilt-free indulgence? Let’s get mixing!
Why Make No-Bake Brownie Protein Balls?
Quick and Easy: With just a few simple steps, these no-bake delights can be prepared in a flash!
Customizable Ingredients: Feel free to swap out almond butter for your favorite nut butter or experiment with different protein powders to find your perfect combo.
Healthier Indulgence: Guilt-free snacking is the way to go! Each ball is packed with protein and made from wholesome ingredients.
Crowd-Pleasing Treat: Perfect for sharing at gatherings or as a tasty post-workout boost, everyone will be asking for your secret!
Versatile Enjoyment: Pair them with coffee, almond milk, or fresh fruits for a balanced snack platter, just like my delightful High Protein Triple bake.
No-Bake Brownie Protein Balls Ingredients
For the Base
- Almond Flour – Provides structure and a nutty flavor; can substitute with any gluten-free flour blend.
- Whey Protein – Adds protein content for a nutritious boost; plant-based options may require adjusting water.
- Cocoa Powder – Offers rich chocolate flavor; ensure it’s unsweetened for the best results.
- Almond Butter – Acts as the binding agent and adds creaminess; swap with cashew butter or sunflower butter for nut-free options.
- Honey – Sweetens and helps hold the mixture together; use maple syrup for a vegan alternative.
- Water – Adjusts the dough’s consistency; start with a little and add more as needed.
For the Coating
- Mini Chocolate Chips – Optional for rolling to enhance sweetness and texture; dark chocolate chips can also be used for a richer taste.
Indulge in these No-Bake Brownie Protein Balls and enjoy a healthier snacking experience!
Step‑by‑Step Instructions for No-Bake Brownie Protein Balls
Step 1: Combine Dry Ingredients
In a medium mixing bowl, whisk together the almond flour, whey protein, and unsweetened cocoa powder. This mixture serves as the dry base for your No-Bake Brownie Protein Balls. Ensure there are no clumps and everything is well incorporated, which will create a smooth texture once combined with the wet ingredients.
Step 2: Mix in Wet Ingredients
Add the almond butter and honey to the dry ingredients, stirring well with a silicone spatula. Begin by incorporating the wet elements slowly to form a cohesive dough. If you see clumps, don’t worry! Keep mixing until a thick and sticky dough forms, which should take about 2–3 minutes of gentle mixing.
Step 3: Adjust Consistency
If the mixture feels too dry, slowly add water, one tablespoon at a time, until the dough holds together without being overly sticky. Aim for a dough that you can easily mold into balls. Continue this process for about 2–3 minutes, letting the mixture absorb the moisture while you mix thoroughly.
Step 4: Shape the Dough
Using your hands, grab a small portion of the dough and roll it into a 1-inch ball. Continue this process, ensuring all the dough is shaped consistently to create No-Bake Brownie Protein Balls that are uniform in size. This step should be quick and should take approximately 5 minutes to roll all the balls.
Step 5: Roll in Chocolate Chips
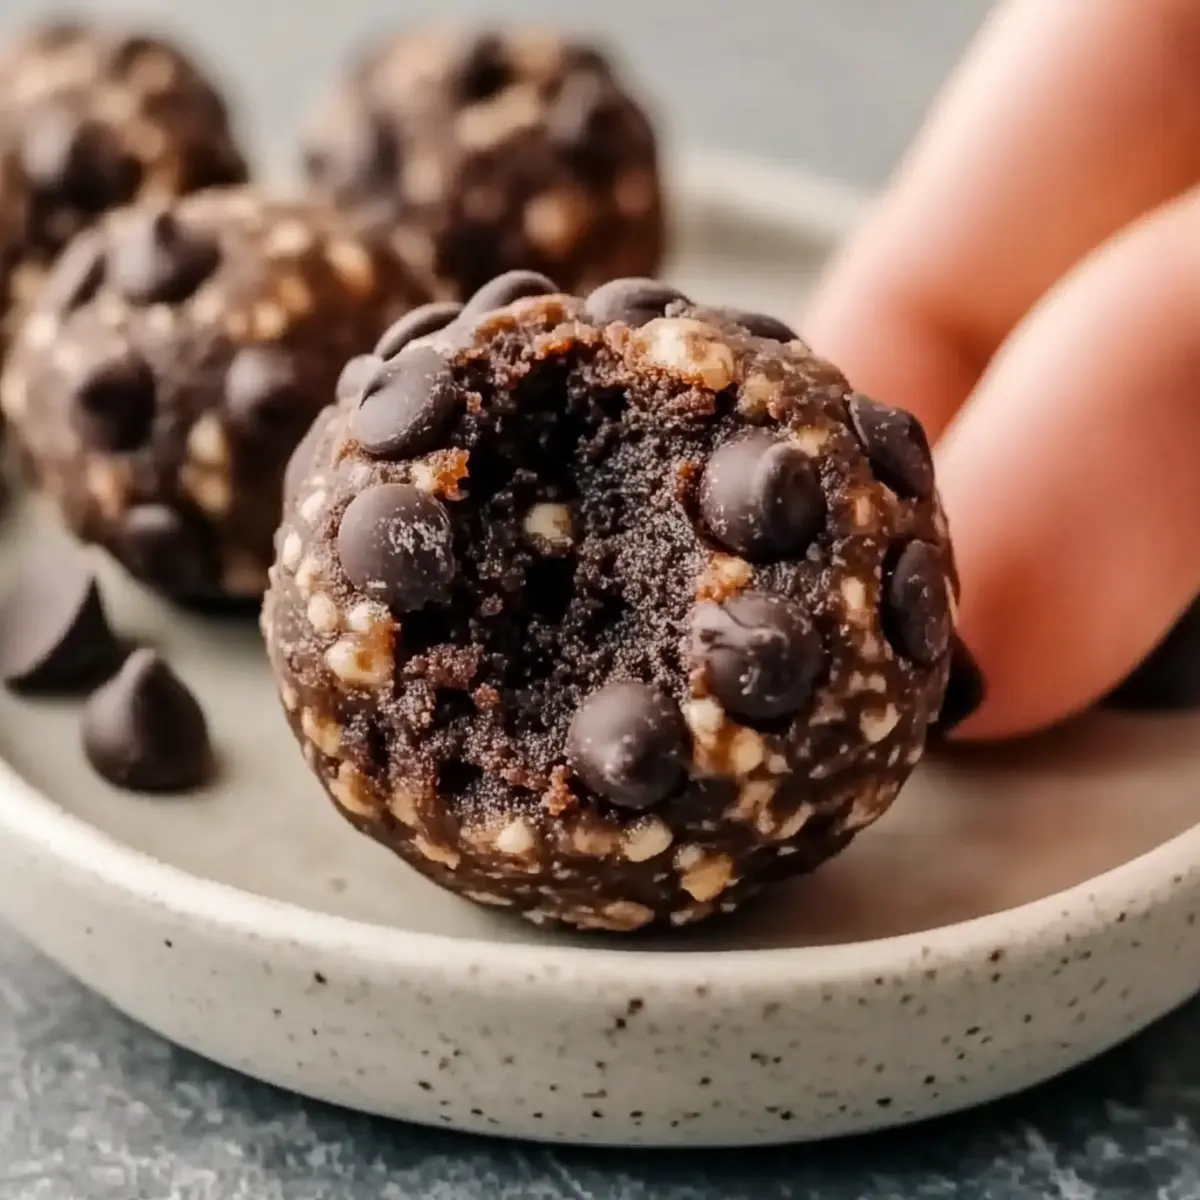
For an extra touch of sweetness and texture, gently roll each ball in mini chocolate chips, pressing lightly to help them adhere. This step adds delightful bite-sized sweetness to your No-Bake Brownie Protein Balls. You can also use dark chocolate chips if you prefer a richer taste.
Step 6: Chill to Firm Up
Place the rolled balls onto a parchment-lined baking sheet and refrigerate for at least 30 minutes. This chilling time is crucial as it allows the No-Bake Brownie Protein Balls to firm up, making them easier to handle and enhancing their fudgy texture. After the time is up, they are ready to enjoy!

How to Store and Freeze No-Bake Brownie Protein Balls
Fridge: Keep your No-Bake Brownie Protein Balls in an airtight container. They stay fresh for up to 1 week, making them a convenient snack option.
Freezer: For longer storage, freeze the protein balls in a zip-top bag. They can be kept for up to 3 months. Thaw them in the fridge overnight or at room temperature before enjoying.
Reheating: These protein balls are best enjoyed cold, but if you prefer a warm treat, microwave for 10-15 seconds to enhance the fudgy texture.
Portion Control: Consider pre-rolling the balls for easy grab-and-go snacking. This way, you can easily control portions while enjoying a healthy treat!
No-Bake Brownie Protein Balls Variations
Feel free to get creative with your No-Bake Brownie Protein Balls and make them your own!
-
Nut-Free: Swap almond butter for sunflower seed butter to accommodate nut allergies. This will still give you a creamy texture without the nuts.
-
Plant-Based: Use a vegan protein powder and replace honey with maple syrup. This makes your snack entirely plant-based while keeping it deliciously sweet.
-
Flavor Variety: Experiment with different flavored protein powders like vanilla or chocolate peanut butter for a unique twist on flavor that keeps things exciting.
-
Fruity Fusions: Add dried cranberries or chopped apricots into the mixture for a fruity surprise. These little bursts of sweetness complement the chocolate beautifully.
-
Spicy Kick: Introduce a pinch of cayenne pepper or some cinnamon for a warm, spicy finish to your protein balls. This unique twist will surely surprise and delight!
-
Crunchy Texture: Fold in some chopped nuts or seeds for a delightful crunch. Pecans, walnuts, or even sunflower seeds add texture that contrasts beautifully with the fudginess.
-
Decadent Swirl: Drizzle melted dark chocolate over the chilled balls for an indulgent touch that enhances their dessert-like quality.
-
Protein Boost: For an extra protein kick, add chia seeds or hemp hearts into the mixture. This not only elevates the nutritional value but also adds a delightful chewy texture.
These variations can truly elevate your No-Bake Brownie Protein Balls and keep them fresh; for more inspiration, consider trying out some other delightful homemade treats like my One Bowl Brownies or the High Protein Triple bake!
Make Ahead Options
These No-Bake Brownie Protein Balls are ideal for busy home cooks looking to save time and enjoy guilt-free snacks throughout the week! You can prepare the dough up to 24 hours in advance; simply mix all the dry and wet ingredients together, then store it in an airtight container in the fridge. When ready to enjoy, roll the dough into balls and coat them in mini chocolate chips just before serving for that fresh taste. Additionally, these protein balls can be stored in the refrigerator for up to 1 week or frozen for up to 3 months—just thaw in the fridge or at room temperature. With these tips, you’ll have delicious No-Bake Brownie Protein Balls on hand whenever those chocolate cravings strike!
What to Serve with No-Bake Brownie Protein Balls?
Elevate your snacking experience by pairing these delightful, protein-packed treats with complementary flavors and refreshments!
- Creamy Almond Milk: The rich, nutty flavor of almond milk perfectly balances the chocolatey goodness while keeping things light and refreshing.
- Fresh Berries: A burst of juicy berries adds a tangy, vibrant element that brightens up the sweetness of the protein balls.
- Greek Yogurt Parfait: Layering them with Greek yogurt and granola creates a satisfying and visually stunning snack that’s both nutritious and delicious.
- Nutty Energy Bars: Pairing with another homemade snack, like nut bars, provides a crunchy texture contrast and extra energy for your day.
- Banana Slices: The soft, sweet, and creamy banana complements the fudge-like texture of the protein balls, elevating your treat into a wholesome bite.
- Iced Coffee: A chilled cup of iced coffee pairs wonderfully, giving you that comforting caffeine kick that enhances the chocolate flavors beautifully.
- Crunchy Veggie Sticks: For a savory twist, serve with carrot or cucumber sticks for a delightful contrast and a healthier overall snack.
- Dark Chocolate Drizzle: A decadent drizzle of melted dark chocolate on top adds another layer of sweetness and indulgence, perfect for those sweet cravings!
Expert Tips for No-Bake Brownie Protein Balls
- Mix Thoroughly: Ensure all ingredients are well combined to avoid dry spots in your No-Bake Brownie Protein Balls. This ensures an even texture and taste.
- Adjust Consistency: Add water gradually to prevent your dough from becoming too sticky. Aim for a moldable texture that holds shape without crumbling.
- Chill Well: Allow enough time in the fridge to firm up, which will enhance the fudgy texture and make them easier to handle when rolling.
- Use Room Temperature Ingredients: Let almond butter come to room temperature; it mixes easier, creating a smoother dough for your protein balls.
- Keep Hands Moist: Slightly damp hands can prevent the dough from sticking while you roll the balls, ensuring a smoother rolling experience.
No-Bake Brownie Protein Balls Recipe FAQs
How do I choose the right almond flour?
Absolutely! When selecting almond flour, look for a finely ground option that’s blanched, meaning the skins have been removed for a smoother texture. This will help your No-Bake Brownie Protein Balls achieve that desirable fudgy consistency. If you’re gluten intolerant, always ensure that the product is certified gluten-free.
How should I store my No-Bake Brownie Protein Balls?
For optimal freshness, store your No-Bake Brownie Protein Balls in an airtight container in the fridge. They’ll keep well for up to a week. If you want to enjoy them later, you can freeze them for up to 3 months. Just be sure to place them in a zip-top bag and label it with the date for easy access!
What are the best freezing instructions for these protein balls?
Very good question! To freeze No-Bake Brownie Protein Balls, follow these steps:
- Once you’ve shaped all the balls, place them on a parchment-lined baking sheet, making sure they’re not touching each other.
- Freeze them for about 2 hours, allowing them to firm up.
- Once frozen, transfer the balls to a zip-top freezer bag, squeezing out as much air as possible before sealing.
- Label the bag with the date and enjoy them within 3 months for the best flavor and texture!
What if my dough is too sticky or crumbly?
No worries! If your dough feels too sticky, gradually add a little more almond flour, a tablespoon at a time, and mix until you reach the desired consistency. Conversely, if your dough is too crumbly, try incorporating a bit more almond butter or honey to add moisture. This should help bind the ingredients together effectively.
Can I modify the recipe for dietary restrictions?
Absolutely! You can customize your No-Bake Brownie Protein Balls to meet various dietary needs. For nut-free options, substitute almond butter with sunflower butter. If you’re avoiding honey, maple syrup works beautifully as a vegan alternative. Always feel free to explore different protein powders based on your dietary preferences, just remember to adjust the liquid to maintain the right consistency.
Can my pets have these protein balls?
It’s best to avoid sharing these No-Bake Brownie Protein Balls with pets. Key ingredients like chocolate and honey can be harmful to them. Always opt for pet-safe treats specifically designed for their dietary needs to ensure their health and safety.

No-Bake Brownie Protein Balls for Guilt-Free Indulgence
Ingredients
Equipment
Method
- In a medium mixing bowl, whisk together the almond flour, whey protein, and unsweetened cocoa powder.
- Add the almond butter and honey to the dry ingredients, stirring well with a silicone spatula.
- If the mixture feels too dry, slowly add water, one tablespoon at a time, until the dough holds together.
- Using your hands, grab a small portion of the dough and roll it into a 1-inch ball.
- Gently roll each ball in mini chocolate chips, pressing lightly to help them adhere.
- Place the rolled balls onto a parchment-lined baking sheet and refrigerate for at least 30 minutes.
Leave a Reply