
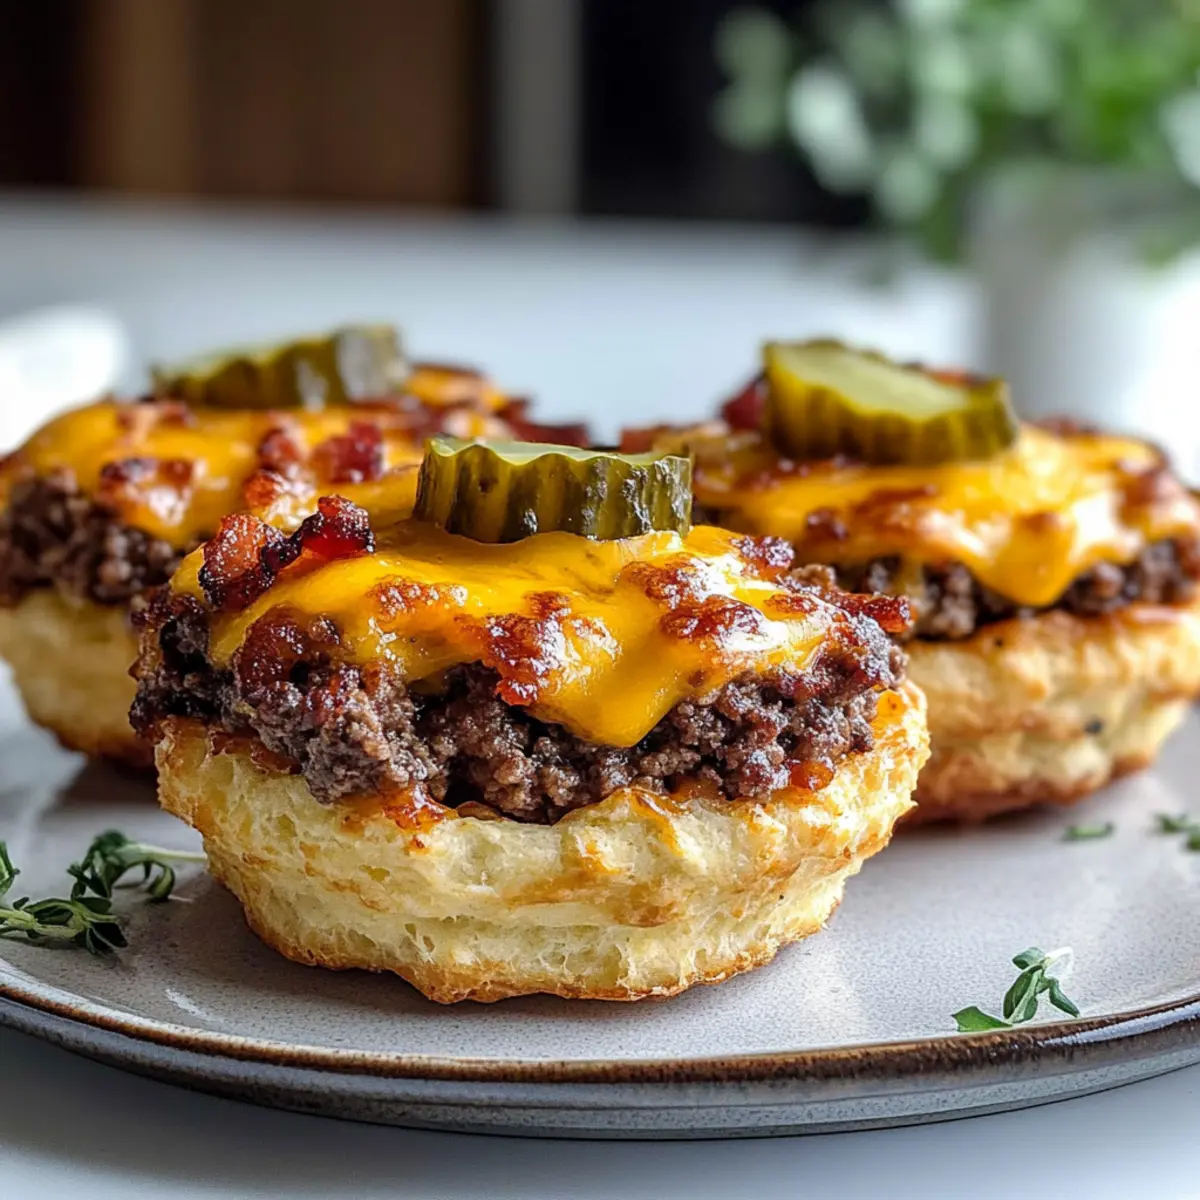
Is there anything better than the aroma of cheeseburgers sizzling on the grill? My version of this timeless favorite—Cheeseburger Cups Recipe—brings that beloved flavor right to your kitchen in a quick and easy format. These delightful handheld bites marry juicy ground beef with melty cheddar, all wrapped in a delectable biscuit crust that even the pickiest eaters will adore. Not only are they perfect for busy weeknights or spur-of-the-moment gatherings, but they also bring a taste of nostalgia to any table, making them the ultimate comfort food. Intrigued? Let’s dive into making these delicious cups that will have everyone coming back for seconds!
Why are Cheeseburger Cups a must-try?
Flavor Explosion: Each cheeseburger cup is bursting with savory goodness, from juicy beef to gooey melted cheese.
Family-Friendly Fun: Perfect for kids and adults, these handheld delights make dinner exciting and enjoyable!
Quick Preparation: With just a few ingredients and minimal prep time, you can whip these up faster than a fast-food run.
Versatile Variations: Customize each cup with your favorite toppings—try bacon or even a spicy Southwest twist!
Comfort Food Redefined: These bite-sized treasures bring the beloved cheeseburger experience to your home in a fun new way, guaranteed to please any crowd.
Cheeseburger Cups Recipe Ingredients
For the Beef Filling
- Ground beef (80/20 blend) – Provides flavor and moisture. Use leaner beef for a healthier option.
- Diced onions – Enhances the savory depth. Yellow or white onions can be used.
- Ketchup – Provides sweetness and moisture. Substitute with barbecue sauce for a twist.
- Mustard (yellow or Dijon) – Adds tanginess. Omit for a milder flavor.
- Garlic powder – Contributes savory depth. Fresh minced garlic can be used for a fresher taste.
- Salt & black pepper – For seasoning. Adjust according to taste preference.
For the Cups
- Refrigerated biscuit dough (8-count can) – Forms the base of the cups. Pillsbury Grands or similar works best.
For the Topping
- Shredded cheddar cheese – Adds creaminess and flavor. Sharp cheddar for a bolder taste.
- Optional toppings:
- Diced pickles – Adds crunch.
- Bacon (cooked and crumbled) – Provides additional flavor.
- Sesame seeds – Enhances visual appeal.
- Extra cheddar cheese – For an additional cheesy layer.
For Pan Preparation
- Cooking spray – Prevents sticking. Can use butter to grease the muffin tin.
Step‑by‑Step Instructions for Cheeseburger Cups Recipe
Step 1: Preheat the Oven
Begin by preheating your oven to 375°F (190°C). While the oven warms up, take out a 12-cup muffin tin and lightly grease each cup with cooking spray or butter. This ensures that your Cheeseburger Cups release easily once baked and helps achieve that golden, crisp exterior everyone loves.
Step 2: Cook the Beef
In a skillet over medium heat, add your ground beef and cook until browned, which should take about 5–7 minutes. Be sure to break up the meat as it cooks to ensure even browning. Once the beef is fully cooked, drain any excess grease, then toss in diced onions and continue cooking for an additional 2–3 minutes until the onions soften and become translucent.
Step 3: Flavor the Mixture
Now, stir in the ketchup, mustard, garlic powder, and season with salt and black pepper. Mix thoroughly and let it simmer on low heat for another minute to meld those flavorful ingredients, then remove the skillet from heat. Allow the beef mixture to cool slightly — this will help keep your biscuit dough from getting too soggy.
Step 4: Prepare the Biscuit Dough
Open the can of refrigerated biscuit dough and separate the biscuits. Flatten each biscuit into a 4-inch circle on a clean surface. Gently press each flattened circle into the greased muffin cups, creating a little cup that will hold all that delicious cheeseburger goodness. Pinch the edges to form a nice crust.
Step 5: Fill the Dough Cups
Spoon about 2 tablespoons of the beef mixture into each biscuit cup, making sure to distribute evenly among all 12. Once filled, sprinkle a generous amount of shredded cheddar cheese on top, and if desired, add any optional toppings like diced pickles or crumbled bacon to enhance each Cheeseburger Cup’s flavor profile.
Step 6: Bake to Perfection
Carefully place the muffin tin in the preheated oven and bake for 15–18 minutes. Keep an eye out for the cups to turn golden brown and the cheese to melt beautifully, creating a mouthwatering visual that’s hard to resist. The smell alone will have your family gathering around the kitchen!
Step 7: Cool and Serve
Once baked, remove the muffin tin from the oven, and let the Cheeseburger Cups cool in the pan for about 3–4 minutes. This helps them firm up a bit more before removing. Run a butter knife around the edges to gently lift each cup out, and serve warm for a delightful, handheld meal!
What to Serve with Cheeseburger Cups Recipe
Gather your family for a satisfying meal that brings comfort and joy to the table!
-
Crispy French Fries: The classic pairing adds a crunchy texture that complements the cheeseburger cups perfectly. Dip them in ketchup for the ultimate comfort food combo.
-
Fresh Coleslaw: This crunchy, tangy side balances the richness of the cheeseburger cups while adding a refreshing crunch to each bite. A scoop of coleslaw on the side will brighten the entire meal.
-
Garden Salad: A simple mixed green salad with a light vinaigrette offers a fresh contrast, making every bite lighter and more enjoyable. Add cherry tomatoes and cucumbers for an extra splash of color.
-
Creamy Macaroni and Cheese: Elevate your meal with extra cheese! The richness of mac and cheese pairs beautifully with the cheeseburger flavors, creating a delightfully indulgent experience.
-
Garlic Bread: Soft, buttery garlic bread provides a savory touch that echoes the flavors of the cheeseburger cups while adding a crispy texture. Perfect for sopping up any stray ketchup!
-
Refreshing Drinks: Serve with chilled lemonade or iced tea for a refreshing contrast to the warm cheeseburger cups, completing this delightful and satisfying family meal!
Cheeseburger Cups Recipe Variations
Get ready to elevate your Cheeseburger Cups with these fun and flavorful twists! Each choice adds a little something special to the already delightful bites.
-
Bacon Boost: Add crumbled bacon on top before baking for smoky flavor. It’s the quintessential upgrade for a true bacon lover!
-
Spicy Southwest: Mix in diced jalapeños or a tablespoon of taco seasoning with the beef for an extra kick. Your taste buds will be dancing with joy!
-
Veggie Delight: Swap out the ground beef for cooked lentils or black beans for a hearty, meatless option. This way, everyone can enjoy a cheeseburger experience.
-
Cheesy Overload: Double the cheese by mixing some into the beef and topping it off with more before baking. The gooey-ness will be irresistible!
-
Pizza Twist: Add Italian spices and swap the ketchup for marinara sauce, topping with mozzarella instead of cheddar. You’ll have mini pizza burgers in no time!
-
Buffalo Style: Incorporate buffalo sauce into the beef mixture for a zesty, tangy variation. Pair it with a blue cheese drizzle for the ultimate flavor hit.
-
Herbed-Up: Experiment with fresh herbs like parsley or chives in the beef mix to elevate the flavor profile. It’s a fresh twist that brings bright notes to every bite.
-
Sweet & Tangy: Drizzle caramelized onions atop the cups just before serving to add sweet contrast. This simple addition is sure to impress your family at dinner!
Feel free to get creative and mix and match these ideas. And if you’re ever in the mood for something cozy, check out our Butter Chicken Pasta for another family favorite!
How to Store and Freeze Cheeseburger Cups
Fridge: Store leftover cheeseburger cups in an airtight container for up to 3-4 days. They stay delicious and don’t become soggy like traditional burgers.
Freezer: Wrap cooled cheeseburger cups individually in plastic wrap and place them in freezer bags for up to 3 months. This makes them perfect for quick meals!
Reheating: To enjoy your frozen cups, reheat from frozen in a preheated oven at 350°F for 15-18 minutes, or if thawed overnight, heat for 8-10 minutes until warmed through.
Serving: When reheating, feel free to add a bit more cheese on top for extra gooeyness, enhancing your cheeseburger cups recipe experience.
Make Ahead Options
These Cheeseburger Cups are fantastic for meal prep, allowing you to enjoy this delicious comfort food with minimal effort on busy weeknights. You can prepare the beef filling and refrigerate it for up to 3 days in an airtight container. Additionally, the assembled cups can be prepped and stored in the refrigerator for up to 24 hours before baking. To maintain quality, avoid adding cheese until just before baking; this prevents the biscuit from becoming soggy. When you’re ready to enjoy, simply bake them straight from the fridge at 375°F for 15-18 minutes, and you’ll have the same delightful cheeseburger experience that’s just as delicious!
Expert Tips for Cheeseburger Cups Recipe
-
Cheese Secret: For an amazing cheese pull, mix half the cheese with the beef before filling the cups, reserving the rest for the top just before baking.
-
Freezing Friendly: These cheeseburger cups can be frozen! Wrap cooled cups individually and store in freezer bags for up to 3 months. Reheat directly from frozen.
-
Prevent Sogginess: Place baked cups on a cooling rack to avoid soggy bottoms. This ensures they maintain their crunchy texture for delightful bites.
-
Customize with Ease: Don’t hesitate to try different toppings or variations! Options like jalapeños for a kick or veggie substitutes keep it exciting and family-friendly.
-
Perfect Portions: Fill each biscuit cup evenly for consistent baking and flavor in every bite of your delicious cheeseburger cups recipe.
Cheeseburger Cups Recipe FAQs
What kind of ground beef should I use for the Cheeseburger Cups?
Absolutely! An 80/20 blend provides the best flavor and moisture for these cheeseburger cups. If you’re looking for a healthier option, you can use a leaner blend, like 90/10, but keep in mind that the texture may be a little drier.
How long will leftovers of Cheeseburger Cups last in the fridge?
You can store cheeseburger cups in an airtight container in the refrigerator for up to 3-4 days. Trust me, they won’t turn soggy like traditional burgers, making them a fantastic leftover option for quick meals.
Can I freeze Cheeseburger Cups, and how should I do it?
Of course! To freeze them, wrap each cooled cheeseburger cup individually in plastic wrap and then place them in freezer bags. They can be stored for up to 3 months. To reheat, pop them in a preheated oven at 350°F for 15-18 minutes directly from frozen, or thaw overnight in the fridge and reheat for 8-10 minutes—this way, they’ll be deliciously warm again!
What if my biscuit dough is sticking to the muffin tin?
No worries! If your biscuit dough sticks, try greasing the muffin tin more thoroughly before placing the dough in. You could also gently run a butter knife around the edges of each cup right after baking to help release them. A little patience ensures a perfect little cheeseburger cup every time!
Are there any dietary considerations I should keep in mind when making these cups?
Great question! If you or anyone in your family has food allergies, be cautious with ingredients. For example, you can use gluten-free biscuit dough to make this recipe gluten-free or substitute the ground beef with cooked lentils or black beans for a meatless option. Always tailor ingredients to fit dietary needs!
Cheeseburger Cups Recipe: Bite-Sized Comfort on a Plate
Ingredients
Equipment
Method
- Preheat your oven to 375°F (190°C) and grease a 12-cup muffin tin with cooking spray or butter.
- In a skillet over medium heat, cook the ground beef until browned (about 5-7 minutes). Drain excess grease.
- Add diced onions to the skillet and cook for an additional 2-3 minutes until softened.
- Stir in ketchup, mustard, garlic powder, salt, and black pepper. Let simmer for a minute before removing from heat.
- Flatten each biscuit into a 4-inch circle and press into the greased muffin cups.
- Spoon about 2 tablespoons of the beef mixture into each biscuit cup and top with shredded cheddar cheese and optional toppings.
- Bake in the preheated oven for 15-18 minutes until golden brown and cheese is melted.
- Let the cups cool in the pan for about 3-4 minutes before gently lifting them out and serving warm.
Leave a Reply