
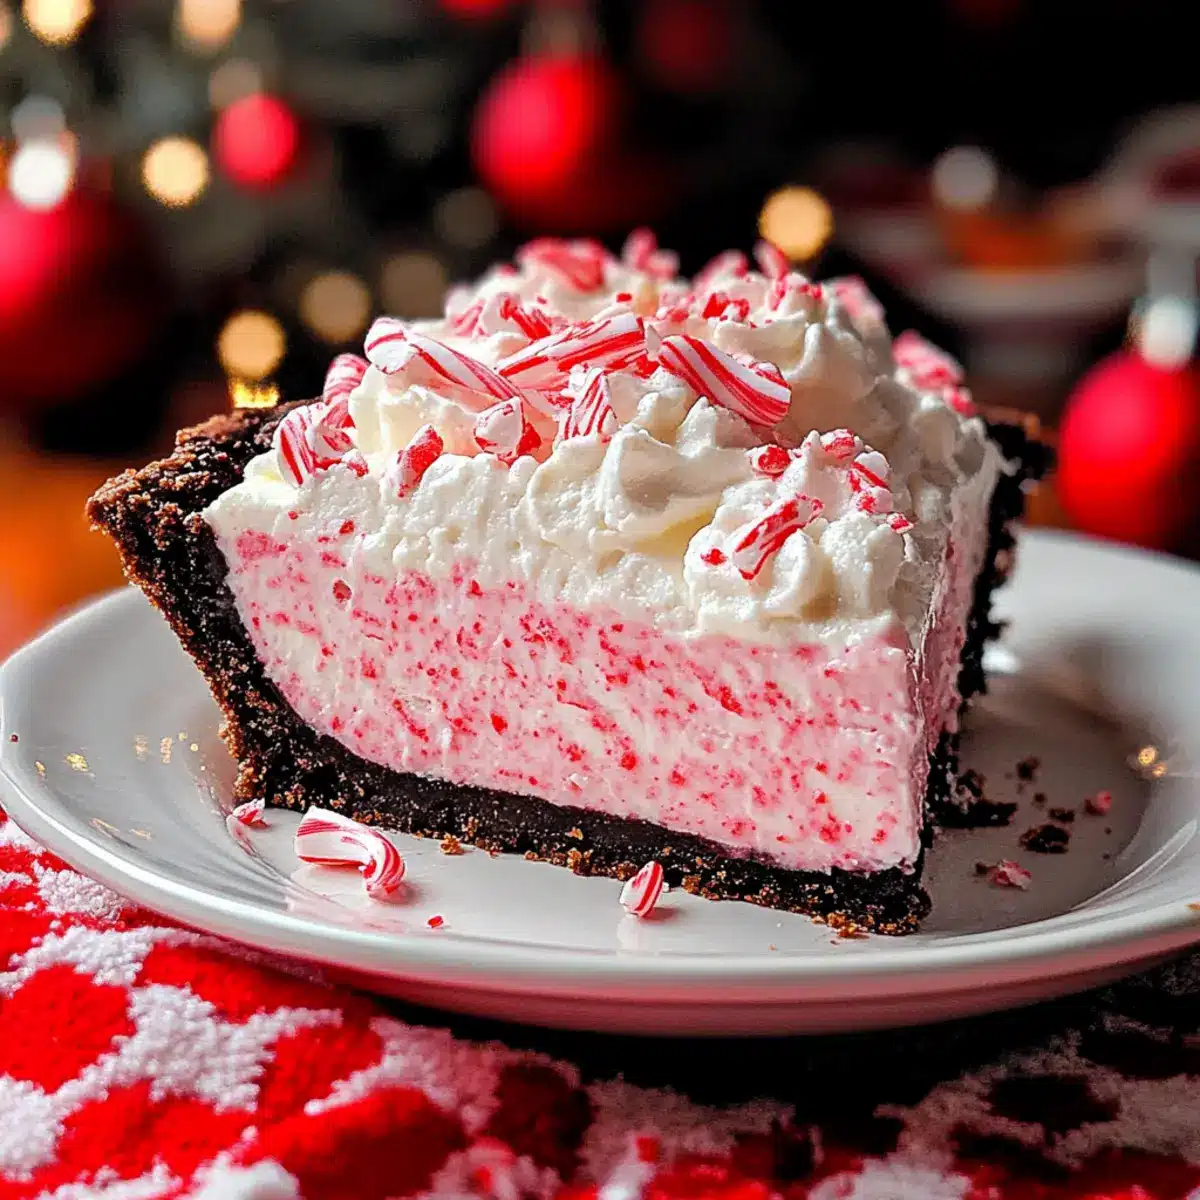
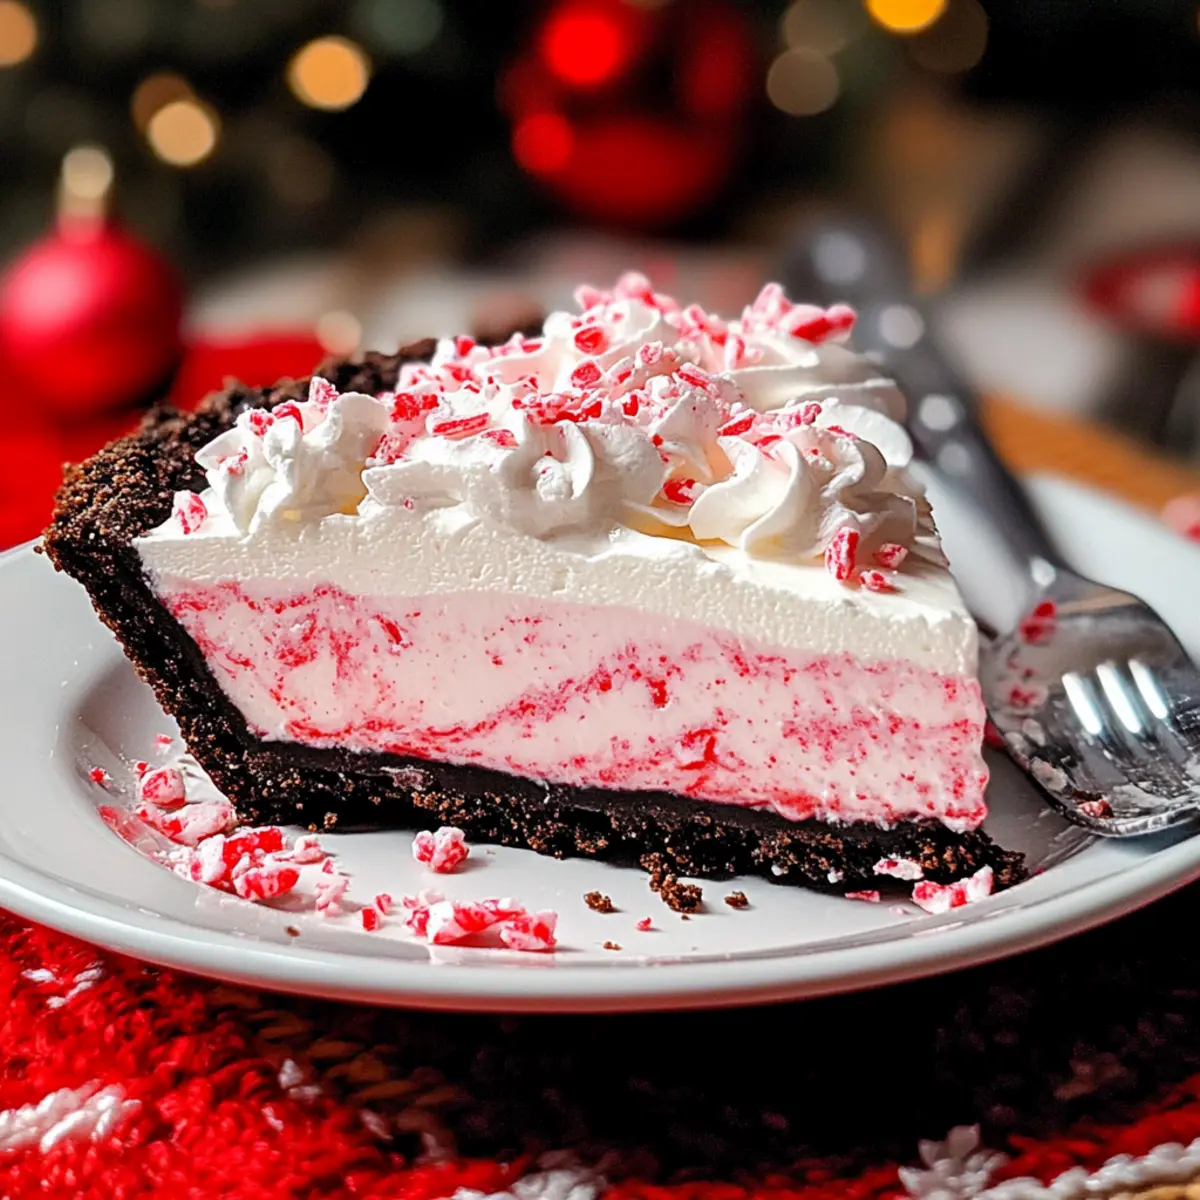
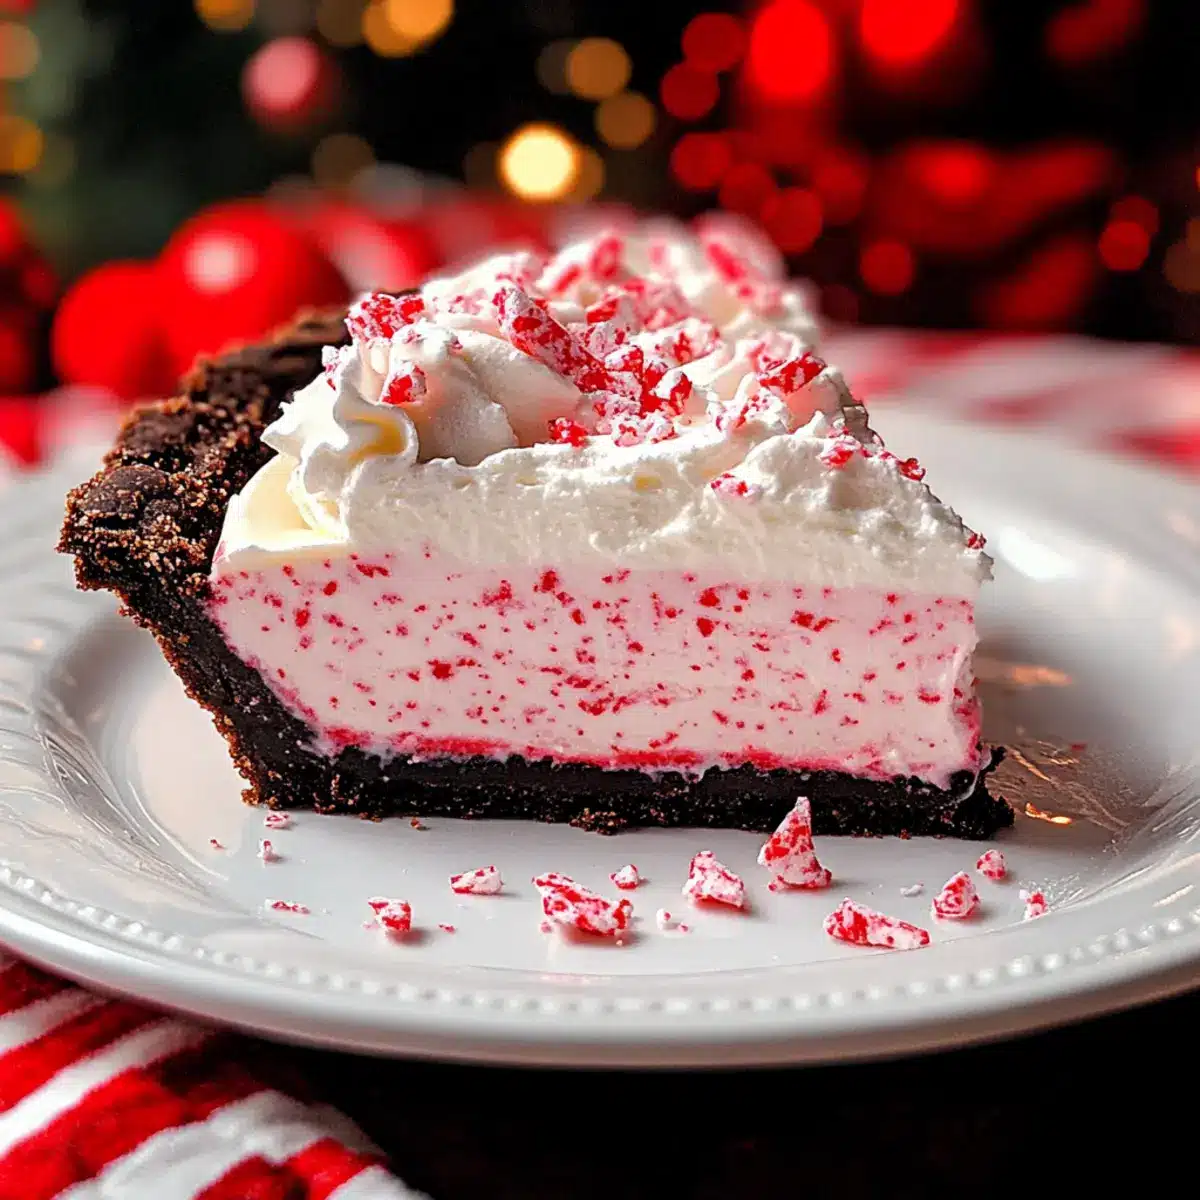
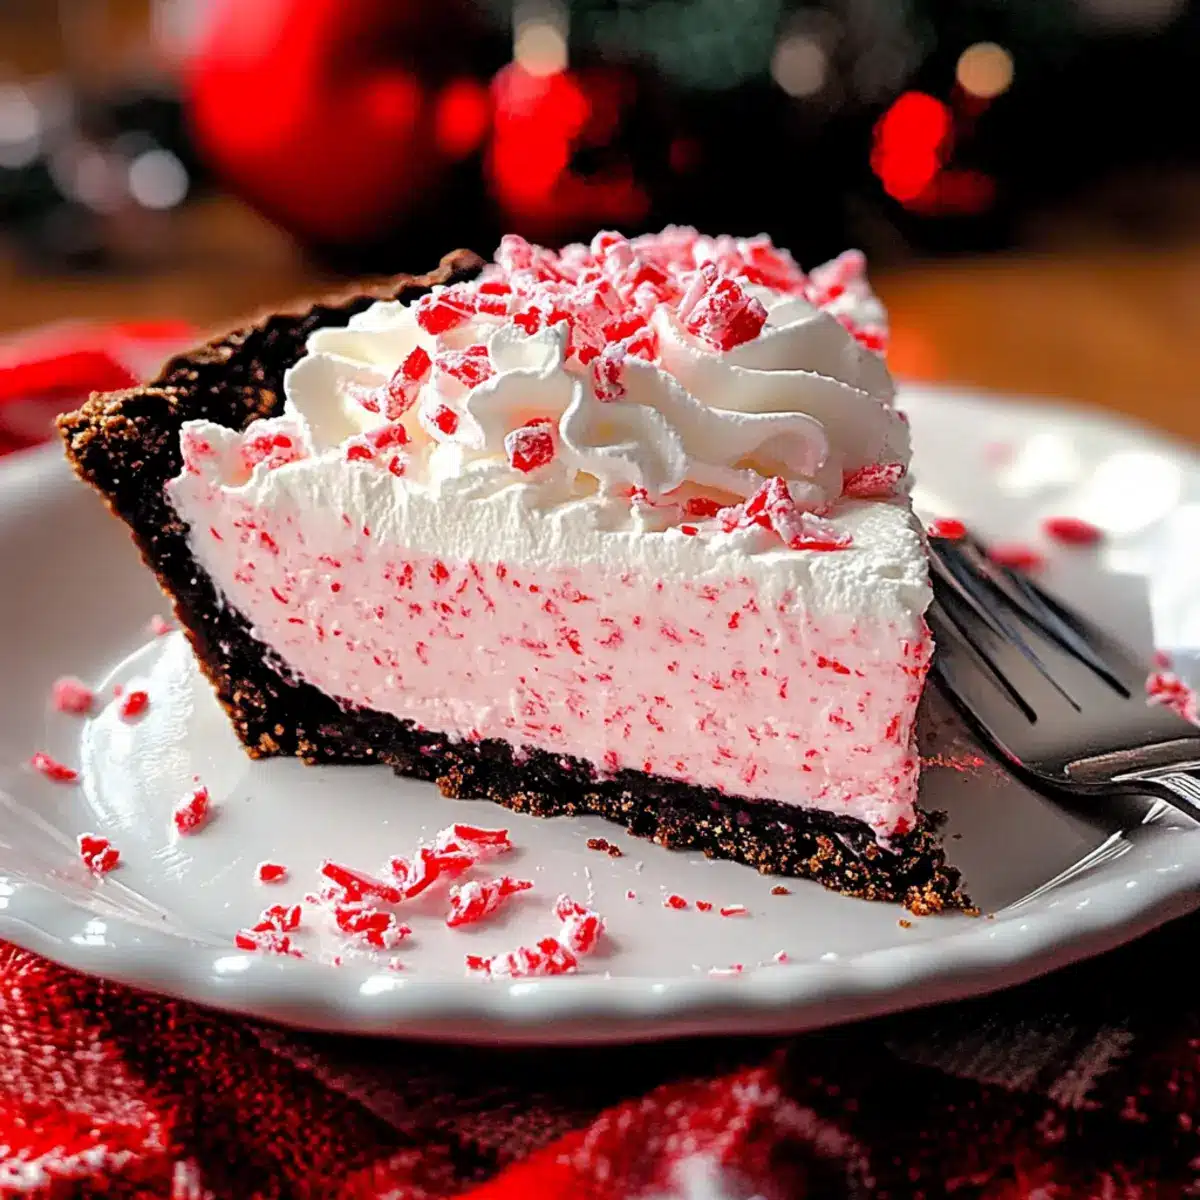
The delightful sound of holiday laughter fills my kitchen as the sweet aroma of peppermint wafts through the air. This season, I’m embracing simplicity without sacrificing joy, and that’s where my No Bake Christmas Peppermint Pie comes in. With its creamy filling and festive peppermint flair, this dessert is an absolute crowd-pleaser that you can whip up in no time. The best part? It’s make-ahead! You can prepare this charming pie the day before your holiday gathering, freeing you to savor every moment with loved ones. Topped with crushed peppermint and nestled in a chocolatey Oreo crust, this pie is as stunning as it is delicious. Are you ready to impress your guests with this delightful treat? Let’s dive into the festive magic!
Why Is This Pie a Must-Make?
Simplicity at its finest: This No Bake Christmas Peppermint Pie requires minimal effort and no baking, making it perfect for busy holiday schedules.
Make-Ahead Convenience: Prepare it a day in advance and keep the fridge free for more holiday dishes, just like with my Cheesy Christmas Lasagna.
Crowd-Pleasing Flavor: The blend of creamy filling, refreshing peppermint, and a crunchy Oreo crust provides a dessert everyone will adore.
Festive Presentation: With vibrant red and white swirls, this pie isn’t just tasty—it’s a showstopper on your dessert table!
Versatility beckons: Change up the crust or flavor extracts to make it your own, just as you can with these delightful Christmas Cookies Butterscotch.
Elevate your holiday dessert game and watch your friends and family rave over this delightful creation!
No Bake Christmas Peppermint Pie Ingredients
For the Filling
• Cream Cheese – Provides creaminess and structure; use full-fat block cream cheese for the best texture.
• Powdered Sugar – Adds sweetness and smoothness to the filling; essential for balancing flavor.
• Heavy Cream – Creates a light and airy texture in the filling; whip until stiff peaks form to incorporate air.
• Vanilla Extract – Enhances flavor depth; opt for pure vanilla extract for the best taste.
• Peppermint Extract – Infuses holiday flavor; start with a small amount and adjust to taste.
• Food Coloring – Adds festive color to the filling; use gel food coloring for vibrant results.
• Crushed Peppermint – Provides a crunchy topping and festive flavor; avoid crushing too finely to maintain texture.
For the Crust
• Oreo Crust – Serves as the base, offering a deliciously chocolatey contrast; pre-made options save time!
Step‑by‑Step Instructions for No Bake Christmas Peppermint Pie
Step 1: Soften the Cream Cheese
Begin by letting the cream cheese sit at room temperature for 1 to 2 hours until it’s perfectly softened. This step is crucial to ensure a smooth and creamy texture for your No Bake Christmas Peppermint Pie filling. Use a sharp knife to cut the cream cheese block into smaller pieces to speed up the softening process if you’re in a hurry.
Step 2: Whip the Heavy Cream
In a mixing bowl, pour the heavy cream and whip it using an electric mixer on medium speed. Continue whipping for about 3 to 5 minutes until stiff peaks form, which should look firm and hold their shape. Once achieved, gently set the whipped cream aside as you prepare the rest of the filling for the pie.
Step 3: Cream the Cheese and Sugar
In another bowl, combine the softened cream cheese and powdered sugar. Using a hand mixer, blend them together on medium speed for about 2 to 3 minutes or until the mixture is completely smooth and free of lumps. This step creates a luscious base for your No Bake Christmas Peppermint Pie, enhancing its sweetness.
Step 4: Add Flavorings and Color
Next, gently mix in the vanilla extract and peppermint extract into the cream cheese mixture. For fun visual flair, add a drop or two of gel food coloring, stirring until the color is uniform throughout. This festive touch not only enhances the flavor profile but also gives your pie a joyful appearance.
Step 5: Fold in the Whipped Cream
Carefully fold your whipped cream into the cream cheese mixture. Use a spatula and incorporate it slowly to maintain the light, airy texture you’ve created. This step helps to seamlessly blend the components together, resulting in a creamy filling for your No Bake Christmas Peppermint Pie that is both light and rich at the same time.
Step 6: Incorporate Crushed Peppermint
Once combined, gently fold in ½ cup of crushed peppermint into the filling mixture. Be sure to reserve some crushed peppermint for decorating later. You want to maintain some of that delightful texture and flavor that makes this No Bake Christmas Peppermint Pie uniquely festive.
Step 7: Assemble in the Crust
Pour your creamy peppermint filling into the prepared Oreo crust. Use a spatula to spread the filling evenly, smoothing out the top for a lovely finish. This base not only enhances the flavor but provides a delicious contrast to the sweet filling as it transforms into the centerpiece of your dessert table.
Step 8: Add Topping and Chill
Top the pie with a generous layer of Cool Whip and sprinkle the reserved crushed peppermint on top for added crunch and a festive touch. Once assembled, place the pie in the refrigerator to chill for at least 4 hours, or ideally overnight. Chilling allows the flavors to meld beautifully, creating that perfect, melt-in-your-mouth experience.
Step 9: Serve and Enjoy
Before serving your No Bake Christmas Peppermint Pie, remove it from the refrigerator and let it sit at room temperature for a few minutes. This simple step enhances the creamy texture even further. Slice and serve this festive delight to your eager guests, ensuring everyone enjoys a taste of the holidays!
No Bake Christmas Peppermint Pie Variations
Feel free to get creative and tailor this delightful pie to please your tastebuds this holiday season!
-
Gluten-Free Crust: Use almond flour or gluten-free cookie crumbs to create a base that everyone can enjoy. This swap maintains that sweet crunch without compromising flavor.
-
Dairy-Free Delight: Substitute the cream cheese with dairy-free alternatives like cashew cream or coconut cream. This change ensures everyone at the table can savor the festive spirit!
-
Mint Chocolate Twist: Drizzle chocolate ganache over the top before chilling, marrying the refreshing peppermint with rich chocolate. It’s the perfect indulgence!
-
Layered Peppermint Parfait: Instead of a pie, assemble the filling in individual cups with layers of crushed cookies and whipped cream for a fun presentation, just like my Peppermint Kiss Chocolate treats.
-
Extra Flavor Boost: Add a tablespoon of cocoa powder to the filling to create a chocolate peppermint experience. This delightful addition brings an even richer taste to your pie.
-
Slightly Spicy: For a warm twist, incorporate a pinch of cayenne pepper into the cream cheese mixture. This surprising element pairs beautifully with peppermint!
-
Seasonal Infusion: Replace the peppermint extract with eggnog or vanilla bean for a cozy holiday vibe. It’s a creative update that keeps the festive spirit alive!
-
Berry Topping: Top with fresh raspberries or crushed strawberries to add a fruity freshness that contrasts wonderfully with the creamy pie. Perfect for those who love fruity desserts!
There’s so much fun to be had customizing this festive treat! For further inspiration, don’t forget to try my seasonal favorites like Christmas Cookies Butterscotch or our comforting Chicken Pot Pie. Happy baking!
What to Serve with No Bake Christmas Peppermint Pie
Elevate your dessert experience with delightful accompaniments that perfectly complement the festive charm of your pie.
-
Warm Chocolate Chip Cookies: The gooey chocolate and crisp edges create a delightful contrast in both temperature and texture when paired with the creamy pie.
-
Vanilla Ice Cream: A scoop of smooth vanilla ice cream adds a velvety richness that pairs wonderfully with the refreshing peppermint flavor.
-
Chocolate Sauce Drizzle: A drizzle of rich chocolate sauce over the pie enhances the chocolatey Oreo crust and adds an extra layer of indulgence.
-
Fresh Berries: Serve with a mix of raspberries or strawberries; their tartness cuts through the sweetness of the pie, providing a refreshing balance.
-
Peppermint Hot Chocolate: This warm drink echoes the peppermint theme, making for a cozy, nostalgic pairing with your festive dessert.
-
Caramel Sauce: Drizzling your pie with a bit of warm caramel brings a rich, buttery flavor that beautifully contrasts the cool peppermint filling.
-
Whipped Cream Topping: Always a classic! Add a dollop of whipped cream on top to enhance the texture and maintain that light, airy feel.
Expert Tips for No Bake Christmas Peppermint Pie
• Softening Cream Cheese: Ensure your cream cheese is fully softened; this prevents lumps in the filling and creates a smooth texture.
• Whip with Caution: Stop whipping the cream as soon as stiff peaks form; over-whipping can lead to a grainy texture in your final pie.
• Taste as You Go: Add peppermint extract gradually and taste along the way; this helps avoid an overpowering flavor, ensuring your No Bake Christmas Peppermint Pie is perfectly balanced.
• Chill Time Matters: Be sure to chill the pie adequately—ideally overnight; this enhances flavor and helps the pie set properly.
• Crush Peppermint Wisely: Avoid crushing peppermint too finely for topping; larger pieces add delightful crunch and festive flair to your dessert.
How to Store and Freeze No Bake Christmas Peppermint Pie
Fridge: Store your pie in the refrigerator for up to 5 days. Cover it loosely with plastic wrap to keep the topping fresh and maintain that luscious texture.
Freezer: If you’re planning ahead, freeze the pie for up to 2 months. Wait to add crushed peppermint until you’re ready to serve for the best flavor and crunch.
Thawing: To enjoy your frozen No Bake Christmas Peppermint Pie, thaw it in the refrigerator overnight. Let it sit at room temperature for a few minutes before slicing to achieve the ideal creamy consistency.
Serving Tip: Always consider serving small slices of the pie alongside other desserts, as this delightful treat is rich and perfect for sharing!
Make Ahead Options
These No Bake Christmas Peppermint Pies are a dream for busy home cooks looking to save time during the festive season! You can prepare the creamy filling and assemble the pie up to 24 hours in advance. Simply whip the cream, mix in the softened cream cheese, and blend in the flavors, then pour it into the Oreo crust. Cover the pie tightly with plastic wrap and refrigerate it. To maintain the pie’s delightful texture, add the crushed peppermint topping just before serving. This way, you’ll ensure it stays crunchy and fresh, allowing you to enjoy a stress-free holiday gathering while impressing guests with your stunning and delicious creation!
No Bake Christmas Peppermint Pie Recipe FAQs
What type of cream cheese should I use?
Absolutely! I recommend using full-fat block cream cheese for the best texture. Low-fat or spreadable cream cheese can result in a filling that lacks the creamy richness you want for your No Bake Christmas Peppermint Pie.
How should I store the pie?
You can store your No Bake Christmas Peppermint Pie in the refrigerator for up to 5 days. Just cover it loosely with plastic wrap to keep the topping fresh. This way, you can enjoy the luscious texture and flavors right through your holiday celebrations!
Can I freeze the No Bake Christmas Peppermint Pie?
Yes, you can! Freeze the pie for up to 2 months. Just remember to wait to sprinkle the crushed peppermint on top until you’re ready to serve. To thaw, place it in the refrigerator overnight, letting it sit at room temperature for a few minutes before slicing for the best creamy texture.
What if my filling is too runny?
If you find that the filling is too runny, it may be due to under-whipping the heavy cream or not fully chilling the pie. To fix this, try adding more whipped cream for volume and stability, then return it to the fridge to firm up. If all else fails, you can always freeze the pie to help it set!
Can I make this pie gluten-free?
Very! To make a gluten-free version of the No Bake Christmas Peppermint Pie, simply substitute the Oreo crust with a gluten-free cookie crust, or even a gluten-free graham cracker crust if you prefer. Always double-check the packaging to ensure ingredients are safe for your dietary needs.
Is this recipe safe for pets?
It’s best to keep this pie away from pets, especially due to the cream cheese and sugar content, which can upset their stomachs. Always think of your furry friends before indulging in this festive treat!
No Bake Christmas Peppermint Pie – A Festive Holiday Treat
Ingredients
Equipment
Method
- Soften the cream cheese by letting it sit at room temperature for 1 to 2 hours.
- Whip the heavy cream using an electric mixer on medium speed for 3 to 5 minutes until stiff peaks form.
- Cream together the softened cream cheese and powdered sugar with a hand mixer until smooth.
- Mix in the vanilla and peppermint extract, and add food coloring until uniform.
- Fold the whipped cream into the cream cheese mixture carefully.
- Gently fold in the crushed peppermint, reserving some for decoration.
- Pour the filling into the prepared Oreo crust and smooth the top.
- Top with Cool Whip and reserved crushed peppermint. Chill for at least 4 hours or overnight.
- Serve at room temperature for the best creaminess.
Leave a Reply