
As the scent of baking wafts through my kitchen, my mind wanders to those blissful mornings at our local bakery, where the buttery, flaky goodness of a cheese Danish awaits. Today, I’m excited to share my Ultimate Cheese Danish Recipe, perfect for anyone eager to recreate that delightful experience at home. Whether you’re pressed for time and opting for the convenient puff pastry method or diving into the rewarding challenge of making dough from scratch, this recipe has you covered. It’s not just about the taste—this Danish is a guaranteed crowd-pleaser and a flexible treat that lends itself beautifully to both sweet and savory variations. So, are you ready to fill your kitchen with warmth and deliciousness? Let’s get started!
Why Is This Danish So Irresistible?
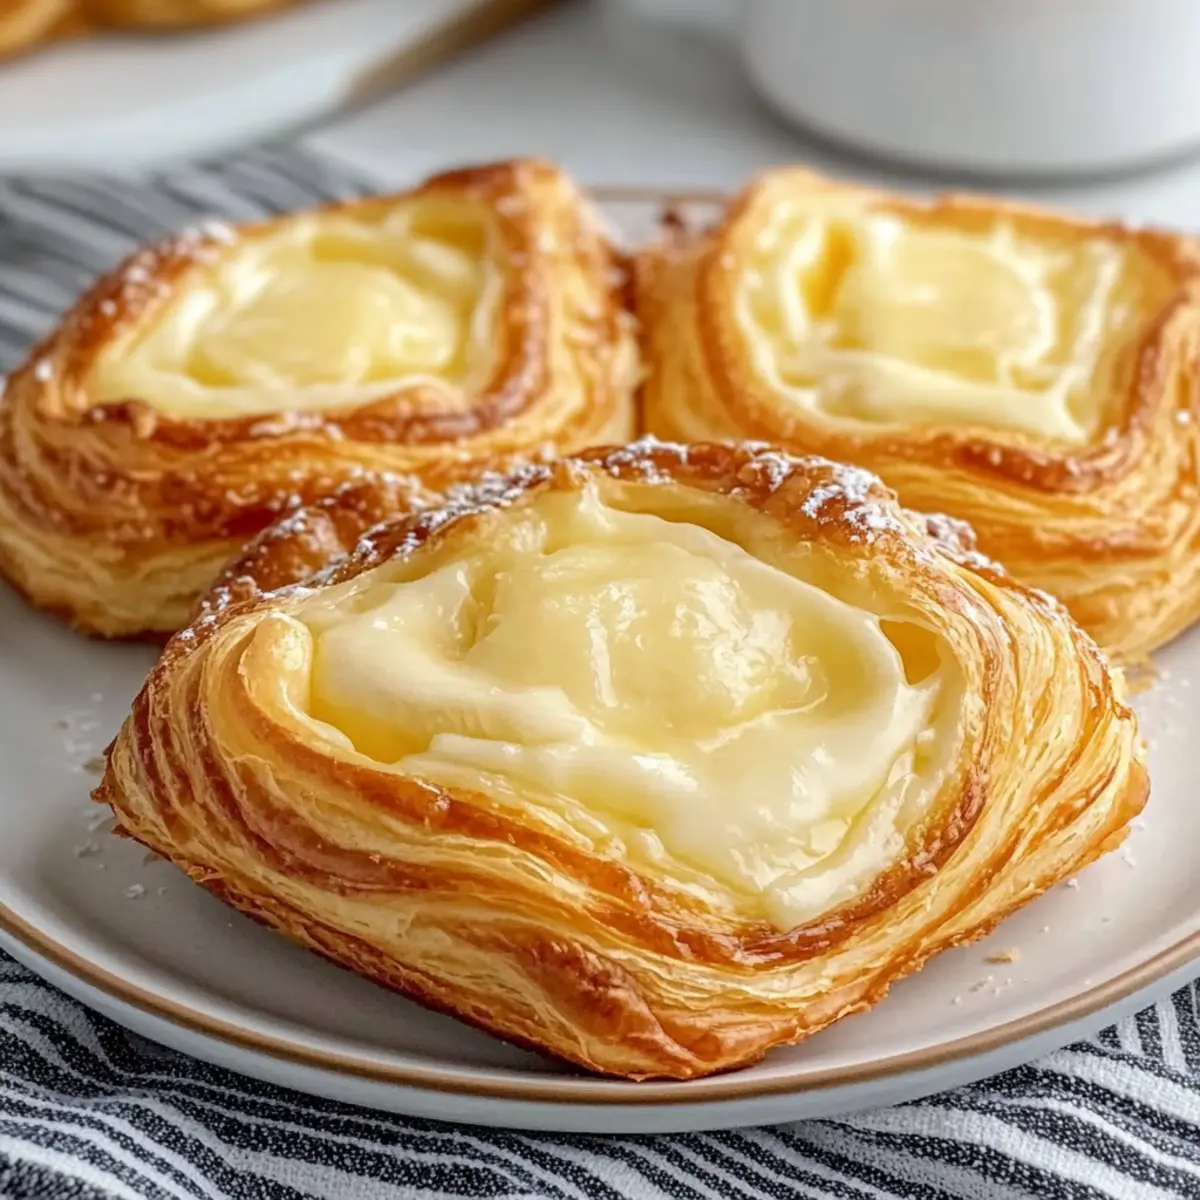
Flaky Perfection: Each bite of this cheese Danish brings a satisfying crunch, thanks to the perfectly layered crust created through the lamination process.
Versatile Delight: Whether you prefer a sweet treat or a savory snack, this recipe easily adapts to your cravings—think fresh fruit or creamy cheeses!
Quick or Traditional: Short on time? No problem! Choose between using store-bought puff pastry or making dough from scratch for a rewarding baking experience.
Crowd-Pleasing Appeal: Impress your friends and family at brunch with these delicious pastries—they’ll wonder how you made such bakery-quality treats at home!
Make Ahead Friendly: Prep these Danishes in advance and freeze them for a quick bake whenever the craving strikes. Serving these fresh will always be a hit!
Trust me, once you try this Ultimate Cheese Danish Recipe, you’ll want to whip up batch after batch!
Ultimate Cheese Danish Ingredients
• The ingredients list below will guide you to create a delicious Ultimate Cheese Danish from scratch or with puff pastry.
For the Cream Cheese Filling
- Cream Cheese (8 oz) – Provides a creamy filling; use full-fat for best results.
- Granulated Sugar (0.25 cup) – Adds sweetness to balance the cream cheese.
- Vanilla Extract (1 tsp) – Enhances flavor; optional boost with vanilla bean paste.
- Lemon Juice (1 tsp, optional) – Adds brightness; substitute with additional vanilla if desired.
- Egg Yolk (1 large) – Binds filling ingredients together and contributes to richness.
- Salt (1 pinch) – Balances sweetness; necessary for flavor.
For the Puff Pastry Version
- Puff Pastry (1 sheet, thawed) – Quick base for the Danish; ready-made saves time.
- Egg (1 large, for egg wash) – Creates a golden finish; can substitute with milk or olive oil for savory Danishes.
- Water (1 tbsp, for egg wash) – Helps create the egg wash consistency.
For the Homemade Dough Version
- All-Purpose Flour (4 cups) – Provides structure; possibly substitute half with pastry flour for lightness.
- Sugar (0.33 cup) – Sweetens the dough slightly.
- Salt (1 tsp) – Seasoning for flavor.
- Active Dry Yeast (1 tbsp) – Leavens the dough for a fluffy texture.
- Whole Milk (1 cup, warm) – Activates the yeast; must be warm for effective proofing.
- Egg (1 large) – Adds moisture and richness to the dough.
- Unsalted Butter (1 cup, cold) – Creates flaky layers; use cold for effective lamination.
For the Glaze (Optional)
- Powdered Sugar (1 cup) – Adds sweetness for topping; adjust with milk/lemon juice as needed.
- Milk or Lemon Juice (1 tbsp) – Used to adjust glaze consistency.
- Vanilla Extract (0.5 tsp) – Optional flavor enhancement for the glaze.
Now that you have your ingredients ready, it’s time to bring your Ultimate Cheese Danish to life!
Step‑by‑Step Instructions for Ultimate Cheese Danish Recipe
Step 1: Preheat and Prepare
Begin by preheating your oven to 400°F (200°C). Line a baking sheet with parchment paper to prevent sticking. This setup allows the pastries to bake evenly while ensuring that the flaky layers create that perfect golden brown crust—the hallmark of a delicious Ultimate Cheese Danish.
Step 2: Make the Cream Cheese Filling
In a mixing bowl, combine the cream cheese, granulated sugar, vanilla extract, optional lemon juice, egg yolk, and a pinch of salt. Use a hand mixer or a whisk to blend until the mixture is smooth and creamy, taking about 2-3 minutes. This filling is essential for adding that irresistible richness to your Ultimate Cheese Danish.
Step 3: Prepare the Puff Pastry
If you’re using store-bought puff pastry, unfold the sheet and cut it into 8 equal squares. Arrange these pastry pieces on your prepared baking sheet, leaving space between them. Gently fold the edges inward to create a border for the filling, which helps hold together the creamy stuffing inside each Ultimate Cheese Danish.
Step 4: Fill Each Pastry
Spoon about one tablespoon of the cream cheese filling into the center of each pastry square. Be careful not to overfill, as this could lead to messy leaks during baking. You want just the right amount to ensure every bite of your Ultimate Cheese Danish has that creamy deliciousness without spilling over.
Step 5: Prepare the Egg Wash
In a small bowl, whisk together the egg and water to create an egg wash. This mixture will give your pastries a lovely golden finish when baked. Using a pastry brush, carefully apply the egg wash onto the edges of the filled pastries, which will help them to shine beautifully once baked.
Step 6: Bake the Pastries
Place the baking sheet in your preheated oven and bake for about 15-18 minutes. Keep an eye on them; they should puff up and turn a beautiful golden color. Your kitchen will be filled with delightful aromas as the pastries become the star of your brunch with this Ultimate Cheese Danish!
Step 7: Cool and Glaze
Once baked, remove the pastries from the oven and allow them to cool on a wire rack. Giving them time to cool completely ensures the glaze, if added, adheres properly and doesn’t melt into the pastry, keeping the base of your Ultimate Cheese Danish perfectly crisp.
Step 8: Optional Glaze
If you choose to glaze your Ultimate Cheese Danish, mix powdered sugar with a splash of milk or lemon juice until smooth. Drizzle the glaze over each cooled pastry to add a touch of sweetness and visual appeal. This final touch elevates your pastries from delicious to absolutely irresistible!
What to Serve with Ultimate Cheese Danish
Delight in a full brunch experience with these perfect pairings that complement the rich, flaky sweetness of your Danish.
-
Fresh Berries: Bright and juicy berries like strawberries and blueberries add a refreshing burst of flavor, enhancing the sweetness of the Danish. Their vibrant colors also elevate the brunch table’s presentation.
-
Greek Yogurt with Honey: Creamy Greek yogurt drizzled with honey brings a tangy, smooth element to balance the richness of the cheese filling. It’s a decadent yet healthy addition to your meal.
-
Coffee or Espresso: A steaming cup of coffee or a robust espresso harmonizes beautifully with the flaky pastry, cutting through the sweetness and adding warmth to your brunch.
-
Citrus Spinach Salad: A light salad with baby spinach, mandarin oranges, and a citrus vinaigrette provides a refreshing, zesty contrast. The crisp greens and sweet citrus will cleanse your palate perfectly.
-
Scones with Clotted Cream: These British delights pair wonderfully, offering a similar indulgence with their buttery texture. The addition of clotted cream adds another layer of richness to the brunch spread.
-
Mimosas: Celebrate your brunch with mimosas! The sparkling combination of orange juice and champagne awakens your senses and adds a festive touch to your gathering.
-
Fruit Salad: A simple fruit salad with melon, pineapple, and kiwi introduces refreshing sweetness and vibrant colors that balance well with the richness of the cheese Danish.
-
Chocolate Croissants: For those with a sweet tooth, offering flaky chocolate croissants alongside adds an irresistible option, creating a delightful pastry buffet for your guests.
With these pairings, your Ultimate Cheese Danish takes center stage among a delightful spread, ensuring your brunch is unforgettable!
Make Ahead Options
These Ultimate Cheese Danishes are perfect for meal prep enthusiasts! You can prepare the cream cheese filling up to 3 days in advance, storing it in an airtight container in the refrigerator to keep it fresh. Additionally, you can assemble the pastries (with the filling added) and cover them tightly; they can be refrigerated for up to 24 hours before baking. To maintain their flaky texture, ensure they are kept cold and bake them straight from the fridge when you’re ready to serve. Simply preheat your oven and follow the baking instructions, and you’ll have delicious, bakery-quality Ultimate Cheese Danishes with minimal effort!
How to Store and Freeze Ultimate Cheese Danish
Room Temperature: Enjoy your Ultimate Cheese Danish fresh for up to 2 days stored in a cool, dry place. Keep them covered lightly with a clean kitchen towel to maintain some crispness.
Fridge: For up to 5 days, store leftover cheese Danish in an airtight container in the refrigerator. This helps retain the creaminess of the filling while staying deliciously fresh.
Freezer: Unbaked pastries can be frozen for up to 2 months. Simply wrap them tightly in plastic wrap and place them in a freezer-safe bag. Bake directly from frozen, adding a few extra minutes to the baking time.
Reheating: When reheating, use the oven to preserve the flakiness. Preheat to 350°F (175°C) and warm for 8-10 minutes until heated through, ensuring your Ultimate Cheese Danish is just as delightful as the day they were made.
Ultimate Cheese Danish Recipe Variations
Feel free to get creative with this delightful cheese Danish recipe, and let your imagination guide your flavor choices!
-
Fruit Jam: Add a dollop of raspberry or blueberry jam in the center for a sweet fruity twist. It not only enhances flavor but adds a pop of color to your creation.
-
Savory Spin: Incorporate ricotta and fresh herbs like dill or chives for a delightful savory Danish. This option is perfect for brunch or a light lunch.
-
Mascarpone Swap: Replace cream cheese with mascarpone for an even creamier and richer filling. Your taste buds will thank you!
-
Chocolate Chip Delight: Stir in chocolate chips or chunks into the cream cheese filling. The sweet chocolate against the tangy cheese creates a heavenly combination.
-
Nutty Crunch: Add finely chopped nuts like almonds or walnuts for a delightful crunchy texture. Their earthiness contrasts beautifully with the creamy filling.
-
Cinnamon Twist: Mix in a teaspoon of cinnamon to your cream cheese filling for a hint of warmth and spice that adds depth to every bite.
-
Lemon Zing: Increase the lemon juice, or try lemon zest for an extra refreshing citrusy note. This brightens up the Danish while pairing perfectly with cream cheese.
-
Spicy Kick: For those who love a little heat, consider adding a pinch of crushed red pepper flakes to the savory filling. It’s an exciting way to change the flavor profile!
These variations can easily be incorporated into your Ultimate Cheese Danish journey, creating a treat that’s uniquely yours! While you’re exploring flavors, you might also enjoy a delightful Banana Cream Cheese or a cozy White Chicken Cheese recipe. Happy baking!
Expert Tips for Ultimate Cheese Danish
-
Keep Ingredients Cold: Refrigerate your cream cheese and butter before using. Cold ingredients create a flakier pastry, so don’t skip this step!
-
Perfect Portioning: Stick to one tablespoon of filling per Danish. Overfilling can lead to messy leaks during baking, ruining your beautiful pastries.
-
Egg Wash Essentials: Don’t forget to brush the edges with your egg wash! This gives your Ultimate Cheese Danish that enticing golden brown color and shiny finish.
-
Monitor Baking Time: Ovens can vary; check your pastries at the 15-minute mark. Bake until they’re golden and puffed, but avoid burning to keep the flavors intact.
-
Cool Before Glazing: Allow your Danish to cool completely after baking. Glazing them while warm can lead to a soggy base; we want a delightful crunch!
Ultimate Cheese Danish Recipe FAQs
How do I know if my cream cheese is ripe enough for the filling?
Absolutely! Make sure your cream cheese is at room temperature for the best mixing results. It should be soft and spreadable, without lumps. If it’s too cold, let it sit out for about 30 minutes before using, ensuring a smooth filling that blends beautifully with sugar and vanilla.
What is the best way to store leftover Ultimate Cheese Danish?
After enjoying your delicious Danishes, keep them in an airtight container in the fridge for up to 5 days. This method helps maintain the creamy filling while keeping the pastries fresh and tasty. To reheat, simply pop them in the oven; it’s a sure way to regain that delightful flakiness!
Can I freeze the Ultimate Cheese Danish?
Certainly! You can freeze unbaked pastries wrapped tightly in plastic wrap and placed in a freezer-safe bag for up to 2 months. When you’re ready to bake, there’s no need to thaw! Just bake them straight from the freezer, adding an extra couple of minutes to the cooking time for perfectly puffed pastries.
What should I do if my dough doesn’t puff up properly?
Oh no! If your Danish doesn’t puff up, it could be due to a few factors: the yeast might not have been activated properly, or the pastry could have become warm during the process. Make sure water is warm (not hot) to activate yeast, and always keep your dough and butter cold for that perfect flaky texture. If in doubt, ensure your oven is properly preheated and check with a thermometer if you’re unsure about the temperature.
Are there any allergy considerations for the Ultimate Cheese Danish?
Very! This recipe contains dairy (cream cheese, butter, and milk) and gluten (from the pastry). For a dairy-free option, consider using a dairy-free cream cheese alternative, and you can try gluten-free puff pastry if you need a gluten-free version. Always check product labels, as cross-contamination can occur, especially in packaged goods.
How can I enhance the flavor of my Ultimate Cheese Danish?
Definitely! If you want an extra depth of flavor, consider adding spices like cinnamon or nutmeg to the cream cheese filling. A teaspoon of finely grated lemon or orange zest can also bring a delightful zing. If you’re feeling adventurous, mix in some fruit preserves or nuts for added texture and taste, transforming your Danish into a unique creation!

Ultimate Cheese Danish Recipe: Bake Your Bakery Favorite at Home
Ingredients
Equipment
Method
- Preheat your oven to 400°F (200°C) and line a baking sheet with parchment paper.
- In a mixing bowl, combine cream cheese, granulated sugar, vanilla extract, optional lemon juice, egg yolk, and a pinch of salt. Blend until smooth and creamy, about 2-3 minutes.
- Unfold the sheet of puff pastry and cut it into 8 equal squares. Arrange the squares on your prepared baking sheet and fold the edges inward to create a border.
- Spoon about one tablespoon of cream cheese filling into the center of each pastry square.
- Whisk together the egg and water to create an egg wash and brush it onto the edges of the filled pastries.
- Bake for about 15-18 minutes until golden and puffed. Keep an eye on the baking process.
- Allow the pastries to cool on a wire rack before glazing.
- For the glaze, mix powdered sugar with milk or lemon juice until smooth, and drizzle over cooled pastries.
Leave a Reply