
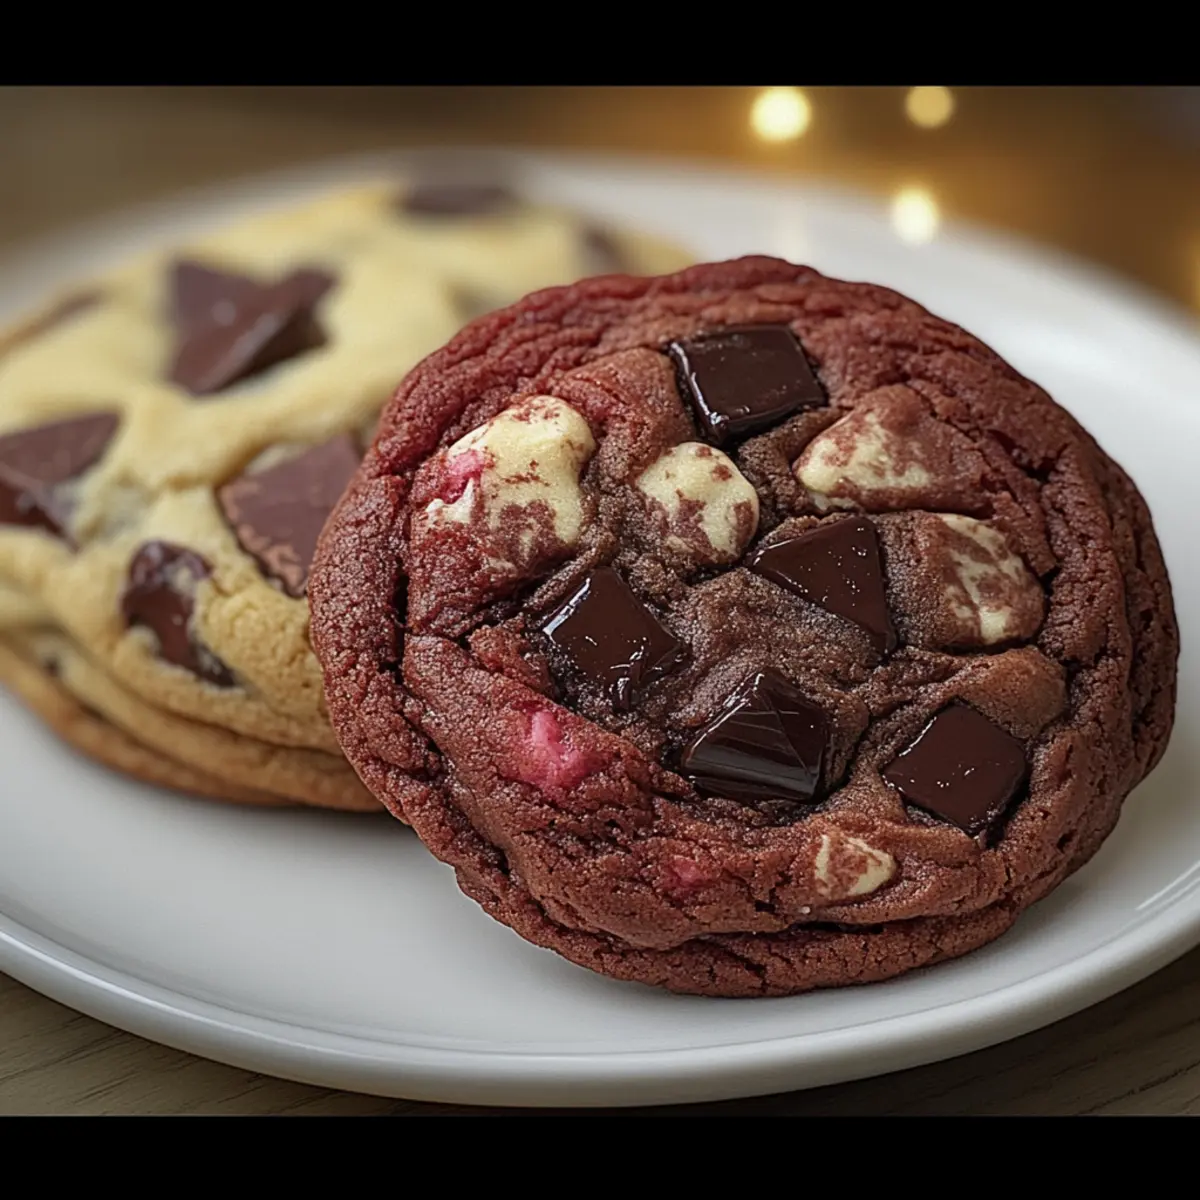
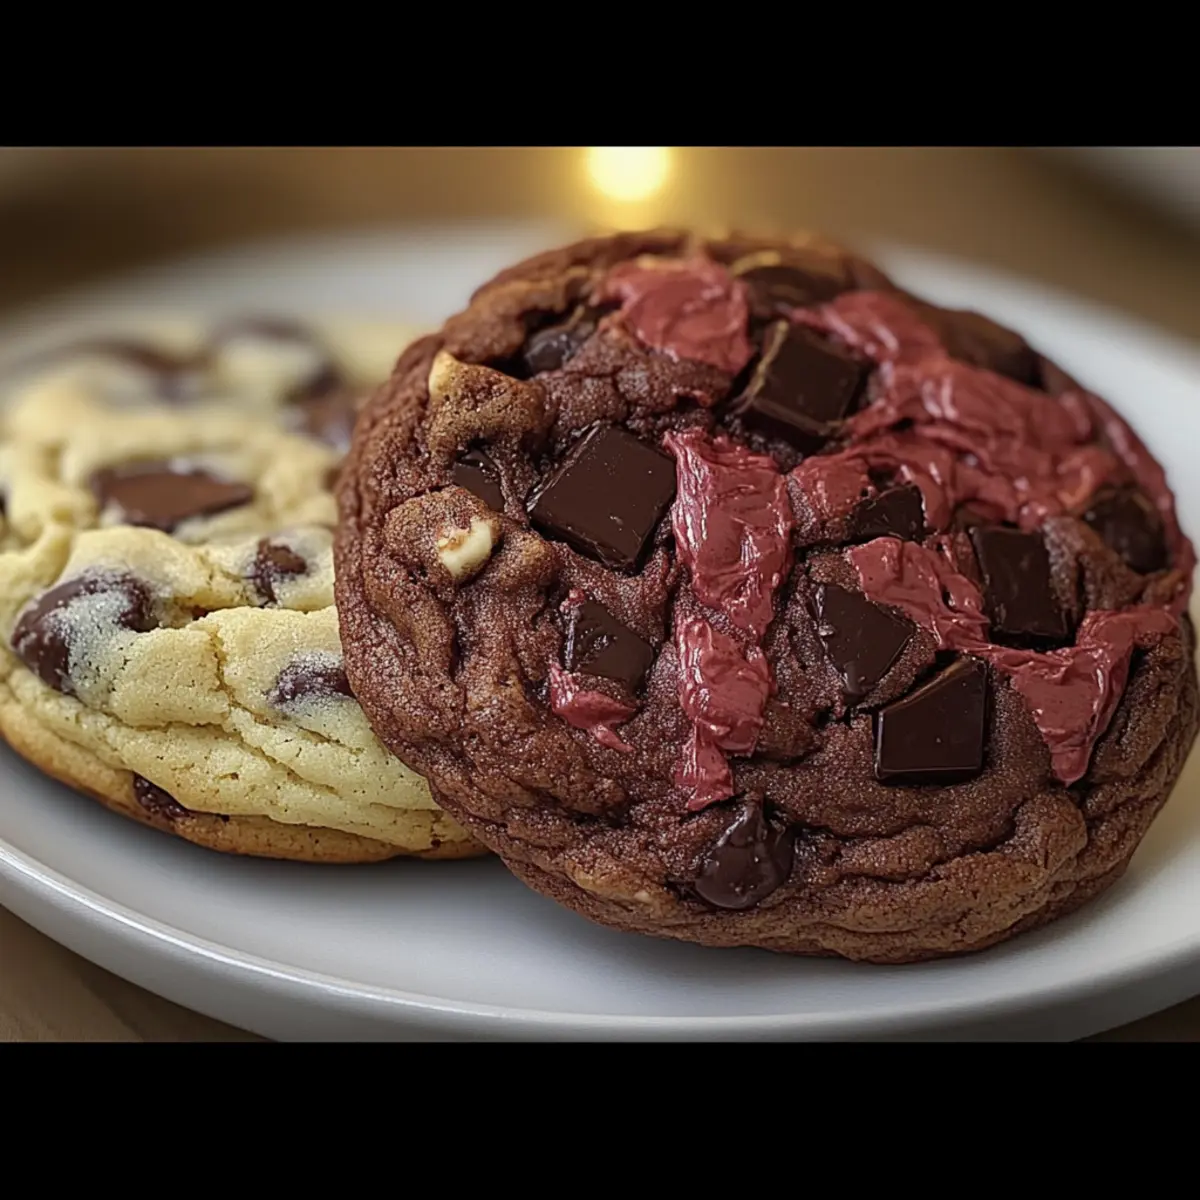
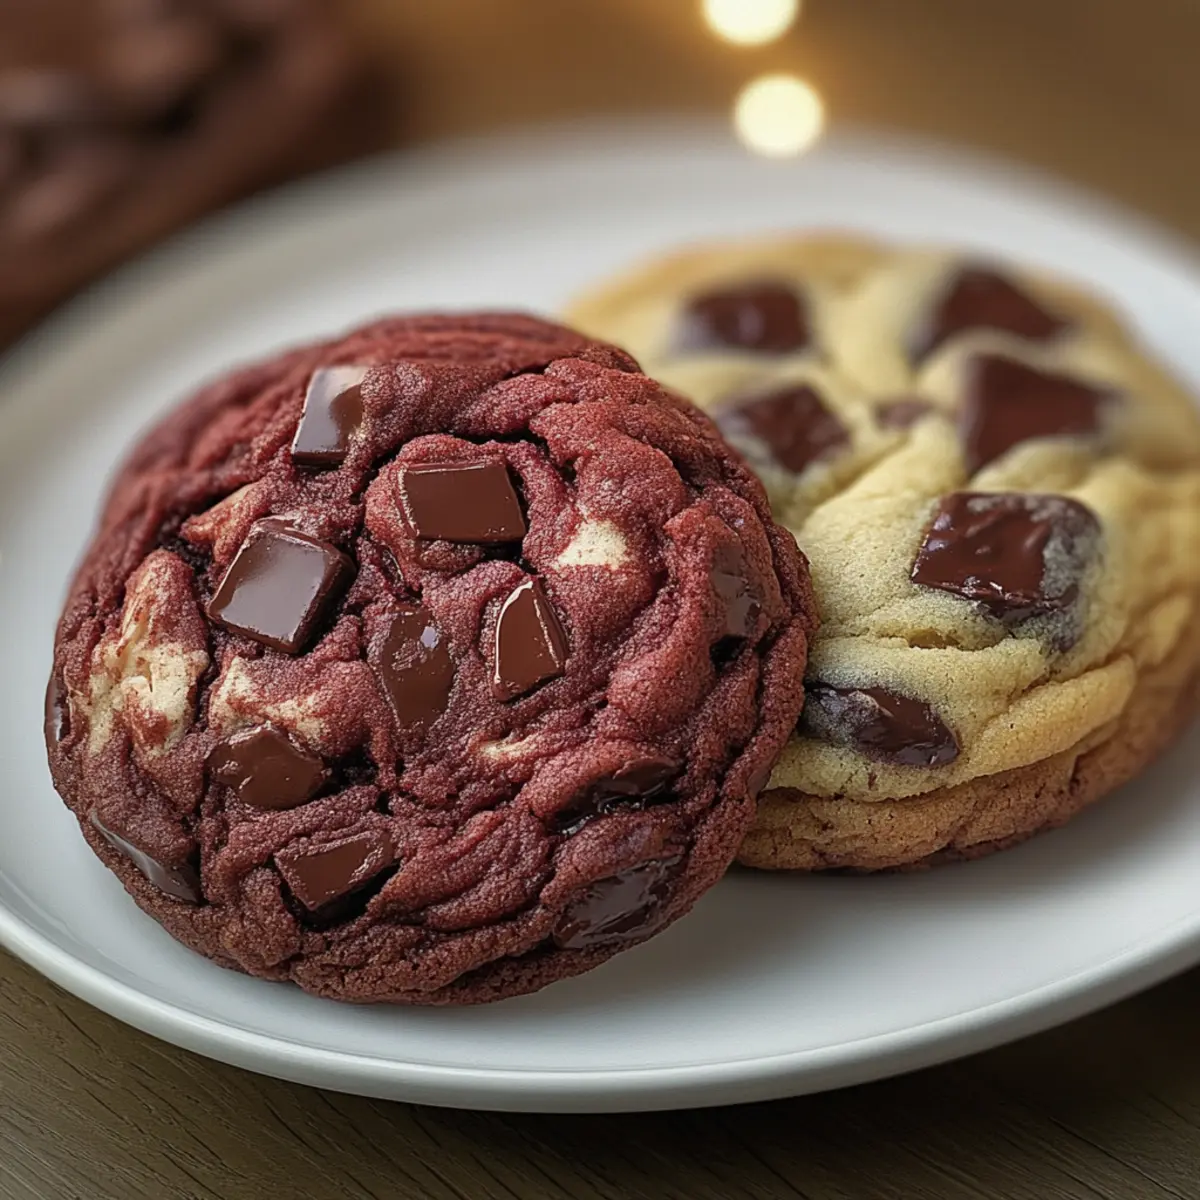
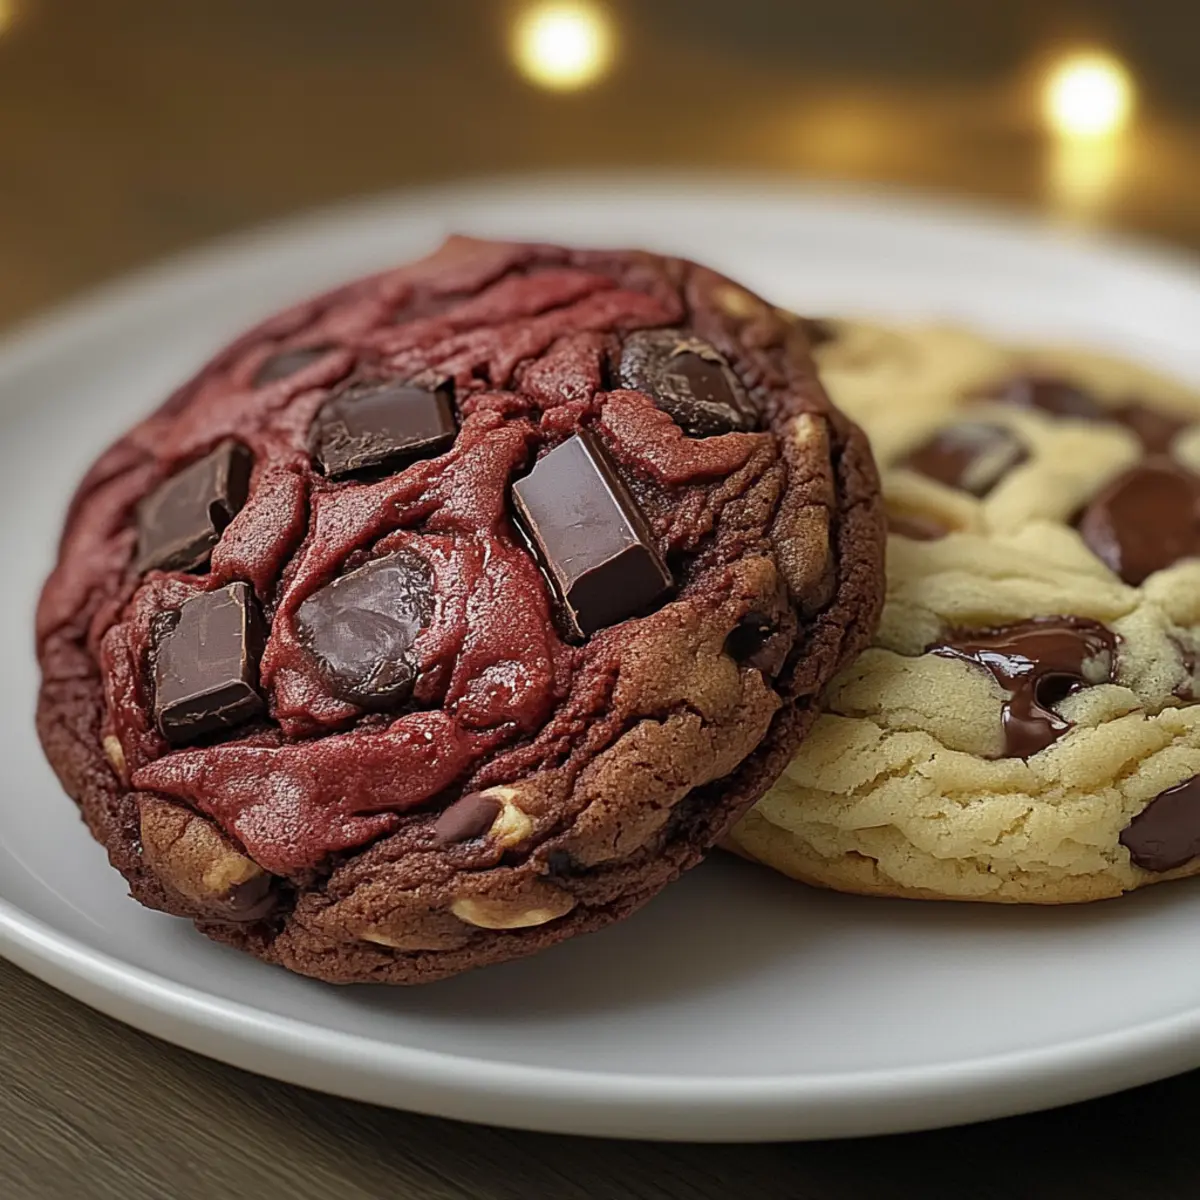
The first waft of warm cookies has a way of pulling me right back to my childhood, where every bite felt like a hug from home. Today, I’m excited to share my recipe for NYC-Style Cookies: One Dough, Three Flavors, a delightful twist on a classic favorite. This recipe is a game-changer for home bakers, using a single master dough to create three scrumptious variations: Classic Chocolate Chunk, Double Chocolate, and vibrant Red Velvet. Not only do these cookies capture the essence of those iconic NYC bakeries with their towering height and gooey centers, but they also make baking a breeze—perfect for those busy weeks when time is of the essence. Whether you’re whipping these up for a cozy night in or a gathering with friends, you’ll find that they’re a crowd-pleaser that will leave everyone craving more. Are you ready to delve into this cookie-making adventure and transform your kitchen into a sweet haven?
Why are these cookies so irresistible?
Irresistible flavor variety: With three decadent options, there’s something to please every palate.
Simple approach: The master dough saves time and effort, making baking feel effortless.
Indulgent texture: Expect thick, chewy cookies with gooey centers that will take you straight to cookie heaven.
Fun twists: Customize flavors with different chocolates or even gluten-free options, bringing creativity to your baking.
Perfect for sharing: These cookies are the ideal treat for gatherings, ensuring every guest will leave with a smile! For more cookie ideas, check out these One Bowl Brownies or the delightful One Pan Cowboy.
NYC-Style Cookies Ingredients
• Let’s gather what we need for these scrumptious cookies!
For the Master Dough
• Unsalted Butter (285 g / 1 1/4 cups) – Provides rich flavor and structure; ensure it’s softened, not melted.
• Brown Sugar (110 g / 1/2 cup) – Adds moisture and keeps your cookies chewy.
• Granulated Sugar (150 g / 3/4 cup) – Aids the cookies in developing a beautiful golden-brown hue.
• Eggs (3 large) – Binds everything together and contributes to that wonderful cookie texture.
• Vanilla Extract (3 teaspoons) – Enhances the overall flavor profile, making each bite more delightful.
• All-Purpose Flour (420 g / 3 1/2 cups) – The essential base for structure; you’ll adjust it later for each flavor.
• Salt (1/2 teaspoon) – Intensifies sweetness and balances flavors.
• Baking Powder (2 teaspoons) & Baking Soda (1/2 teaspoon) – Essential for helping your cookies rise and achieve that perfect bake.
• Cornstarch (2 teaspoons) – Helps to create softer, more tender cookies.
For the Flavors
• Chocolate (various amounts for each flavor) – Provides the rich, chocolate goodness; opt for chopped bars for the best melting.
- Classic: 100 g semi-sweet + 100 g dark chocolate – These chocolates deliver that signature NYC-style experience.
- Double: 100 g milk chocolate + 50 g semi-sweet + 50 g dark chocolate – A triple chocolate delight for the true chocoholic.
- Red Velvet: 100 g white chocolate + 100 g semi-sweet chocolate + optional red gel food coloring – Adds a fun twist with a beautiful color.
Now that we have our ingredients, get ready to embark on a cookie-making adventure that celebrates the charm of the Big Apple! These NYC-Style Cookies: One Dough, Three Flavors are not just treats; they’re memories waiting to be made.
Step‑by‑Step Instructions for NYC-Style Cookies: One Dough, Three Flavors
Step 1: Cream Butter and Sugars
In a large mixing bowl, beat together the softened butter, brown sugar, and granulated sugar until the mixture is light and fluffy, which should take about 2-3 minutes. This step is crucial as it incorporates air into the dough, resulting in a lighter texture. Make sure your butter is at room temperature for optimal creaming.
Step 2: Add Eggs and Vanilla
Next, add the three large eggs and the vanilla extract to the creamed mixture. Mix just until combined, being careful not to overblend; you want a smooth, cohesive dough. This addition of eggs enhances the cookie’s structure and richness, making your NYC-Style Cookies all the more delightful.
Step 3: Combine Dry Ingredients
In a separate bowl, whisk together the all-purpose flour, salt, baking powder, baking soda, and cornstarch. Gradually mix this dry blend into your wet ingredients using a spatula or wooden spoon. Stir gently until just combined to avoid overmixing, which ensures your NYC-Style Cookies remain tender and chewy.
Step 4: Divide Dough
Once your dough is well-mixed, divide it into three equal portions, roughly 390 g each, for the different flavor variations. Lightly shape each portion into a ball and place them on a flat surface. This preparation will make the flavoring process quicker and easier in the following steps.
Step 5: Flavor Preparation
Now, let’s create the three delicious variations! For the Classic Chocolate Chunk, fold in extra flour and the chopped semi-sweet and dark chocolates. For the Double Chocolate, blend in cocoa powder and milk, then add the various chocolates. Finally, for the Red Velvet, mix in cocoa, vinegar, and a few drops of red gel food coloring, followed by the chocolates.
Step 6: Shape Cookies
Divide each flavored dough into 4 equal pieces, weighing about 154 g each, then roll them into balls. Gently press the tops to create slight cracks, making the cookies visually appealing. This shaping step is essential as it impacts the final texture and appearance of your NYC-Style Cookies.
Step 7: Chill Dough
To ensure the cookies maintain their thick shape while baking, place the dough balls on a baking sheet lined with parchment paper and freeze for 15-20 minutes. Chilling the dough will prevent spreading and ensure that your cookies have chewy centers with crispy edges, essential for the NYC-Style Cookies.
Step 8: Bake
Preheat your oven to 350°F (180°C) while the dough chills. Once ready, bake the cookies for about 14 minutes, or until they are pale and soft. Watch for the edges to set while the centers remain slightly underbaked; they will firm up as they cool, achieving that iconic NYC-style texture.
Step 9: Finish Cookies
As soon as your cookies come out of the oven, use a round cutter to gently shape the edges for that perfect look, and press a few extra chocolate chunks on top for added decadence. Allow the cookies to cool completely on the baking sheet before serving to let them set perfectly.
How to Store and Freeze NYC-Style Cookies
Airtight Container: Store the baked NYC-Style Cookies in an airtight container at room temperature for up to 4 days to maintain their freshness and chewy texture.
Freezer: For longer storage, freeze raw cookie dough balls individually on a baking sheet for 1-2 hours until firm. Then, transfer them to a zip-top bag or airtight container for up to 3 months for easy baking whenever you crave these delicious cookies.
Reheating: To enjoy frozen cookies, bake directly from the freezer, adding an extra 2 minutes to your baking time for perfect results.
Dough Thawing: If you prefer to bake only a few at a time, simply thaw the desired number of frozen cookie dough balls in the fridge overnight before baking.
Expert Tips for NYC-Style Cookies
• Chill the Dough: Ensure your dough is properly chilled before baking to prevent cookies from spreading too much and losing that thick, bakery-style shape.
• Weigh Ingredients: Use a kitchen scale to measure your dough portions accurately for consistent cookies; each dough ball should be about 154 g for the best results.
• Don’t Overmix: When combining wet and dry ingredients, mix just until incorporated. Overmixing can lead to tough cookies instead of the desired chewiness of NYC-Style Cookies.
• Oven Watch: Keep an eye on the baking time. These cookies will continue to cook slightly as they cool, so remove them when they are pale and soft to achieve that gooey center.
• Extra Chocolate: Adding a few chocolate pieces on top of warm cookies creates an inviting look and irresistible gooeyness that will leave everyone craving more!
Make Ahead Options
These NYC-Style Cookies: One Dough, Three Flavors are perfect for meal prep enthusiasts! You can prepare the master dough up to 24 hours in advance and refrigerate it in an airtight container to lock in freshness. Additionally, you can shape the cookie dough balls and freeze them for up to 3 months. Just place the frozen dough directly on a baking sheet and add an extra 2 minutes to your baking time, so they’ll come out just as delicious as when made fresh. By prepping ahead, you’ll have delightful cookies ready with minimal effort, making those busy weeknights feel a little sweeter!
What to Serve with NYC-Style Cookies: One Dough, Three Flavors
Warm cookies fresh from the oven provide a perfect centerpiece for a delightful meal, inviting comfort and joy at the table.
-
Classic Milkshake: A thick, creamy milkshake complements the chocolatey goodness of the cookies, enhancing the indulgent experience.
-
Rich Espresso: The bold flavor of espresso cuts through the sweetness, creating a delicious contrast that awakens the taste buds.
-
Vanilla Ice Cream: Ice cream melting over a warm cookie creates a heavenly blend of temperatures and textures—pure bliss!
-
Fresh Fruit Salad: Bright, juicy fruits add a refreshing element, balancing the rich cookies with their natural sweetness.
-
Chocolate Dipping Sauce: For the ultimate treat, serve warm cookies alongside a dark chocolate dipping sauce for a decadent experience.
Pairing these cookies with delightful beverages or light desserts elevates the entire experience, making it even more memorable for you and your loved ones.
NYC-Style Cookies: One Dough, Three Flavors Variations
Feel free to make these scrumptious cookies your own by exploring exciting variations and substitutions!
- Dairy-Free: Use coconut oil or a dairy-free butter substitute for a rich, flavorful twist that’s perfect for lactose-intolerant friends.
- Nutty Flavor: Incorporate 100 g of crushed nuts like walnuts or pecans into the master dough for extra crunch and warmth.
- Gluten-Free: Substitute all-purpose flour with a 1:1 gluten-free blend to enjoy these cookies without worry.
- Spicy Kick: Add a pinch of cayenne pepper or cinnamon to the Classic Chocolate Chunk version for a surprising heat that’s utterly delightful.
- Fruity Twist: Incorporate dried fruits like cranberries or cherries into the dough for a burst of natural sweetness; it makes for a lovely contrast with chocolate.
- Different Chocolates: Explore flavored chocolates, such as orange or mint, for a unique flavor experience that will elevate the cookie to new heights.
- Red Velvet Upgrades: For a cream cheese treat, add chunks of cream cheese frosting to the Red Velvet cookies or drizzle with a simple icing for added sweetness and flair.
- Mix and Match: Combine different flavors by mixing two types of chocolates in one cookie; a little creativity goes a long way!
There’s so much joy in personalizing cookies to fit your taste! For more cookie inspiration, check out these decadent One Bowl Brownies or flavorful Honey Garlic Chicken.
NYC-Style Cookies: One Dough, Three Flavors Recipe FAQs
What should I look for when selecting ingredients?
Absolutely! When choosing your unsalted butter, aim for a soft texture at room temperature—this is key for creaming. For chocolate, I recommend using good-quality bars rather than chips for better melting. Check your eggs to ensure they’re fresh; a quick float test in water can help confirm their freshness. Lastly, opt for all-purpose flour that feels fine and has no lumps for a smooth dough.
How should I store the cookies after baking?
Very simple! Store your baked NYC-Style Cookies in an airtight container at room temperature for up to 4 days. For optimal freshness, you can place a slice of bread in the container, which helps keep the cookies soft and moist. Just be cautious to switch it out if it becomes too hard.
Can I freeze the cookie dough? If so, how?
Absolutely! Freezing raw cookie dough is a great way to have these delicious treats ready whenever the craving strikes. After shaping the dough into balls, place them on a baking sheet lined with parchment paper and freeze for 1-2 hours until firm. Once frozen, transfer the dough balls to a zip-top bag or airtight container and store them in the freezer for up to 3 months. When ready to bake, you can bake them directly from the freezer, simply adding an extra 2 minutes to your baking time.
What if my cookies spread too much while baking?
Oh no! If your cookies spread too much, it might be due to the dough being too warm when placed in the oven. Ensure you chill the dough properly for 15-20 minutes beforehand, as this helps maintain their height during baking. Also, your butter should be softened but not melted; if overcreamed, that could introduce too much air, causing spreading.
Are there dietary considerations I should keep in mind?
Certainly! If you’re baking for someone with gluten intolerance, consider substituting the all-purpose flour with a gluten-free blend designed for baking. You can also try using nut-based flours, but keep in mind that this can change the texture slightly. Furthermore, for those with chocolate allergies, you could explore using carob or simply stick to the Red Velvet variation, which uses white chocolate with a delightful cocoa taste.
Are these cookies safe for pets or children?
Definitely be cautious! Avoid giving cookies that contain chocolate to pets, as it can be toxic to them. For children, these cookies are generally safe as long as the ingredients are suitable for their dietary needs (such as avoiding any allergens). Always supervise young kids while they’re enjoying tasty treats to prevent any mishaps!
NYC-Style Cookies: One Dough, Three Flavors to Indulge You
Ingredients
Equipment
Method
- Cream Butter and Sugars: In a large mixing bowl, beat together the softened butter, brown sugar, and granulated sugar until light and fluffy, about 2-3 minutes.
- Add Eggs and Vanilla: Add the eggs and vanilla extract to the creamed mixture. Mix until just combined.
- Combine Dry Ingredients: In a separate bowl, whisk together flour, salt, baking powder, baking soda, and cornstarch. Gradually mix into the wet ingredients until just combined.
- Divide Dough: Divide the dough into three equal portions, roughly 390 g each, for flavor variations.
- Flavor Preparation: Create variations by folding in specific chocolates and additional ingredients for each flavor.
- Shape Cookies: Divide the flavored dough into 4 equal pieces each, rolling them into balls and pressing the tops for cracks.
- Chill Dough: Place the dough balls on a baking sheet and freeze for 15-20 minutes.
- Bake: Preheat oven to 350°F (180°C) and bake cookies for about 14 minutes.
- Finish Cookies: Use a round cutter to shape edges and press extra chocolate chunks on top after baking.
Leave a Reply