
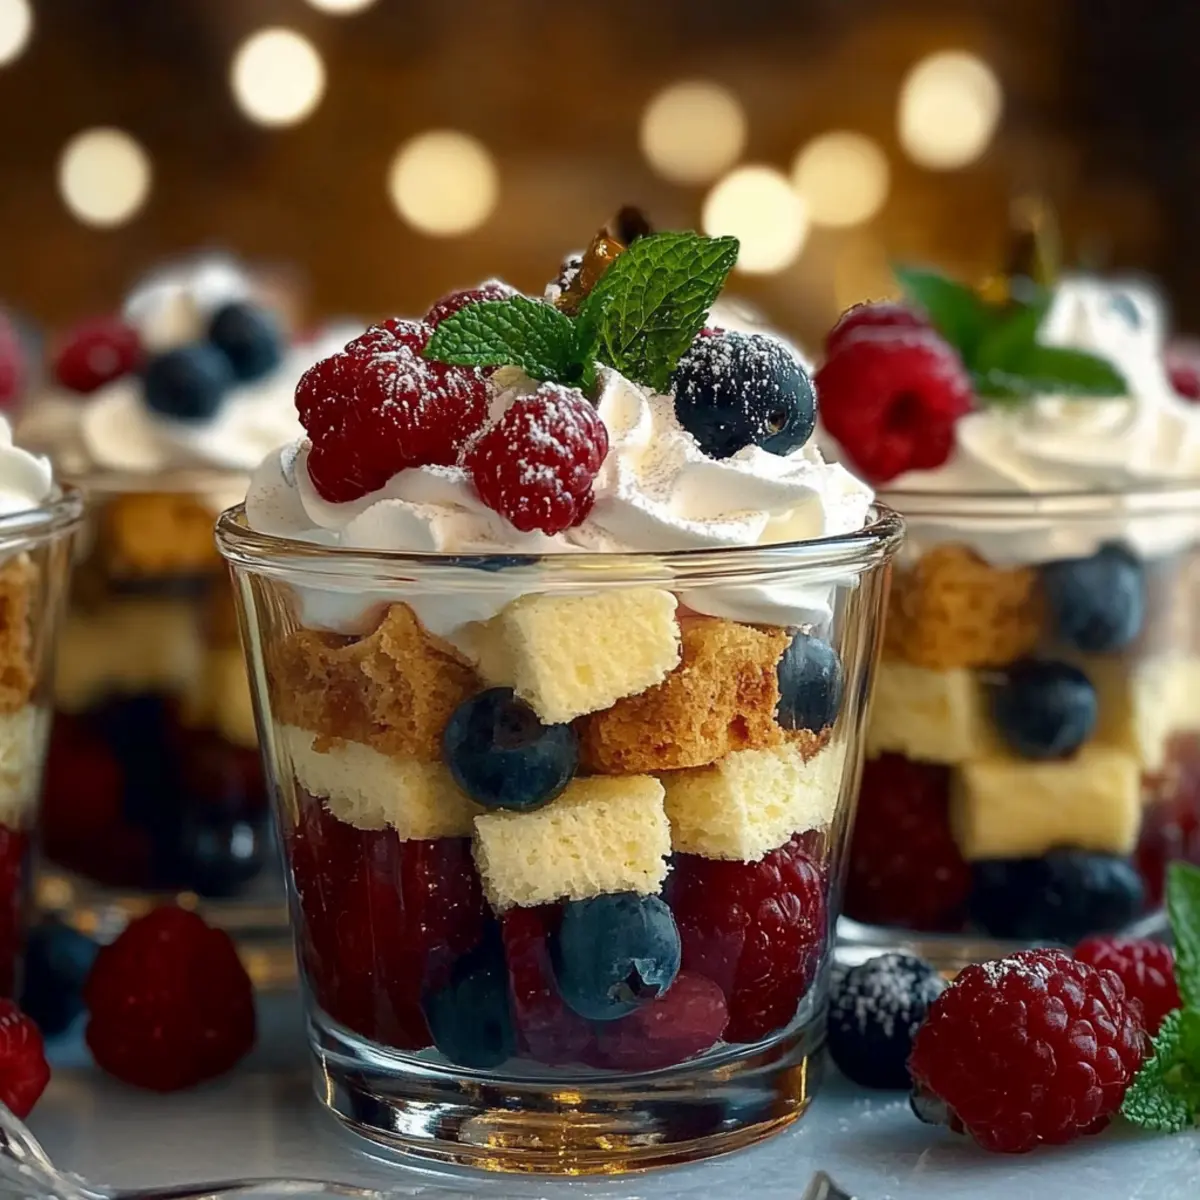
As the festive season approaches, I’m reminded of the little delights that bring a sparkle to our gatherings. These Mini Christmas Trifles are like a hug in a glass, layered with soft sponge cake, creamy custard, and vibrant berries—each bite is a celebration of holiday cheer! Not only are they stunning and customizable, allowing you to mix and match flavors, but they’re also super easy to assemble and make ahead of time, so you can spend more quality moments with your loved ones instead of being stuck in the kitchen. With their delightful textures and eye-catching presentation, these trifles will surely become the highlight of your holiday table. Curious to see how to create this festive masterpiece? Keep scrolling for the recipe!
Why are Mini Christmas Trifles special?
Holiday Cheer: These Mini Christmas Trifles bring a joyful spirit to any gathering with their vibrant layers and festive flavors!
Ease of Preparation: Assembling these trifles is a breeze; you can whip them up in no time without sacrificing the wow factor.
Make-Ahead Magic: Prepare them 24 hours in advance for stress-free entertaining; just add your festive garnishes before serving!
Customizable Delights: Feel free to swap in your favorite fruits or flavorings, making each trifle truly unique. Try using Greek yogurt instead of custard for a fresh twist! Your guests will adore the stunning presentation.
Mini Christmas Trifles Ingredients
For the Cake Layer
• Sponge Cake – Use store-bought for convenience or bake your own for a personal touch.
For the Creamy Layer
• Custard or Vanilla Pudding – Ensure it’s chilled for a rich and creamy texture; consider using flavored extracts for extra depth.
For the Fresh Layer
• Mixed Berries (Raspberries, Blueberries, Strawberries) – These introduce a burst of flavor and freshness; feel free to substitute with other fruits based on your preferences.
For the Topping
• Whipped Cream – This adds a light and sweet finish; using stabilized whipped cream helps maintain its shape over time.
• Fresh Mint Leaves – Garnish for color and a hint of freshness.
• Gold Star Sprinkles or Edible Decorations – Optional, but they elevate the festive look of your Mini Christmas Trifles!
These Mini Christmas Trifles are a delightful holiday dessert that everyone will love!
Step‑by‑Step Instructions for Mini Christmas Trifles
Step 1: Prepare Cake Base
Begin by cutting the sponge cake into small, uniform cubes. Aim for approximately 1-inch pieces, ensuring they are easy to layer. If you’re using store-bought sponge cake, allow it to sit out for about 15 minutes—this will slightly firm it up and prevent sogginess when layered with the creamy custard.
Step 2: Layer Cake
Take a clear glass or dessert cup and place a layer of sponge cake cubes at the bottom. Use approximately ¼ of the glass for this layer to create a solid base. Press the cake down gently with the back of a spoon to ensure stability. The Mini Christmas Trifles should begin to take shape beautifully!
Step 3: Add Custard
Spoon chilled custard or vanilla pudding over the layer of cake, filling the glass about halfway. Use around ¼ cup for each glass, smoothing it out with the back of the spoon for an even surface. The creamy texture will complement the sponge cake and create a delightful contrast in your Mini Christmas Trifles.
Step 4: Incorporate Berries
Now it’s time to add a burst of color and flavor! Scatter a handful of mixed berries directly over the custard layer, ensuring even distribution. Aim for about a tablespoon of berries per glass, layering them for visual appeal. Choose vibrant raspberries, blueberries, and strawberries for a festive touch that enhances your dessert.
Step 5: Repeat Layers
Continue to build your Mini Christmas Trifles by repeating the layers of sponge cake, custard, and berries. You should aim for at least one more layer for a total of two rounds for each ingredient. Each layer should fill the glass sufficiently while leaving some space at the top for the final whipped cream and decorations.
Step 6: Finish
To complete your delightful Mini Christmas Trifles, pipe a generous swirl of whipped cream on top using a star-tipped piping bag. This airy topping not only looks enticing but adds a light sweetness. Garnish with fresh mint leaves, a few extra berries, and a sprinkle of gold star decorations to elevate the festive appearance.
Step 7: Chill
Finally, cover the assembled Mini Christmas Trifles with plastic wrap and refrigerate for at least 1 hour before serving. This chilling time allows the flavors to meld beautifully and the textures to set. If you’re making them ahead of time, you can prepare them up to 24 hours in advance, adding garnishes right before serving.
What to Serve with Mini Christmas Trifles?
Cozy up your holiday spreads with delightful dishes that perfectly complement these tasty Mini Christmas Trifles.
-
Warm Gingerbread Cookies: Soft and spiced, these cookies echo holiday flavors and provide a lovely contrast to the trifles’ creaminess.
-
Spiced Apple Cider: This warm drink adds a festive touch, bringing comforting spices that enhance the sweetness of the trifle.
-
Chocolate Fondue: Pairing melted chocolate with fresh fruits can create an indulgent experience, mirroring the trifles’ layered decadence.
-
Peppermint Bark: The crunchy, cool mint pieces add a delightful surprise that echoes the freshness of the berries.
-
Roasted Nuts: A bowl of spiced or candied nuts offers a crunchy texture while balancing the sweetness of the dessert beautifully.
-
Vanilla Ice Cream: A scoop of smooth ice cream layered alongside the trifles takes the dessert to a new level of indulgence, creating a luxurious mouthfeel.
What a fabulous way to round out a festive gathering!
Mini Christmas Trifles Variations & Substitutions
Feel free to get creative with your Mini Christmas Trifles; let your imagination run wild with these delightful twists!
-
Fruit Swap: Replace mixed berries with peaches or cherries for a sweet, tropical flavor that’s perfect for any season.
Imagine the juicy sweetness of ripe peaches or the comforting taste of cherries marrying with creamy custard in each bite. -
Flavor Boost: Add flavored extracts like almond or coconut to the custard for an aromatic twist that will surprise your taste buds.
A hint of coconut can evoke memories of exotic destinations, making your trifles not just a dessert but an experience. -
Dairy-Free: Use almond or coconut milk to create a dairy-free custard, satisfying guests with dietary restrictions without skimping on flavor.
Celebrate the holidays with inclusive treats that everyone can enjoy, while still packing a punch in the delicious department. -
Greek Yogurt: Swap custard for Greek yogurt for a tangy, thicker option that adds protein and a touch of healthiness.
Gorgeous layers of yogurt can add a surprising tartness that balances out the sweetness and adds depth to your Mini Christmas Trifles. -
Chocolate Layers: Incorporate layers of chocolate mousse or pudding between the other layers for a decadent, indulgent twist.
Rich chocolate introduces an element of luxury, transforming your trifle into a show-stopping centerpiece. -
Spicy Kick: Mix in a pinch of cinnamon or nutmeg with the custard for a warm, holiday-inspired flavor that wraps you in festive comfort.
The warm spices make every layer feel cozy, adding a delightful layer of nostalgia to your dessert. -
Nutty Crunch: Sprinkle crushed nuts like pistachios or hazelnuts on top of the whipped cream for added texture and flavor.
A nutty crunch complements the soft textures of the trifle, enhancing each spoonful with delightful surprises. -
Festive Touches: Decorate with pomegranate seeds or candied orange peel for a vibrant touch that elevates the visual appeal of your dessert.
These colorful additions not only look festive but will also pop with flavor, creating an irresistible feast for the eyes and palate.
Embrace the joy of customization and create Mini Christmas Trifles that reflect your personal taste! If you’re exploring more festive delights, don’t forget to check out our Christmas Cookies Butterscotch for another sweet treat!
Expert Tips for Mini Christmas Trifles
-
Layer Strategically: Ensure the sponge cake is the base layer for stability; this prevents the custard from soaking through and creating sogginess.
-
Chill Custard: Always use fully chilled custard or pudding; a warm mixture can make the layers runny and unappealing in your Mini Christmas Trifles.
-
Swap Fresh Fruits: Don’t hesitate to customize! If berries aren’t in season, substitute with diced peaches or cherries for a seasonal twist.
-
Stabilize Whipped Cream: For a fluffier texture that holds up, consider using stabilized whipped cream, which helps keep your trifle presentation intact for gatherings.
-
Garnish Before Serving: To maintain freshness and visual appeal, add your mint leaves and sprinkles right before serving. This keeps your Mini Christmas Trifles looking festive!
Make Ahead Options
These Mini Christmas Trifles are ideal for busy home cooks looking to simplify holiday entertaining! You can assemble the trifles up to 24 hours in advance, just be sure to leave off the whipped cream garnish until right before serving to maintain its airy texture. Start by preparing your layers—cut the sponge cake into cubes and chill the custard or vanilla pudding. Layer them in your serving glasses with mixed berries and refrigerate. This not only saves time but also enhances the flavors as they meld together beautifully. When it’s time to impress your guests, simply add the whipped cream and any festive decorations, and you’ll have a stunning dessert that’s just as delicious!
How to Store and Freeze Mini Christmas Trifles
Fridge: Keep your assembled Mini Christmas Trifles covered in the refrigerator for up to 24 hours before serving. This will maintain their freshness and flavors.
Freezer: For longer storage, you can freeze the layers individually (cake, custard, berries) for up to 1 month. However, avoid freezing the assembled trifle as it may affect the texture.
Reheating: There’s no need to reheat these trifles; simply serve them chilled. If freezing, allow the layers to thaw in the refrigerator overnight before assembly.
Garnishing: Add whipped cream and decorations just before serving to keep them looking fresh and appealing!
Mini Christmas Trifles Recipe FAQs
What is the best way to choose ripe berries for my trifle?
Absolutely! Select berries that are vibrant in color with no dark spots or signs of mold. Aim for firm, plump berries for the best flavor and texture. When it comes to freshness, you should ideally use them within 1-2 days of purchase to keep them juicy and flavorful.
How should I store my Mini Christmas Trifles?
Very simply! Store your assembled Mini Christmas Trifles covered in the refrigerator for up to 24 hours. This helps to keep them fresh and allows the flavors to meld together. If you’ve made them in advance, remember to add the whipped cream and any decorative elements just before serving for the best presentation.
Can I freeze the components of my Mini Christmas Trifles?
Yes, you can! To freeze, layer the sponge cake, custard, and berries separately in airtight containers for up to 1 month. When you’re ready to assemble your trifles, thaw the components overnight in the fridge. However, it’s best to avoid freezing the fully assembled trifle, as the texture may suffer.
What should I do if my custard is runny during the preparation?
If your custard is runny, don’t worry! Make sure it’s properly chilled; heat can cause it to lose its structure. If it still appears too thin, you can mix a small amount of cornstarch into the custard while it’s warm, cooking it for an extra minute until it thickens up nicely. Let it cool completely before layering.
Are Mini Christmas Trifles safe for people with allergies?
Definitely something to consider! If you’re serving a crowd, always ask about allergies beforehand. You can make your Mini Christmas Trifles gluten-free by using gluten-free cake and pudding. Also, for dairy-free options, consider using almond or coconut milk-based puddings and whipped toppings, ensuring everyone can enjoy this festive treat!
Mini Christmas Trifles: A Joyful Holiday Dessert Delight
Ingredients
Equipment
Method
- Cut the sponge cake into small, uniform cubes (about 1-inch pieces). Allow to sit for 15 minutes.
- Place a layer of sponge cake cubes at the bottom of a clear glass, using about ¼ of the glass.
- Spoon chilled custard or vanilla pudding over the sponge cake, filling the glass about halfway.
- Scatter a handful of mixed berries directly over the custard layer.
- Repeat the layers of sponge cake, custard, and berries, aiming for at least two rounds.
- Pipe a swirl of whipped cream on top and garnish with mint leaves, extra berries, and gold star decorations.
- Cover with plastic wrap and refrigerate for at least 1 hour before serving.
Leave a Reply