
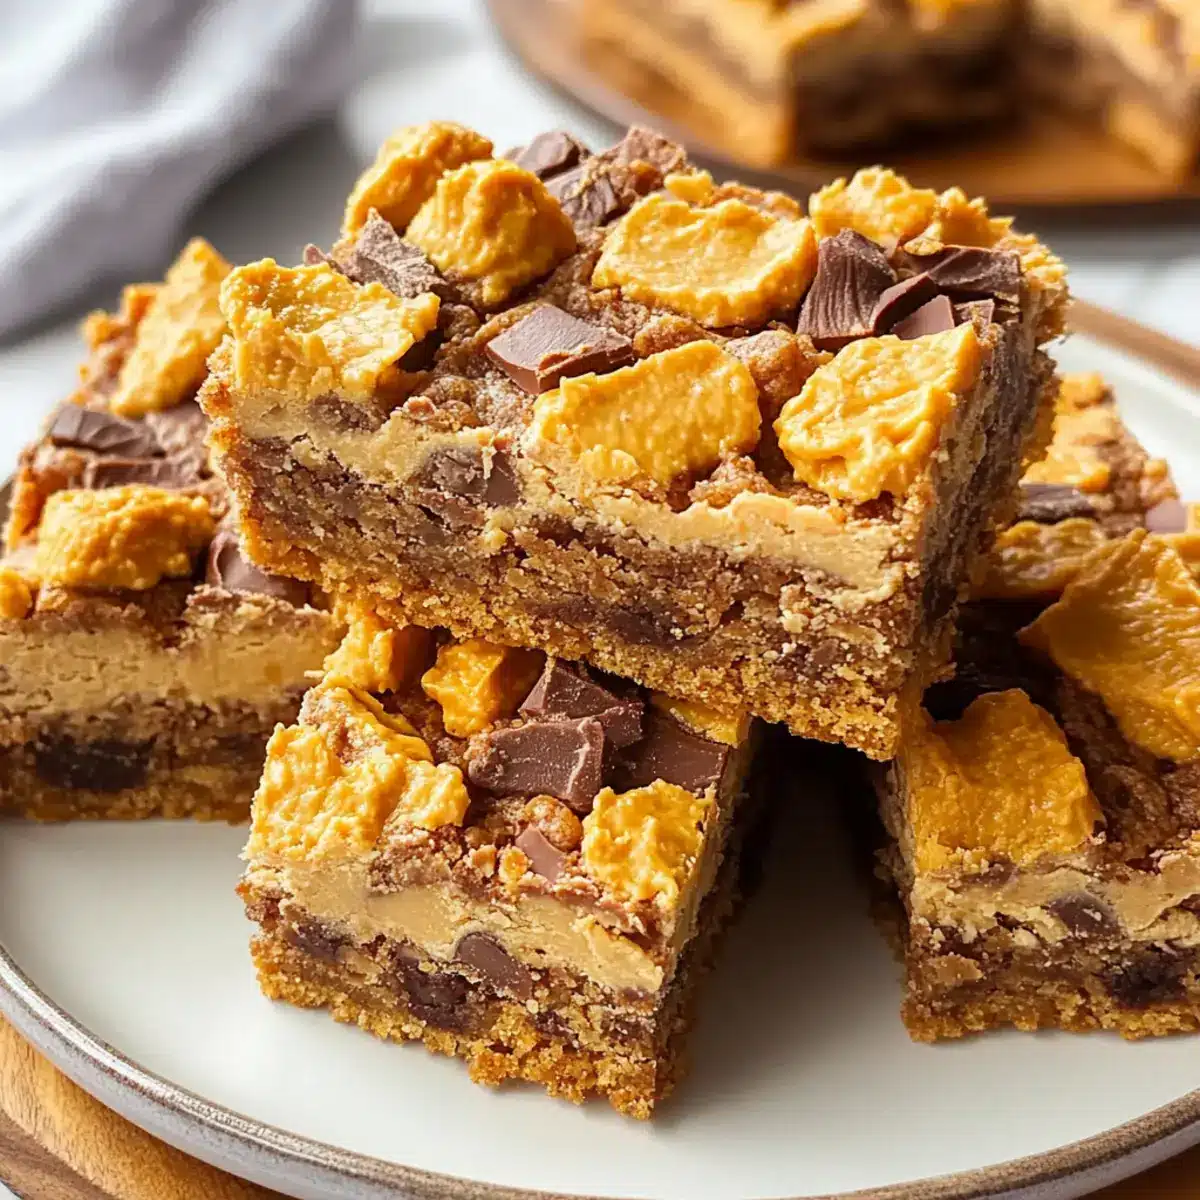
As I opened the pantry, a half-eaten Butterfinger wrapper caught my eye, instantly transporting me back to childhood days filled with sweet treats and sticky fingers. It inspired me to create a delightful indulgence that pays homage to those blissful moments: Butterfinger Cookie Bars with Creamy Peanut Butter Frosting. These bars combine a soft, chewy cookie base studded with crunchy Butterfinger pieces, topped off with a luscious frosting that brings a nostalgic twist to any dessert table. What’s not to love about an easy, crowd-pleasing recipe that’s perfect for gatherings or a little self-love at home? Plus, you can easily customize these bars to suit dietary needs, making them a versatile treat for everyone. Ready to relive those sweet memories and whip up a batch of joy? Let’s dive into this delightful recipe!
Why are Butterfinger Cookie Bars amazing?
Nostalgic Experience: These bars are a delightful throwback to childhood, combining the iconic Butterfinger candy we all love into a soft, chewy cookie. Easy to Customize: You can easily tweak the recipe to meet gluten-free needs by swapping in 1-to-1 gluten-free baking flour. Crowd-Pleasing Delight: Perfect for gatherings, these bars are a sweet treat that will impress guests and family alike. Decadent Topping: Topped with creamy peanut butter frosting, they offer a luxurious finish that takes them over the top. Check out my Christmas Cookies Butterscotch for more festive delights!
Butterfinger Cookie Bars Ingredients
For the Cookie Base
• Unsalted Butter (room temp) – Provides richness and moisture; ensure it’s soft for easy creaming.
• Granulated Sugar – Adds sweetness and contributes to the cookie’s crispness.
• Light Brown Sugar – Imparts a caramelly flavor and enhances chewiness; dark brown sugar can be used for a deeper taste.
• Large Eggs – Binds the ingredients together, ensuring the bars remain perfectly chewy.
• Vanilla Extract – Adds depth of flavor to enrich the overall taste.
• All-purpose Flour – The primary structure of the bars; substitute with 1-to-1 gluten-free baking flour for a gluten-free option.
• Salt – Balances sweetness and enhances overall flavor.
• Baking Soda – Acts as a leavening agent to help the bars rise.
• Butterfinger Bars (chopped) – Introduces the signature flavor and crunchy texture; feel free to substitute with other crunchy candies if desired.
For the Frosting
• Creamy Peanut Butter – Forms the base for the frosting, delivering a rich and delicious flavor.
• Powdered Sugar – Sweetens and thickens the frosting; adjust the quantity for your desired sweetness.
• Whole Milk – Adjusts the frosting’s consistency; use more for a thinner frosting or less for a thicker one.
These Butterfinger Cookie Bars are sure to bring smiles to faces and warmth to hearts, making them the perfect homemade dessert to share and enjoy!
Step‑by‑Step Instructions for Butterfinger Cookie Bars
Step 1: Preheat Your Oven
Begin by preheating your oven to 350°F (175°C). Prepare a 9×13 inch baking dish by lining it with parchment paper and lightly greasing it with non-stick spray. This setup ensures the Butterfinger Cookie Bars will bake evenly and make for easy removal once baked.
Step 2: Make the Cookie Base
In a large mixing bowl, cream together 1 cup of softened unsalted butter with ½ cup granulated sugar and ½ cup light brown sugar until the mixture is light and fluffy, about 2-3 minutes. Next, add in 2 large eggs and 1 teaspoon of vanilla extract, mixing well until incorporated. Gradually add 2 cups of all-purpose flour, ½ teaspoon of salt, and 1 teaspoon of baking soda; fold in ½ cup of chopped Butterfinger pieces for that delightful crunch that makes these bars so special.
Step 3: Bake the Cookie Base
Spread the dough evenly into the prepared baking dish, using a spatula to smooth the top. Place it in your preheated oven and bake for approximately 25 minutes. The edges should be golden brown, and a toothpick inserted into the center should come out clean or with just a few crumbs attached, indicating your Butterfinger Cookie Bars are ready.
Step 4: Cool the Bars Completely
Once baked, remove the dish from the oven and allow the Butterfinger Cookie Bars to cool in the pan for about 20-30 minutes. It’s essential to let them cool completely before frosting, as this prevents the creamy peanut butter frosting from melting and ensures a beautifully layered dessert.
Step 5: Prepare the Peanut Butter Frosting
In a separate bowl, beat together ½ cup of softened butter with ½ cup of creamy peanut butter until the mixture is smooth, about 1-2 minutes. Gradually mix in 1 cup of powdered sugar, along with 1 tablespoon of milk, until the frosting is fluffy and well combined. Adjust the consistency with more milk for a thinner texture or more powdered sugar for a thicker frosting.
Step 6: Frost and Top the Bars
Once the cookie bars have cooled completely, spread the peanut butter frosting evenly over the top using a spatula. For added indulgence, sprinkle the remaining chopped Butterfinger pieces over the frosting, gently pressing them in to ensure they adhere well. This step adds a delightful crunch and makes your Butterfinger Cookie Bars look irresistible.
Step 7: Slice and Serve
To achieve clean cuts, place the finished bars in the refrigerator for about 30 minutes, allowing the frosting to set. Once chilled, slice your Butterfinger Cookie Bars into 16 squares. Serve them at room temperature or enjoy them slightly warmed for a gooey treat that will bring smiles all around!
What to Serve with Butterfinger Cookie Bars?
Indulge in a delightful feast that perfectly complements the sweet decadence of your Butterfinger Cookie Bars.
-
Vanilla Ice Cream: A classic pairing, the creamy texture and cold temperature of vanilla ice cream contrast beautifully with the chewy bars, adding a refreshing element.
-
Coffee: The rich, bold flavors of freshly brewed coffee elevate the sweetness, creating a perfect balance for an afternoon treat.
-
Salted Caramel Sauce: Drizzling warm salted caramel over your Butterfinger Cookie Bars enhances their flavor, adding a sweet and salty twist that’s utterly irresistible.
-
Chocolate Milk: Creamy chocolate milk is a nostalgic drink choice that pairs wonderfully with the bars, evoking childhood memories of sweet after-school snacks.
-
Fresh Berries: Serve with a side of strawberries or raspberries for a burst of freshness and a delightful tartness that cuts through the sweetness.
-
Whipped Cream: A dollop of fluffy whipped cream adds lightness and creaminess, making each bite even more indulgent and satisfying.
-
Nutella Drizzle: Enhance the chocolate notes with a drizzle of Nutella, which adds an extra layer of richness and irresistible flavor.
-
Chilled Milk: For a traditional approach, a glass of cold milk complements the sweetness of the bars and enhances their chewy texture.
Create a dessert experience that’s both heartwarming and memorable!
Make Ahead Options
These Butterfinger Cookie Bars are a dream for meal prep enthusiasts! You can prepare the cookie base up to 24 hours in advance by mixing all the ingredients and pressing it into the baking dish. Simply cover the dish with plastic wrap and refrigerate until you’re ready to bake. For the frosting, you can whip that up 2-3 days ahead and store it in an airtight container in the refrigerator; just give it a quick mix before spreading it on the cooled bars. When ready to enjoy, bake the cookie base as directed, cool completely, frost, and slice. This way, you’ll have delicious homemade dessert ready with minimal effort on busy nights!
Storage Tips for Butterfinger Cookie Bars
Room Temperature: Store your Butterfinger Cookie Bars in an airtight container at room temperature for up to 5 days to keep them fresh and chewy.
Fridge: In warmer climates, consider refrigerating the bars to maintain their texture and flavor, but allow them to come to room temperature before serving for the best taste.
Freezer: For longer storage, you can freeze individual bars wrapped tightly in plastic wrap and then placed in a freezer bag for up to 3 months. Thaw them in the fridge before enjoying.
Reheating: If you prefer your bars warm, gently heat them in the microwave for about 10–15 seconds, being mindful not to overheat and melt the frosting.
Expert Tips for Butterfinger Cookie Bars
-
Cool Properly: Allow the bars to cool completely before frosting to achieve perfect layers. Frosting on warm bars can melt, creating a messy look.
-
Don’t Overbake: Keep a close eye on the baking time; the edges should only just start to pull away from the pan. Overbaking can lead to dry bars.
-
Chill for Cutting: For cleaner slices, chill your frosted Butterfinger Cookie Bars in the fridge for about 30 minutes before cutting; this helps maintain their shape.
-
Adjust Frosting Texture: If your peanut butter frosting turns out too stiff, add a little more milk to achieve your desired spreadability. For thicker frosting, simply add a bit more powdered sugar.
-
Experiment with Substitutes: Feel free to swap Butterfingers for other crunchy candies like Heath bars or Skor; this creates a delightful twist while keeping the essence of the cookie bars intact.
Butterfinger Cookie Bars Variations
Feel free to unleash your creativity and make these bars your own with delicious twists that will tantalize your taste buds!
- Candy Swap: Substitute Butterfingers with Reese’s or Milky Way for a different flavor and crunch. It’s a delightful way to change up the theme!
- Chocolate Chips: Add semi-sweet chocolate chips into the cookie dough for a rich and chocolatey surprise in every bite. Imagine the melty goodness!
- Espresso Elevated: Mix a hint of espresso powder into the peanut butter frosting for a sophisticated touch of coffee flavor that pairs beautifully with the sweetness.
- Nutty Addition: Stir in chopped nuts like pecans or walnuts into the cookie base for an added layer of texture and nuttiness. The crunch elevates the experience!
- Dairy-Free: Use coconut cream in place of butter in the frosting for a dairy-free option that’s still luscious and enjoyable. Coconut adds a tasty twist, too!
- Cookie Swap: Replace the cookie base with a chocolate cookie recipe for a double dessert delight. Rich chocolate meets creamy peanut butter—a match made in heaven!
- Spicy Kick: Add a pinch of cayenne pepper or chili powder to the cookie dough for a surprise kick in sweetness. It’s a bold twist that adventurous palates will love!
- Mini Bars: Press the dough into a mini muffin tin for bite-sized bars that are perfect for gatherings, making them easy to share and enjoy.
Once you’ve played with these variations, don’t forget to pair your creations with a delightful treat like a scoop of vanilla ice cream or try making a batch of Monster Cookie Dough dip for extra fun!
Butterfinger Cookie Bars Recipe FAQs
What type of Butterfinger should I use?
Absolutely! I recommend using regular Butterfinger bars for the best flavor and crunch. If you have other crunchy candies on hand, like Heath or Skor bars, they can be excellent substitutions, giving a slightly different but equally delicious taste!
How long can I store leftover Butterfinger Cookie Bars?
You can store your Butterfinger Cookie Bars in an airtight container at room temperature for up to 5 days. If you’re in a warmer climate, it’s best to refrigerate them to keep them fresh. Just make sure to let them come back to room temperature before serving for the full flavor experience!
Can I freeze Butterfinger Cookie Bars?
Very! Freezing your Butterfinger Cookie Bars is a wonderful option. Wrap each bar tightly in plastic wrap and then place them in a freezer bag to prevent freezer burn. They can be stored for up to 3 months. When you’re ready to enjoy, just thaw them in the fridge overnight, or let them sit at room temperature for about 30 minutes before serving.
What if my cookie bars turn out dry?
If you find your Butterfinger Cookie Bars are a bit dry, there are a few things to consider. First, make sure you’re precisely measuring the flour since too much can lead to dryness. Also, avoid overbaking; they should come out of the oven when the edges are just starting to pull away from the pan. If they do become dry, serving them slightly warm with a scoop of ice cream can really bring back the moisture!
Are Butterfinger Cookie Bars safe for those with nut allergies?
Keep in mind that these bars do include peanut butter in the frosting, making them unsuitable for someone with a peanut allergy. For nut-free alternatives, you can try using sunflower seed butter in place of peanut butter in the frosting. Just be sure to check the ingredient labels for any other allergens in the Butterfinger bars you choose to use.
Can I use gluten-free flour for this recipe?
Absolutely! You can easily adapt this recipe by substituting the all-purpose flour with a 1-to-1 gluten-free baking flour. Just make sure to check that the other ingredients you use are also gluten-free, particularly the baking soda and any candy components!
Decadent Butterfinger Cookie Bars You’ll Want to Devour
Ingredients
Equipment
Method
- Preheat your oven to 350°F (175°C) and prepare a 9x13 inch baking dish by lining it with parchment paper and greasing it.
- Cream together 1 cup of softened butter, ½ cup granulated sugar, and ½ cup light brown sugar until light and fluffy. Add 2 large eggs and 1 teaspoon vanilla extract; mix well. Gradually add 2 cups flour, ½ teaspoon salt, and 1 teaspoon baking soda; fold in ½ cup chopped Butterfinger pieces.
- Spread the dough evenly into the baking dish and bake for approximately 25 minutes. The edges should be golden brown.
- Allow the bars to cool in the pan for 20-30 minutes before frosting.
- In a separate bowl, beat together ½ cup of butter and ½ cup peanut butter until smooth. Gradually mix in 1 cup powdered sugar and 1 tablespoon milk until fluffy.
- Spread the peanut butter frosting evenly over the cooled cookie bars and sprinkle with remaining chopped Butterfinger pieces.
- Refrigerate the frosted bars for about 30 minutes before cutting into 16 squares and serving.
Leave a Reply