
The aroma wafting through my kitchen was simply irresistible, reminiscent of cozy afternoons spent with family and friends. These Quick and Easy Biscoff Rolls capture that essence perfectly, blending the luxurious caramel notes of Biscoff spread into soft, fluffy rolls that are sure to make your taste buds dance. What I love most about this recipe is its impressive speed—taking just over an hour from start to finish—and the satisfaction of creating a delightful dessert without too much fuss. Whether you’re treating yourself or impressing guests, these rolls are a crowd-pleaser that never fail to lift spirits. With endless variations, like adding fruits or even a twist of cinnamon, the possibilities are as tempting as the result. Are you ready to turn your kitchen into a haven of warmth and sweetness? Let’s dive in!
Why are Biscoff Rolls a Must-Try?
Irresistible Aroma: The heavenly scent of freshly baked Biscoff rolls will have everyone flocking to the kitchen.
Quick Preparation: In just over an hour, you can craft these delightful treats, perfect for spontaneous cravings or surprise guests.
Endless Variations: From adding fruits to crafting classic cinnamon rolls, the options are limited only by your imagination!
Crowd-Pleasing Treat: Designed to impress, these rolls are a hit at brunches or family gatherings. Perfect to serve with a cup of coffee!
Vegetarian-Friendly: This recipe caters to a variety of dietary preferences, inviting everyone to indulge in its deliciousness.
Biscoff Rolls Ingredients
For the Dough
• Yeast – Provides leavening for the rolls; use instant quick-dry yeast for a faster rise.
• Soy Milk – Adds moisture and softness to the dough; can be substituted with any non-dairy milk or regular milk.
• Sugar (White Granulated) – Sweetens the dough and filling; brown sugar can be used for a deeper flavor.
• Butter (Melted + Extra) – Adds richness to the dough; use vegan butter for a dairy-free option.
• Flour (All-purpose) – The main structure of the rolls; whole wheat or gluten-free blends could be tested, but may change texture.
• Salt – Balances the sweetness and enhances flavor.
For the Filling
• Biscoff Spread – Provides filling and flavor; can substitute with any similar cookie spread for these delicious Biscoff rolls.
• Cinnamon Powder – Adds warmth and spice to the filling; use freshly ground for the best flavor.
For the Topping
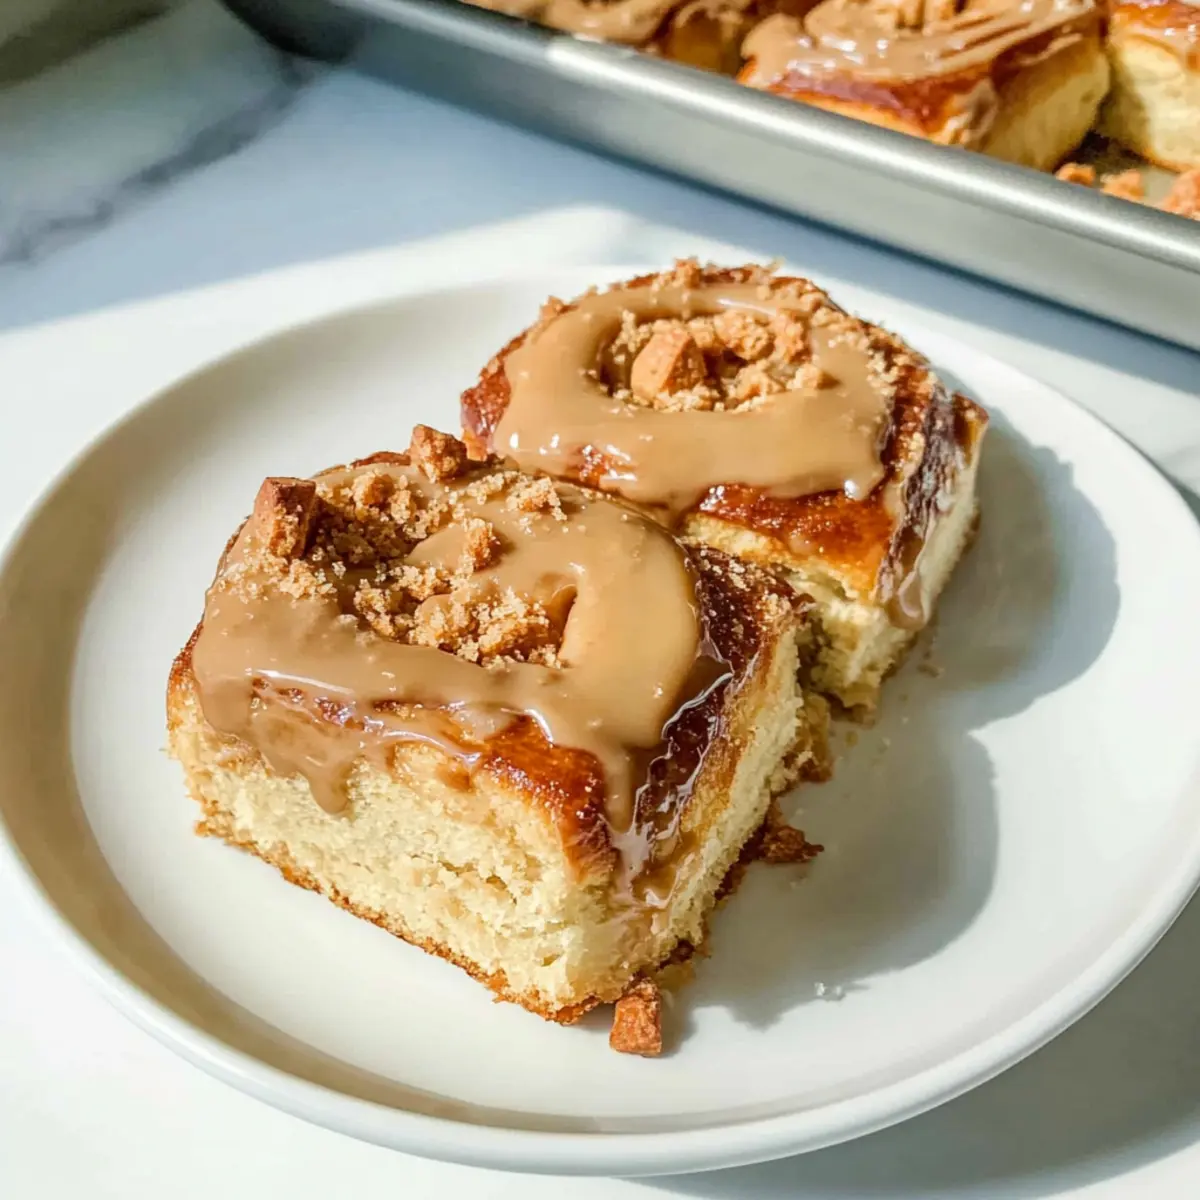
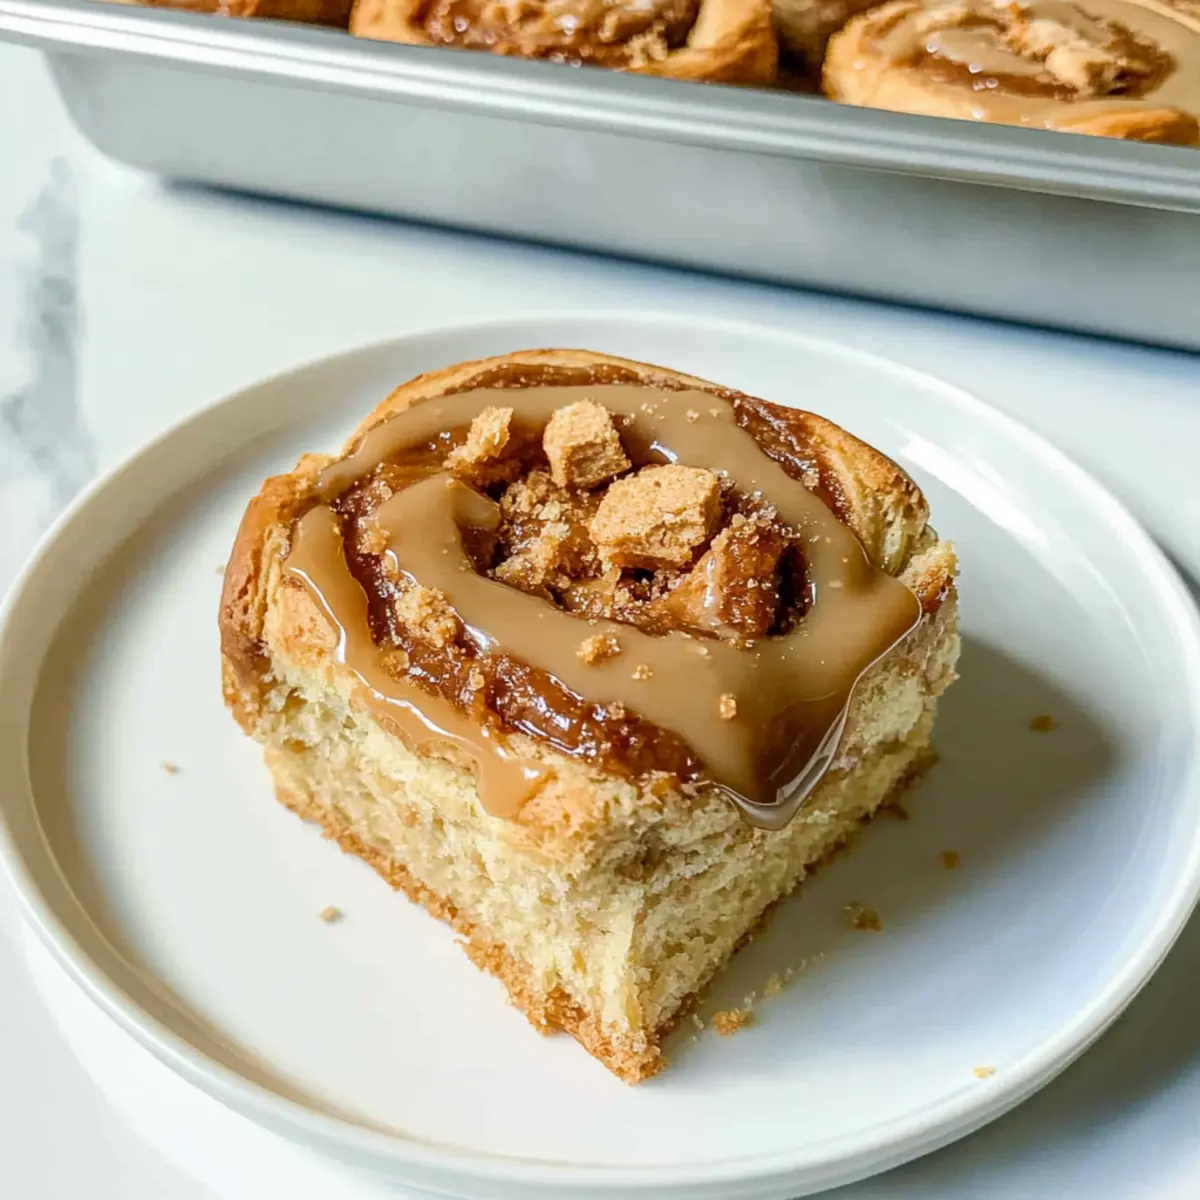
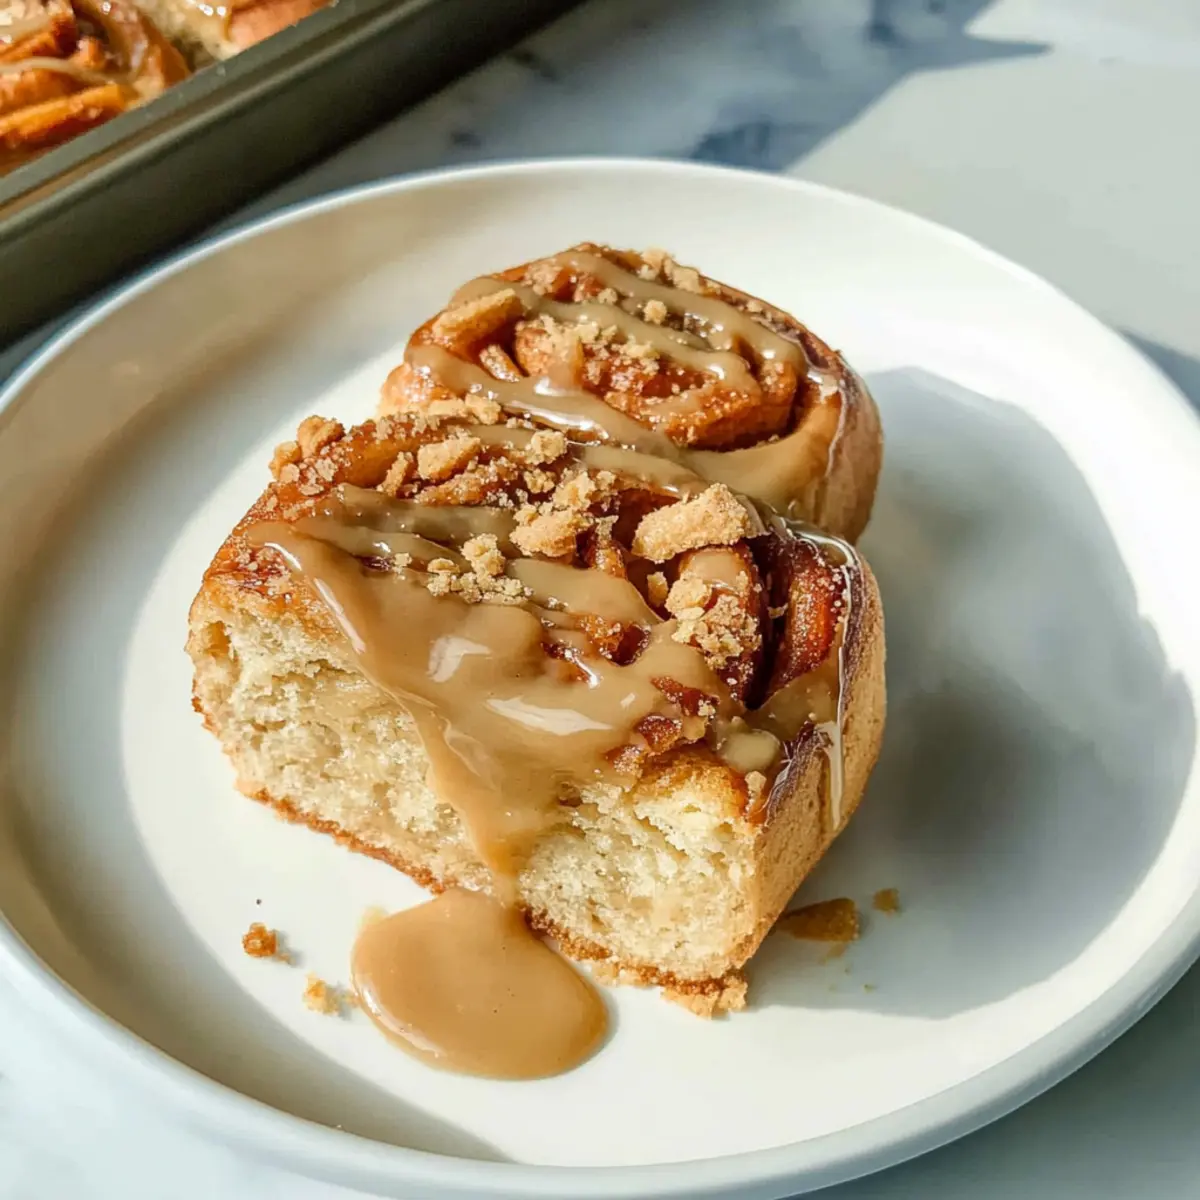
• Crushed Biscoff Biscuits – For topping, adds crunch and flavor; can substitute with any crushed cookies.
Step‑by‑Step Instructions for Biscoff Rolls
Step 1: Prepare the Dough
In a small saucepan, gently warm ¾ cup of soy milk until it’s lukewarm, then whisk in 2 tablespoons of sugar and 1 tablespoon of instant yeast. Allow this mixture to sit for 5 minutes, until it becomes frothy. In a mixing bowl, combine 2 tablespoons of melted butter, 3 cups of all-purpose flour, and ½ teaspoon of salt. Gradually add the yeast mixture, stirring until a dough forms, then knead for about 5-7 minutes on a lightly floured surface until smooth and elastic.
Step 2: Let the Dough Rise
Place the kneaded dough in a greased mixing bowl, cover it with a clean kitchen towel, and let it rise in a warm area for about 30 minutes. The dough should double in size during this time. Keep an eye on it; it should feel soft and slightly springy when you gently press a finger into it, indicating it’s perfectly fluffy and ready for the next step of making Biscoff rolls.
Step 3: Preheat the Oven
While the dough is rising, preheat your oven to 180°C (356°F). This ensures it’s ready to bake the rolls as soon as they’re formed. An adequately preheated oven is key for achieving that lovely golden-brown finish on your Biscoff rolls. Gather your baking trays and line them with parchment paper or grease them lightly.
Step 4: Shape the Dough
Once the dough has risen, turn it out onto a floured surface and roll it into a rectangle about 2 cm thick. Spread a generous layer of Biscoff spread over the surface, then sprinkle with a mixture of cinnamon and sugar to taste. Carefully roll the dough from one long edge to the other, creating a tight log. Use a sharp knife to slice the log into equal pieces, aiming for about 8-12 rolls, depending on your preferred size.
Step 5: Arrange and Bake
Place the sliced Biscoff rolls on your prepared baking tray, leaving a bit of space between each for expansion. Cover them again with a towel and let them rise for 15-20 minutes more. Once they’ve puffed up slightly, bake the rolls in your preheated oven for about 25 minutes, or until they turn golden brown and your kitchen is filled with an irresistible aroma.
Step 6: Finish with Toppings
After removing the Biscoff rolls from the oven, let them cool for a few minutes. Melt a little more Biscoff spread and drizzle it generously over the top of the warm rolls. For an added crunch, sprinkle crushed Biscoff biscuits on top. These finishing touches will enhance the flavor and make your Biscoff rolls look truly delightful before serving.
Biscoff Rolls Variations & Substitutions
Feel free to unleash your culinary creativity with these tasty variations that will elevate your Biscoff rolls even further!
-
Nutella: Swap Biscoff for Nutella for a chocolate lover’s dream. A rich and gooey surprise awaits inside every roll!
-
Fruit-Forward: Add chopped apples, pears, or bananas to the filling for a fresh twist. This will create a delightful contrast with the sweet Biscoff goodness.
-
Classic Cinnamon: Replace the Biscoff spread with a cinnamon-sugar filling. It’s a nostalgic and comforting variation that pairs beautifully with a warm drink.
-
Vegan Twist: Use plant-based butter and any non-dairy milk for a completely vegan version of these decadent rolls. Enjoy the same delightful flavor without compromising on dietary choices.
-
Spicy Kick: Mix in a touch of cayenne or chili powder with the cinnamon for a surprising heat level that complements the sweetness. This bold addition gives these rolls a unique flavor twist!
-
Nutty Crunch: Incorporate chopped walnuts or pecans into the filling for an extra layer of texture. The nutty flavor beautifully complements the soft, fluffy rolls.
-
Gluten-Free Option: Experiment with gluten-free flour blends to create a gluten-free version. Just be mindful that the texture may vary slightly.
These variations not only enhance the flavor but also make the Biscoff rolls adaptable for different tastes and dietary needs. Whether you want a classic cinnamon roll experience or a rich chocolate delight, there’s a perfect twist waiting for you! For more inspiring ideas, feel free to check out our delicious classic cinnamon rolls and vegan baking tips.
Expert Tips for Biscoff Rolls
-
Lukewarm Milk: Ensure your soy milk is lukewarm (not hot) to properly activate the yeast, giving your Biscoff rolls the perfect rise.
-
Kneading Consistency: If your dough feels sticky during kneading, add a little flour at a time until it pulls away from the sides of the bowl.
-
Roll Tight: When shaping your dough, roll it as tightly as possible to keep the filling in and create those irresistible swirls in your Biscoff rolls.
-
Watch the Oven: Every oven is different; keep an eye on your rolls as they bake—look for a golden-brown color and a fragrant aroma to know they’re done.
-
Serve Warm: Enjoy your Biscoff rolls while still warm for the best texture and flavor; they’ll tantalize your taste buds and melt in your mouth!
What to Serve with Biscoff Rolls
Experience the perfect pairing that will elevate your Biscoff rolls into a delightful meal experience.
- Creamy Mashed Potatoes: This comforting side dish offers a smooth texture that contrasts beautifully with the soft Biscoff rolls.
- Fresh Fruit Salad: The sweetness of seasonal fruits brings a fresh, vibrant contrast to the rich flavors of the rolls. A splash of citrus adds brightness that enhances the enjoyment.
- Rich Hot Chocolate: A warm, indulgent drink that complements the caramel-like sweetness of the Biscoff spread, perfect for a cozy afternoon treat.
- Coffee or Espresso: The deep, rich notes of coffee balance the sweetness of the rolls, making it a classic, beloved pair for your brunch or snack time.
- Vanilla Ice Cream: A scoop of creamy vanilla ice cream on the side adds a luxurious touch, creating a heavenly dessert experience worthy of any occasion.
- Whipped Cream Topping: A light, fluffy dollop is the perfect addition to enhance the texture, and it can be infused with vanilla or a sprinkle of cinnamon for an extra kick.
- Caramel Sauce Drizzle: For those who crave extra sweetness, a drizzle of warm caramel sauce over the rolls elevates the indulgence to a whole new level!
Make Ahead Options
These delightful Biscoff Rolls are perfect for meal prep aficionados! You can prepare the dough and fill the rolls up to 24 hours in advance, storing them in the refrigerator to maintain freshness. After shaping the rolls, simply cover them tightly with plastic wrap and refrigerate. When you’re ready to bake, let them rise for about 20-30 minutes at room temperature before placing them in a preheated oven. For long-term storage, feel free to freeze the unbaked rolls for up to 3 months; just ensure they’re well wrapped. Baking them fresh will give you that same warm and gooey goodness, making it so much easier to enjoy homemade treats any day of the week!
How to Store and Freeze Biscoff Rolls
Room Temperature: Keep uneaten Biscoff rolls in an airtight container at room temperature for up to 2 days to maintain their softness and flavor.
Fridge: If you’d like your rolls to last longer, store them in the fridge for up to 5 days in an airtight container. Reheat in the microwave or oven for a warm treat.
Freezer: For longer storage, place cooled Biscoff rolls in an airtight freezer bag, separating layers with parchment paper. They will stay fresh for up to 3 months. Thaw overnight in the fridge and warm before serving.
Reheating: To revive your Biscoff rolls, pop them in the microwave for 10-15 seconds or warm in the oven at 180°C (356°F) until heated through, ensuring they maintain their delightful texture.

Biscoff Rolls Recipe FAQs
What type of yeast should I use for Biscoff rolls?
I highly recommend using instant quick-dry yeast for these Biscoff rolls, as it allows for a faster rise and is very easy to work with. Just mix it with your warm milk, sugar, and you’ll be good to go!
How should I store leftover Biscoff rolls?
Store uneaten Biscoff rolls in an airtight container at room temperature for up to 2 days. If you want them to last longer, keep them in the fridge for up to 5 days. Either way, just reheat them in the microwave or oven to bring back that fresh-baked softness!
Can I freeze Biscoff rolls? What’s the best way?
Absolutely! To freeze Biscoff rolls, allow them to cool completely after baking. Then, place them in an airtight freezer bag, separating layers with parchment paper. They can be stored for up to 3 months. When you’re ready to enjoy them, just thaw overnight in the fridge and warm them up before serving.
What if my dough is too sticky?
If your Biscoff rolls dough feels sticky while kneading, don’t worry! Simply add small amounts of flour, a tablespoon at a time, until it pulls away from the sides of your mixing bowl and feels smooth. This will help achieve the perfect dough consistency for those delightful rolls.
Are Biscoff rolls suitable for vegans or those with allergies?
Great question! You can easily make these rolls vegan by substituting the melted butter with vegan butter and using non-dairy milk, like soy or almond milk. Always check the packaging for allergens like nuts, gluten, or soy based on your dietary needs. Enjoy worry-free!
How can I tell if my dough has risen enough?
You’ll know your dough is ready when it has doubled in size, which should take about 30 minutes in a warm area. You can test this by gently pressing a finger into the risen dough; if it springs back slowly, you’re good to go!
Biscoff Rolls Recipe FAQs: there you have it!
Biscoff Rolls: Irresistibly Soft and Effortlessly Delicious
Ingredients
Equipment
Method
- In a small saucepan, warm ¾ cup of soy milk and whisk in 2 tablespoons of sugar and 1 tablespoon of instant yeast. Let sit for 5 minutes until frothy.
- In a mixing bowl, combine 2 tablespoons of melted butter, 3 cups of flour, and ½ teaspoon of salt. Gradually add yeast mixture and knead until smooth.
- Place dough in a greased bowl, cover, and let rise in a warm place for 30 minutes.
- Preheat oven to 180°C (356°F) while dough rises.
- Roll the risen dough into a rectangle, spread Biscoff spread, and sprinkle with cinnamon and sugar. Roll tightly and slice into 8-12 pieces.
- Place rolls on a baking tray, cover, and let rise for an additional 15-20 minutes before baking for 25 minutes.
- Cool slightly, drizzle with melted Biscoff spread, and sprinkle with crushed biscuits before serving.
Leave a Reply