
As I stood in my kitchen, a swirling aroma of chocolate began to fill the air, carrying a hint of nostalgia that transported me back to my childhood. The Matilda Chocolate Cake, aptly named for the whimsical spirit of Roald Dahl’s beloved tale, is my go-to recipe whenever I crave something chocolatey and decadent. This irresistibly moist fudge cake offers not only an easy and quick preparation method, but it’s also a guaranteed hit for gatherings—trust me, even the most discerning sweet tooth will rave about it! With options for dairy-free and gluten-free variations, you can cater to various dietary preferences without sacrificing flavor. Are you ready to embark on this delightful chocolate journey with me?
Why is This Cake So Irresistible?
Decadent Flavor: With rich cocoa and premium dark chocolate, this cake brings a burst of chocolatey goodness that will leave you craving more.
Versatile Options: Whether you prefer the classic version or want to try the Dairy-Free Version or gluten-free alternative, this recipe caters to all.
Quick Prep Time: Spend less time in the kitchen with an easy-to-follow process that leads to fantastic results in just over an hour.
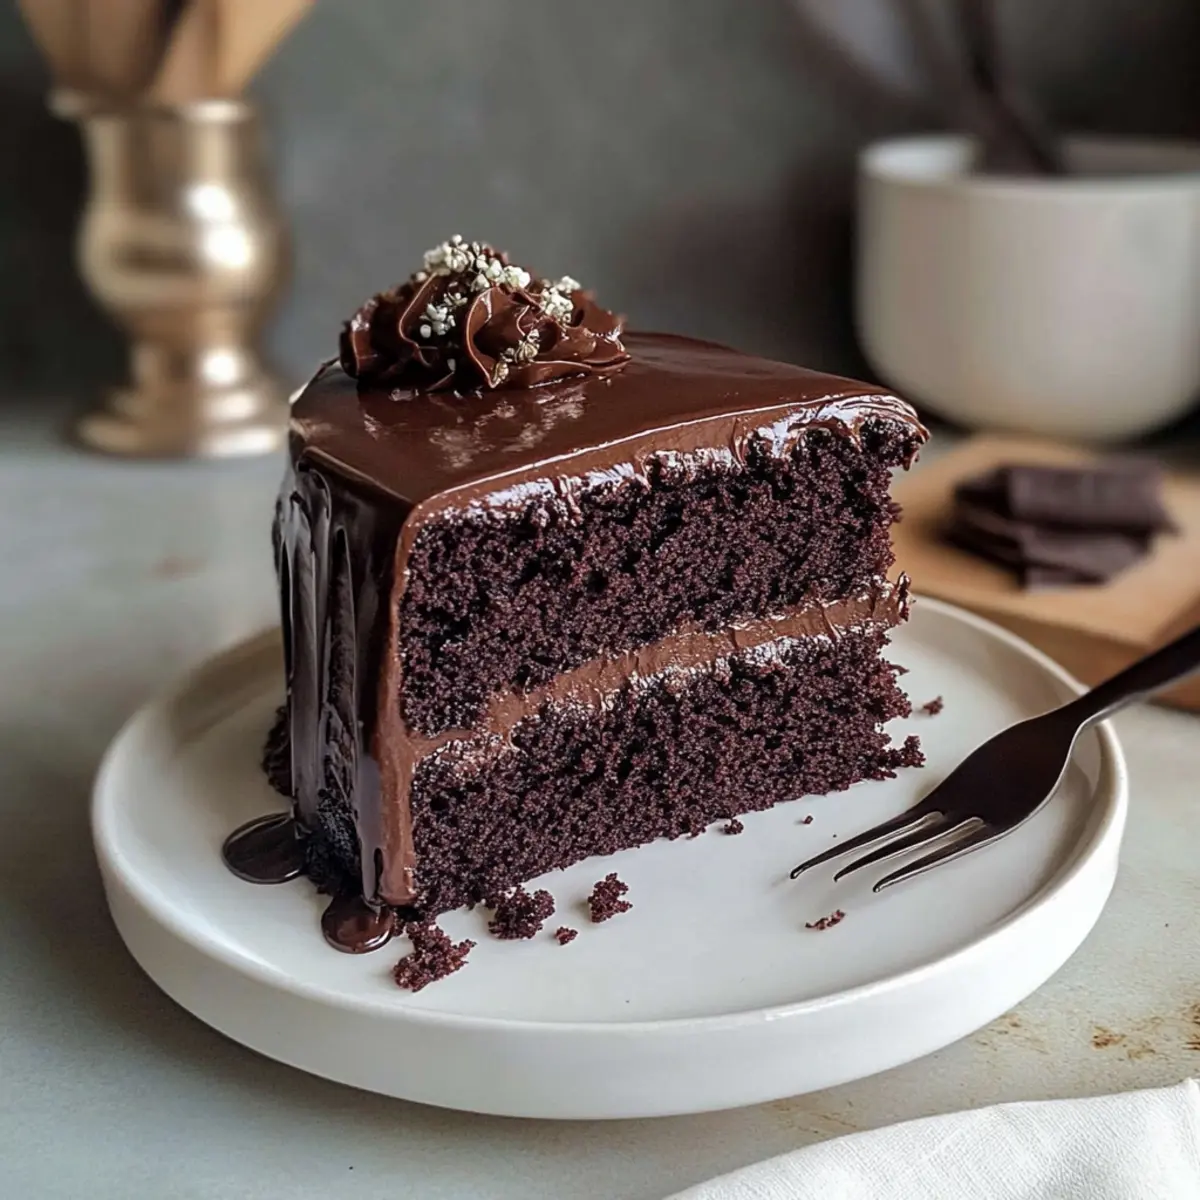
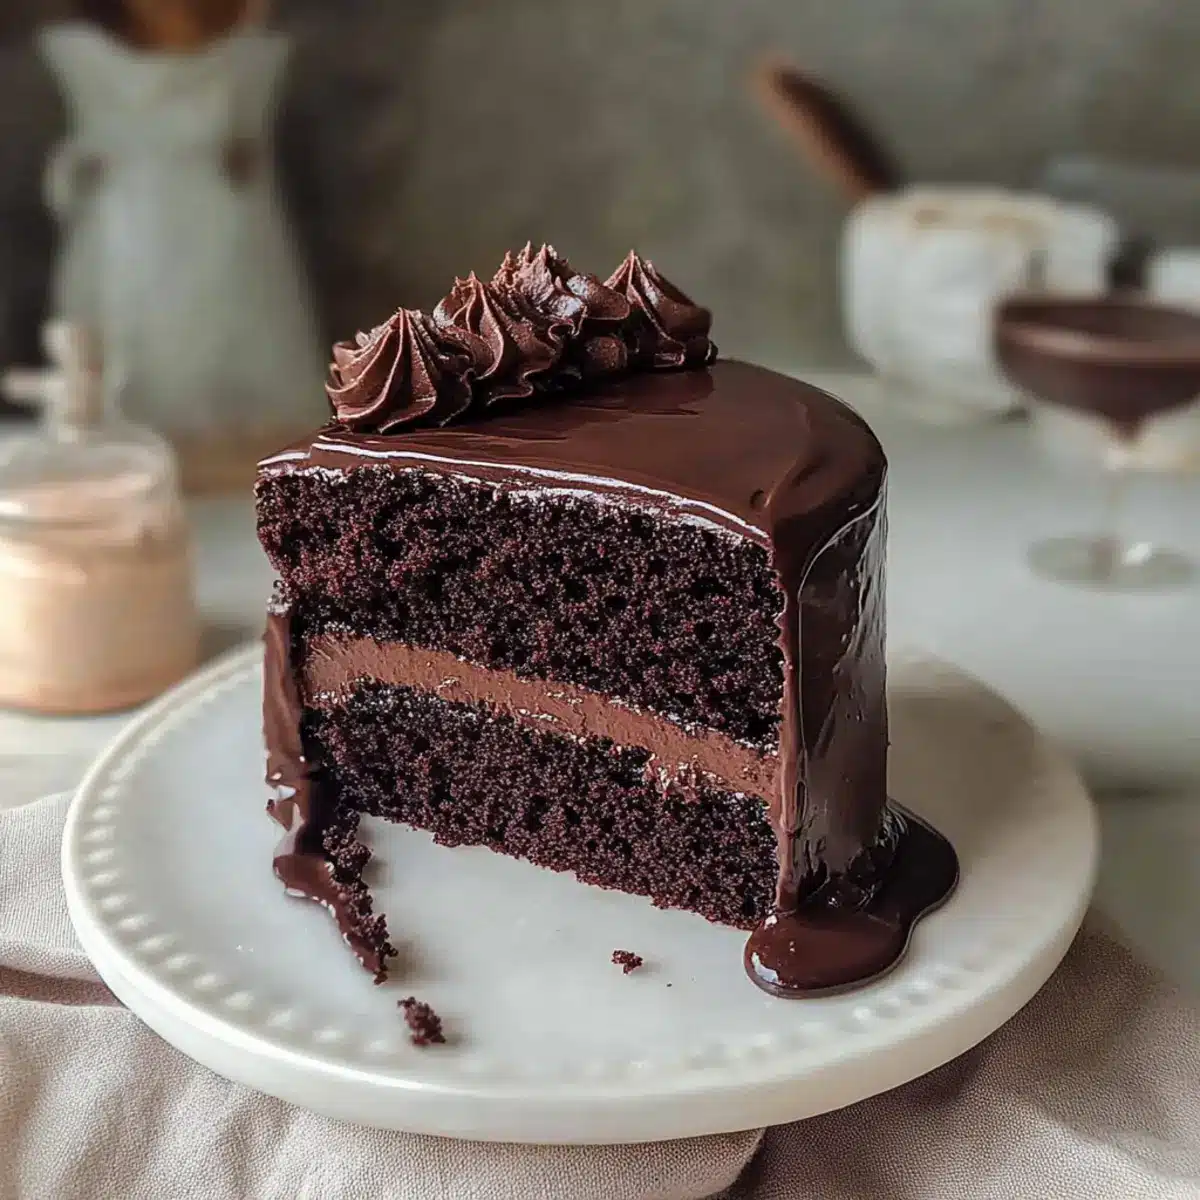
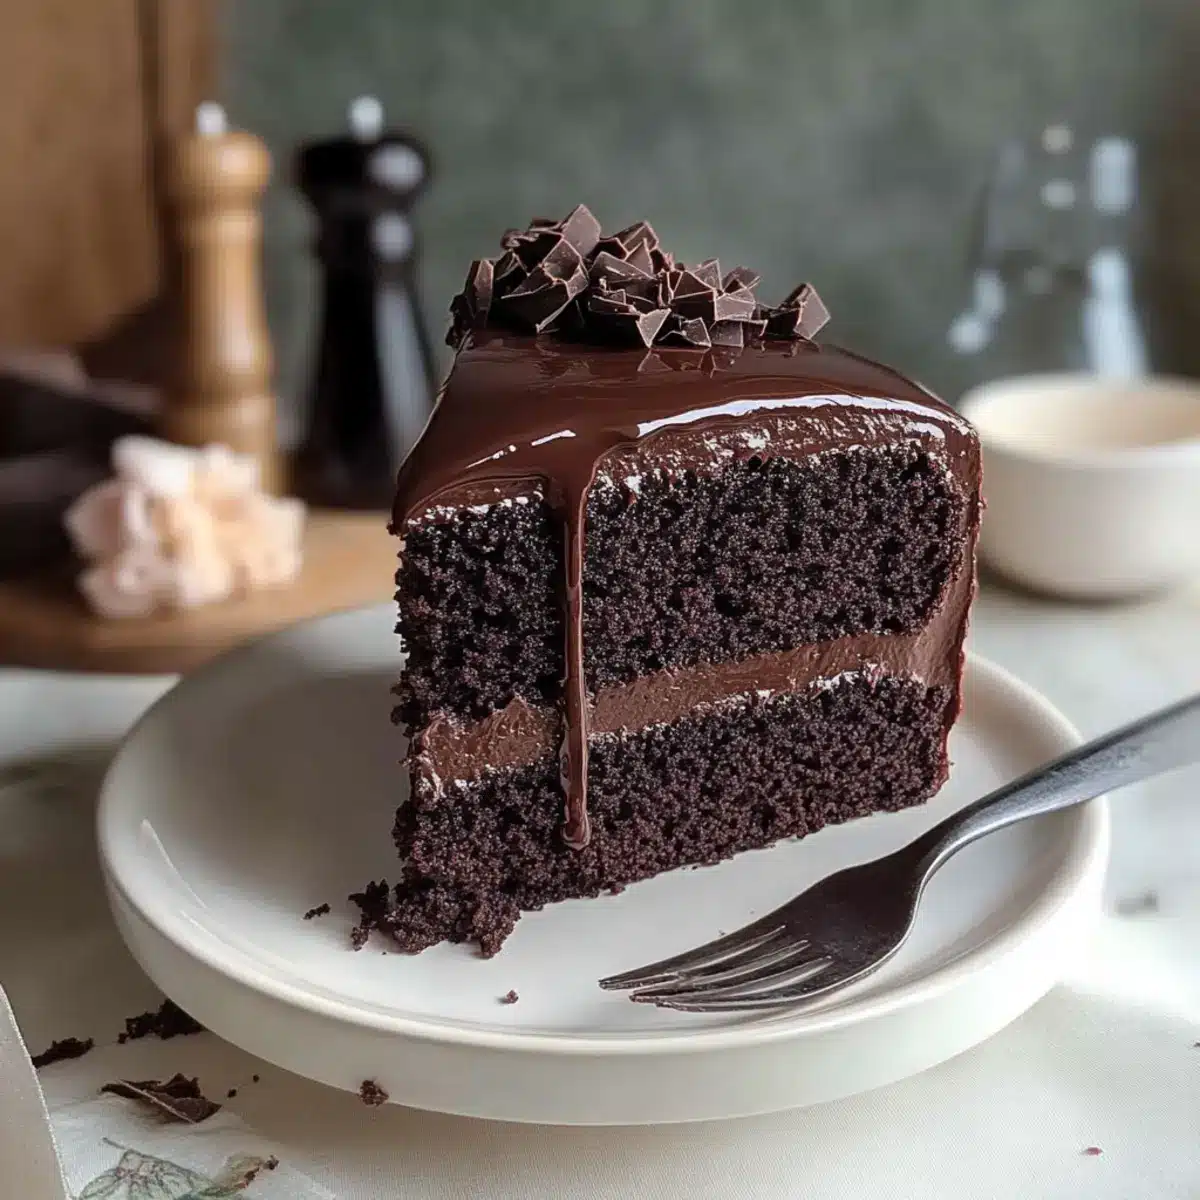
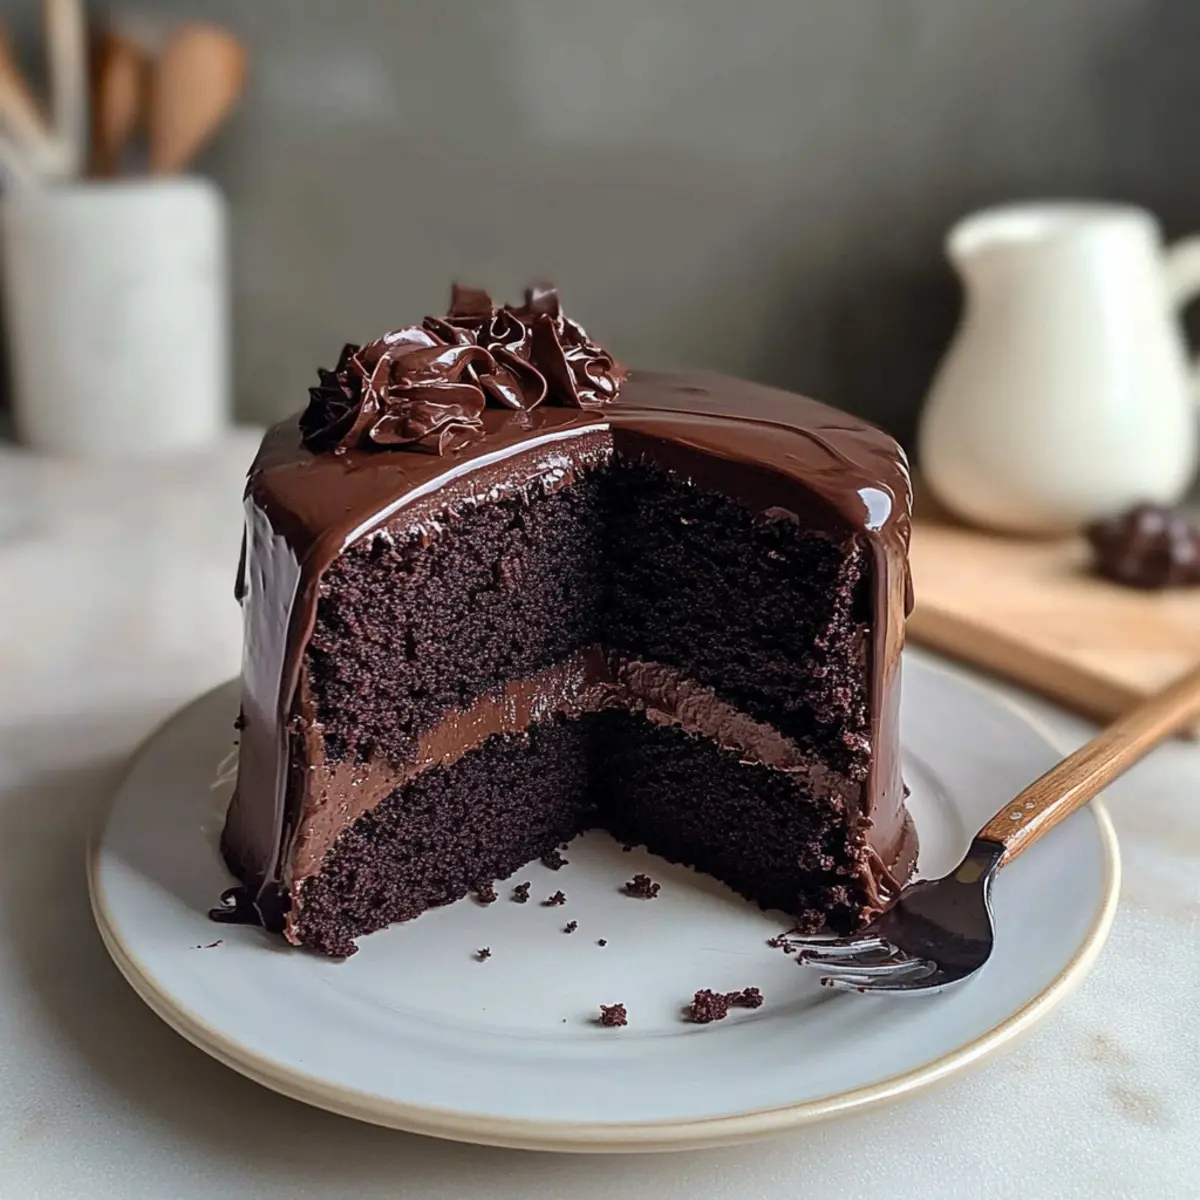
Impressive Texture: Each slice reveals a moist, fudgy consistency topped with a glossy fudge frosting, making it a showstopper for any gathering.
Crowd-Pleaser: Perfect for parties or just a cozy night in, everyone from kids to adults will be asking for seconds! Don’t forget to serve it warm with a scoop of vanilla ice cream for the ultimate treat!
Matilda Chocolate Cake Ingredients
For the Cake Batter
- Cocoa Powder – Use Dutch-processed for a richer chocolate flavor and sift to eliminate any lumps.
- Milk (Room Temperature) – A crucial ingredient for achieving that moist cake texture; always use it at room temperature.
- Hot Coffee – This enhances the chocolate flavor; make sure to brew it strong and don’t skip this step!
- Eggs (Room Temperature) – Essential for emulsifying the batter; you can quickly bring them to room temp using warm water.
- Dark Brown Sugar – Adds moisture and a subtle caramel undertone; pack it tightly to avoid a drier cake.
- Dark Chocolate – Used for melting the fudge frosting; chop into small pieces for even melting.
For the Fudge Frosting
- Cold Butter – Integrates flawlessly into hot fudge, giving it that glossy finish we all crave.
- Cornstarch – Ensures a smooth, velvety texture by preventing clumping in the frosting for your Matilda Chocolate Cake.
Enjoy baking this cake, and don’t forget to share your experience with friends and family!
Step‑by‑Step Instructions for Matilda Chocolate Cake
Step 1: Prepare Cocoa
Start by blooming the cocoa powder in hot coffee to awaken its rich chocolate flavor. In a medium bowl, pour the hot coffee over the sifted cocoa powder. Stir gently until well combined, then set it aside to cool slightly while you prepare other ingredients.
Step 2: Mix Dry Ingredients
In a large mixing bowl, sift together the cocoa powder, all-purpose flour, cornstarch, and baking powder. This step is vital as it removes lumps and ensures even distribution of the leavening agent. Once combined, create a well in the center for incorporating the wet ingredients later.
Step 3: Combine Wet Ingredients
In a separate bowl, beat the room-temperature eggs, milk, and dark brown sugar until the mixture is smooth and creamy. This process should take about 2-3 minutes with a hand mixer. Make sure the sugar is fully dissolved for a uniform texture in your Matilda Chocolate Cake.
Step 4: Blend Mixtures
Gradually add the dry ingredients into the wet mixture, stirring gently with a spatula or wooden spoon. Be careful not to overmix; you want a smooth batter that is slightly thick with visible bubbles. The batter should reach a consistent color without any dry flecks remaining.
Step 5: Bake
Preheat your oven to 350°F (175°C) and prepare your cake pans by greasing them and lining the bottoms with parchment paper. Pour the batter evenly into the prepared pans and bake for 35-40 minutes. They are done when a toothpick inserted in the center comes out clean, indicating a perfectly baked Matilda Chocolate Cake.
Step 6: Cool Completely
Once baked, remove the cake layers from the oven and let them cool in the pans for about 10 minutes. After that, carefully transfer them onto wire racks to cool completely. Ensure the layers are fully cooled before moving on to the frosting; this prevents the frosting from melting and sliding off.
Step 7: Make Frosting
While the cake layers cool, prepare the fudge frosting. Start by melting chopped dark chocolate in a heatproof bowl over simmering water or in the microwave in short bursts. After it’s melted, mix in cold butter and stir until smooth, then add any remaining frosting ingredients to achieve a glossy finish.
Step 8: Frost Layers
Once the cake layers are fully cooled, spread a generous layer of fudge frosting between them. Then, coat the top and sides with the remaining frosting using a spatula for an even finish. The Matilda Chocolate Cake is now beautifully frosted and ready to be savored by friends and family.
How to Store and Freeze Matilda Chocolate Cake
Room Temperature: Keep the frosted cake at room temperature for up to 2 days. Store it covered with a cake dome or plastic wrap to maintain freshness.
Fridge: If you want to extend its life, refrigerate the frosted cake in an airtight container for up to 5 days. This helps preserve its flavor and moisture.
Freezer: For longer storage, freeze unfrosted layers or individual slices wrapped tightly in plastic wrap and aluminum foil for up to 3 months.
Reheating: To enjoy your frozen slices, thaw them in the refrigerator overnight, and if desired, warm them gently in the microwave for 10-15 seconds before serving. The Matilda Chocolate Cake will still taste delightful!
Expert Tips for the Best Matilda Chocolate Cake
-
Room Temperature Ingredients: Always use room temperature ingredients, especially eggs and milk, to create a light, fluffy texture in your cake.
-
Avoid Overmixing: When blending the wet and dry ingredients, mix only until combined. Overmixing can result in a dense Matilda Chocolate Cake.
-
Proper Baking Time: Keep an eye on your cake while baking—start checking for doneness around 35 minutes. A toothpick should come out clean when it’s perfect!
-
Cooling is Key: Make sure your cake layers are completely cooled before frosting. Otherwise, the fudge may melt and slide off, ruining your beautiful creation.
-
Fudge Frosting Texture: Stir your frosting every 20 minutes while it cools to prevent hardening. You’ll want that silky, spreadable consistency!
What to Serve with Matilda Chocolate Cake
Savoring a slice of this rich chocolate delight can be even more delightful when paired with the perfect accompaniments.
-
Fresh Berries: Juicy raspberries or strawberries add a fresh, tangy contrast to the cake’s rich flavors, brightening every bite. Their tartness enhances the chocolate, making it a winning combination.
-
Vanilla Ice Cream: A scoop of creamy vanilla ice cream melts beautifully against the warm cake, creating a delightful temperature and flavor contrast. The vanilla harmonizes perfectly with the intense chocolate, making each bite heavenly.
-
Salted Caramel Sauce: Drizzling salty-sweet caramel over a slice of Matilda Chocolate Cake adds an extra layer of indulgence, enhancing the rich flavor and bringing out the fudgy notes. The gooey texture is irresistibly enticing!
-
Espresso or Coffee: A robust cup of coffee or a shot of espresso balances the sweetness of the cake while elevating its chocolate taste. Sipping on warm coffee enhances the experience, making it a cozy pairing.
-
Whipped Cream: Light, airy whipped cream complements the dense cake, adding a soft texture and neutral sweetness that feels like a hug in dessert form. A dollop on top transforms every slice into a work of art.
-
Chocolate Covered Strawberries: For the ultimate chocolate lover’s indulgence, serve chocolate-covered strawberries alongside the cake. They echo the cake’s flavors while adding a surprising crunch and freshness.
-
Mint Tea: A soothing cup of mint tea provides a refreshing finish to the chocolate decadence, cleansing the palate perfectly after enjoying your slice. The mint adds a delightful twist that can be surprisingly uplifting!
Matilda Chocolate Cake Variations
Get creative with your Matilda Chocolate Cake by exploring these delightful twists that enhance its flavor and cater to various dietary preferences!
-
Dairy-Free Version: Replace regular milk with almond or oat milk, and use vegan butter for the fudge frosting. This way, everyone can indulge without worry!
-
Gluten-Free Alternative: Swap out all-purpose flour for a 1:1 gluten-free baking blend. Your gluten-sensitive friends will thank you, and they won’t even notice the difference!
-
Mocha Variation: Add an extra tablespoon of instant coffee to the batter for a rich mocha flavor. This splendid addition makes it perfect for coffee lovers looking for a chocolatey kick.
-
Orange Chocolate Twist: Brighten the cocoa delight by mixing in two teaspoons of fresh orange zest. It’s a refreshing twist that will leave your taste buds dancing!
-
Nutty Facelift: Fold in a half cup of toasted walnuts or pecans into the batter for an extra crunch. This creates a wonderful contrast to the cake’s velvety softness, making each bite incredibly satisfying.
-
Minty Fresh: Add a few drops of mint extract to the frosting for a refreshing mint chocolate version! It’s like enjoying a chocolate peppermint treat that’s sure to get everyone’s excitement buzzing.
-
Decadent Layer Cake: Instead of baking two layers, try a smaller, incremental approach and bake four layers! Stack them up with frosting in between each to create a stunning showpiece for gatherings.
-
Spiced Sensation: For a flavorful twist, include a teaspoon of cinnamon or Nutmeg in the dry ingredients. This adds a warm spice that harmonizes beautifully with the rich chocolate.
For even more delicious ideas, don’t miss out on our delightful Strawberry Shortcake Bars that are perfect for the summer season or the indulgent Chocolate Pretzel Cupcakes that pair chocolate with the perfect crunch!
Make Ahead Options
These Matilda Chocolate Cake make-ahead tips are perfect for busy home cooks looking to save time without compromising on flavor! You can bake the cake layers up to 2 days in advance. Simply cool them completely, wrap tightly in plastic wrap, and refrigerate to maintain their moist texture. If you’re looking to prep even further ahead, consider making the fudge frosting up to 3 days in advance; store it in an airtight container in the fridge. When you’re ready to indulge, simply bring the frosting to room temperature and give it a quick stir to restore its creamy consistency before frosting the chilled cake layers. This way, you can enjoy your delicious homemade Matilda Chocolate Cake with minimal effort on the day of serving!
Matilda Chocolate Cake Recipe FAQs
What type of cocoa powder should I use for this cake?
I recommend using Dutch-processed cocoa powder for a rich, deep chocolate flavor in your Matilda Chocolate Cake. Sifting it before use is essential to eliminate any lumps that might ruin the texture of the batter.
How should I store my Matilda Chocolate Cake?
For short-term storage, keep the frosted cake at room temperature for up to 2 days, covered with a cake dome or plastic wrap to maintain its moisture. If you need to keep it longer, refrigerate it in an airtight container for up to 5 days for freshness.
Can I freeze the Matilda Chocolate Cake?
Absolutely! For long-term storage, wrap unfrosted layers or individual slices tightly in plastic wrap and then in aluminum foil. This is best done for up to 3 months to preserve flavor and texture. When you’re ready to enjoy, thaw the cake in the refrigerator overnight.
What if my cake layers sink in the middle?
This can happen if the batter is overmixed or if you had an issue with leavening agents. Be sure to gently blend ingredients until just combined. If your cake sinks after baking, it may need to bake for a bit longer. Always check for doneness with a toothpick, ensuring it comes out clean.
Are there dairy-free options for this recipe?
Yes, you can easily make a dairy-free version of the Matilda Chocolate Cake! Just replace the regular milk with almond or oat milk, and use vegan butter for the frosting. Both substitutions maintain the cake’s rich flavor and deliciousness.
Can I add a twist to the chocolate flavor?
Absolutely, you can enhance the experience! For a mocha flavor, add an additional tablespoon of instant coffee to the batter. Alternatively, try adding two teaspoons of orange zest for a refreshing twist that complements the chocolate beautifully.
Matilda Chocolate Cake: An Irresistibly Fudgy Delight
Ingredients
Equipment
Method
- Start by blooming the cocoa powder in hot coffee to awaken its rich chocolate flavor. In a medium bowl, pour the hot coffee over the sifted cocoa powder. Stir gently until well combined, then set it aside to cool slightly.
- In a large mixing bowl, sift together the cocoa powder, all-purpose flour, cornstarch, and baking powder. Create a well in the center for incorporating the wet ingredients later.
- In a separate bowl, beat the room-temperature eggs, milk, and dark brown sugar until smooth and creamy for about 2-3 minutes.
- Gradually add the dry ingredients into the wet mixture, stirring gently to combine without overmixing.
- Preheat your oven to 350°F (175°C) and prepare your cake pans. Pour the batter evenly into the prepared pans and bake for 35-40 minutes.
- Once baked, let the cake layers cool in the pans for about 10 minutes before transferring them to wire racks to cool completely.
- Prepare the fudge frosting by melting chopped dark chocolate and then mixing in cold butter until smooth.
- Once layers are cooled, frost between them with a generous layer of fudge frosting and coat the top and sides evenly.
Leave a Reply