
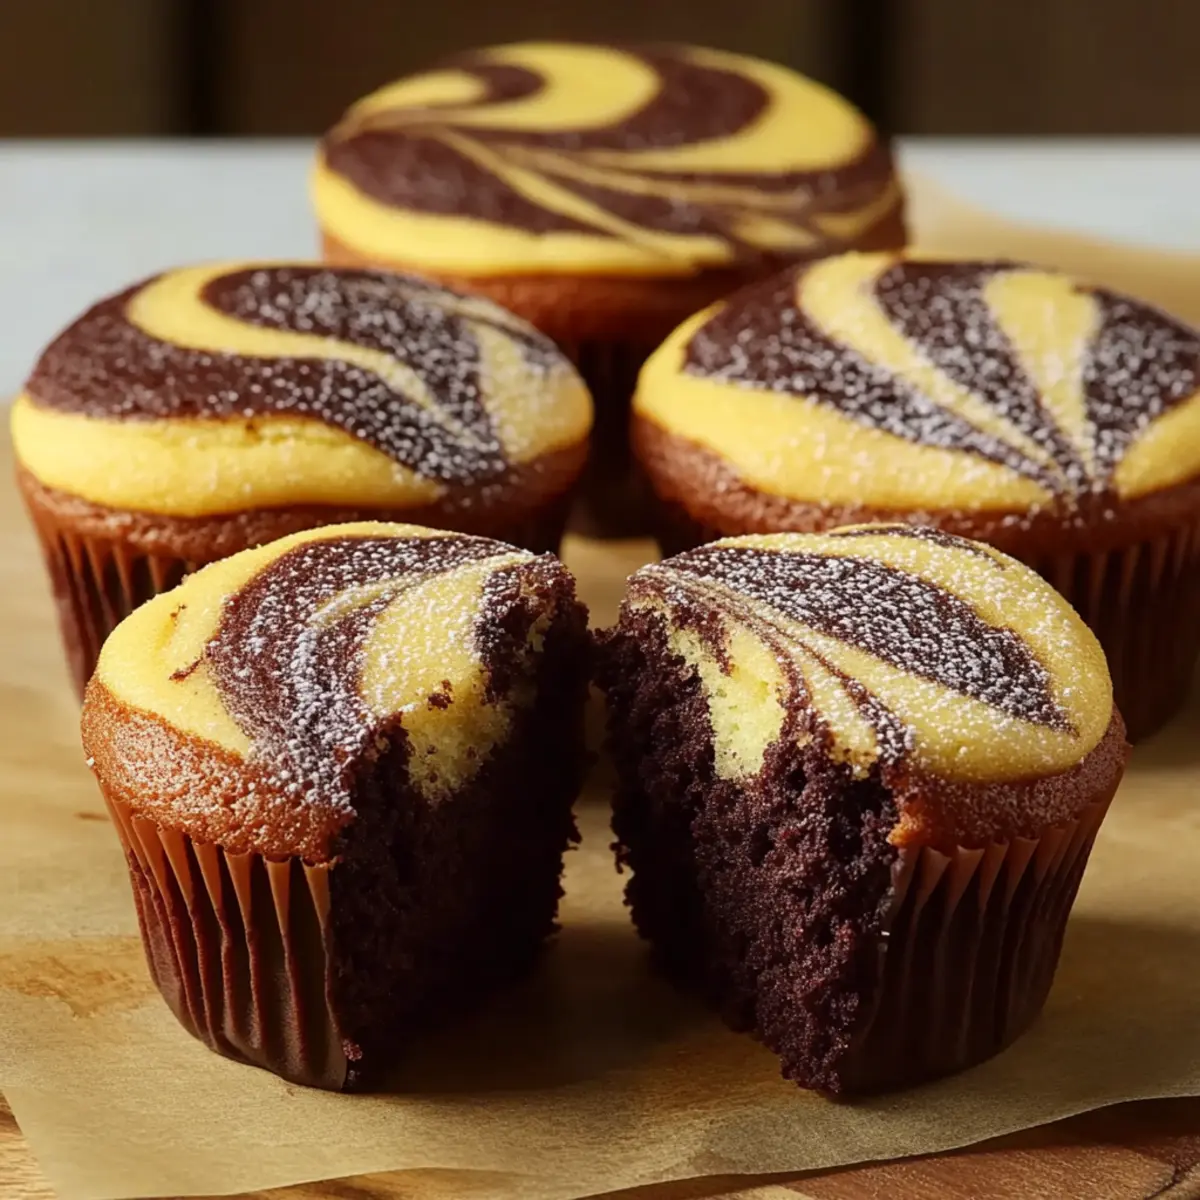
The rich aroma of freshly baked cupcakes wafts through my kitchen, instantly transporting me to simpler times filled with sweet memories. Today, I’m excited to share my recipe for Chocolate Marble Cupcakes—a delightful treat that marries soft, fluffy vanilla batter with deep, rich chocolate swirls. These cupcakes aren’t just visually stunning; they offer a perfectly balanced flavor that makes them suitable for any occasion, from birthday celebrations to cozy family gatherings. Best of all, they’re easy to make, allowing you to whip them up in no time, thrilling both kids and adults alike. Have you ever wondered how the perfect marble effect can turn an everyday dessert into a showstopper? Let’s dive into these perfectly irresistible Chocolate Marble Cupcakes and discover the flavors that await!
Why are Chocolate Marble Cupcakes a must-try?
Deliciously Unique: The harmony of vanilla and chocolate batters creates a flavor experience that never fails to impress!
Easy to Make: With a simple process, you don’t need to be a baking expert to achieve perfection.
Eye-Catching Presentation: The marbled appearance is not only stunning but also wildly appealing at any gathering.
Versatile for Any Occasion: Perfect for celebrations like birthdays or casual family dinners, these treats fit right in on any dessert table.
Looking for more delightful ideas? Pair these with some Strawberry Shortcake Cupcakes for a colorful dessert spread that everyone will love!
Chocolate Marble Cupcake Ingredients
• Here’s what you need for creating these delicious Chocolate Marble Cupcakes:
For the Cupcake Batter
- All-purpose flour – Provides structure; cake flour can be used for a lighter texture.
- Baking powder – Acts as a leavening agent for fluffiness; make sure it’s fresh for the best results.
- Salt – Enhances flavor; using kosher salt can offer a different texture.
- Unsalted butter – Adds richness and moisture; substitute with half oil for a softer crumb.
- Granulated sugar – Adds sweetness and moisture; replace with brown sugar for a deeper flavor.
- Eggs – Provide structure and moisture; using room temperature eggs helps with better mixing.
- Vanilla extract – Enhances flavor; for a twist, substitute with almond extract.
- Milk – Contributes to moisture and richness; buttermilk works beautifully for extra tenderness or opt for a non-dairy version.
For the Chocolate Batter
- Cocoa powder – Adds color and flavor; make sure it’s unsweetened for the right balance.
- Hot milk or hot water – Activates the cocoa powder; using coffee can intensify the chocolate flavor.
Remember, these Chocolate Marble Cupcakes are perfect for celebrating the joys of homemade desserts!
Step‑by‑Step Instructions for Chocolate Marble Cupcakes
Step 1: Preheat and Prepare
Begin by preheating your oven to 350°F (175°C). While the oven warms up, line a muffin tin with cupcake liners to prepare for your delightful Chocolate Marble Cupcakes. This step is crucial, as it ensures even baking and easy removal of the cupcakes once they’re done.
Step 2: Mix Dry Ingredients
In a medium bowl, whisk together the all-purpose flour, baking powder, and salt until well combined. This mixing helps aerate the flour and incorporate the leavening agent. Set this bowl aside for now as you prepare to create the buttery cupcake batter in the next step.
Step 3: Cream Butter and Sugar
In a large mixing bowl, cream the softened unsalted butter and granulated sugar together using an electric mixer on medium speed for about 3-5 minutes, until the mixture is light and fluffy. The goal here is to achieve a pale, creamy texture that will add richness to your Chocolate Marble Cupcakes.
Step 4: Add Eggs and Vanilla
Add the eggs, one at a time, to the creamed butter and sugar mixture, mixing well after each addition. Follow this by pouring in the vanilla extract. Continue mixing until the ingredients are fully incorporated to create a smooth batter, which forms the base for the delicious flavors of your cupcakes.
Step 5: Combine Ingredients
Gradually add the dry ingredient mixture and the milk to the wet ingredients, alternating between the two. Begin and end with the dry ingredients, mixing until just combined. This gentle mixing prevents overworking the batter, ensuring your cupcakes will have a tender crumb.
Step 6: Prepare Chocolate Batter
In a small bowl, mix the cocoa powder with hot milk or hot water, stirring until smooth. Take half of the vanilla cupcake batter and gently fold in the prepared chocolate mixture. This will create the rich chocolate batter for the marble effect in your Chocolate Marble Cupcakes.
Step 7: Fill Cupcake Liners
Spoon the vanilla batter into the lined muffin tin, filling each liner about halfway. Then, add a spoonful of the chocolate batter on top of the vanilla layer. Use a toothpick or skewer to gently swirl the two batters together, creating a beautiful marbled effect without fully blending them.
Step 8: Bake and Cool
Place the muffin tin in the preheated oven and bake for 18-22 minutes, or until a toothpick inserted into the center of a cupcake comes out clean. Once baked, allow the cupcakes to cool in the tin for about 5 minutes before transferring them to a wire rack to cool completely. Letting them cool ensures the perfect texture for your treats.
Expert Tips for Chocolate Marble Cupcakes
-
Use Fresh Ingredients: Ensure your baking powder is fresh for the best rise. Old leavening agents can lead to dense cupcakes.
-
Room Temperature Ingredients: Bring eggs and milk to room temperature before mixing for better emulsification and a lighter texture in your Chocolate Marble Cupcakes.
-
Don’t Overmix: Stirring too much can lead to tough cupcakes; mix until just combined for a tender crumb.
-
Perfect Swirl Technique: Use a toothpick to swirl batters gently. Over-swirl can muddy the colors, losing that beautiful marbled effect.
-
Check Oven Temperature: An oven thermometer can help you ensure your oven isn’t too hot or too cold, leading to evenly baked cupcakes.
How to Store and Freeze Chocolate Marble Cupcakes
Room Temperature: Keep unfrosted Chocolate Marble Cupcakes in an airtight container at room temperature for up to 3 days for the best flavor and texture.
Fridge: Store frosted cupcakes in the refrigerator for up to a week, ensuring they’re covered to maintain freshness and prevent drying out.
Freezer: For long-term storage, freeze unfrosted cupcakes in a single layer on a baking sheet, then transfer to a freezer-safe container, where they can last up to 3 months.
Reheating: To enjoy frozen cupcakes, thaw overnight in the fridge, then bring to room temperature before serving for a delightful taste reminiscent of fresh-baked treats.
Chocolate Marble Cupcakes Variations
Invite your taste buds on a delightful journey with these wonderful ways to customize your Chocolate Marble Cupcakes!
-
Espresso Boost: For a richer chocolate flavor, mix in ½ teaspoon of espresso powder to the cocoa. This will awaken the chocolate and add depth to every delicious bite.
-
Mini Marvels: Transform your cupcakes into bite-sized treats by using a mini muffin tin and reducing the baking time to 10–12 minutes. Perfect for parties or lunch boxes!
-
Frosting Twist: Swap traditional buttercream for a ganache top. Melt chocolate with cream and pour over cooled cupcakes for a luxurious finish that’s utterly indulgent.
-
Fruit Swirl: Incorporate a fruity twist by mixing in some raspberry or strawberry puree into the chocolate batter. This fruity contrast adds a refreshing pop to the rich chocolate!
-
Nutty Surprise: Fold in chopped walnuts or pecans into the chocolate batter for added crunch and nuttiness. The texture adds an exciting contrast to the softness of the cupcakes.
-
Sprinkle of Fun: For a festive touch, top the cupcakes with colorful sprinkles or edible glitter after frosting. They’ll be a hit at birthday parties or any celebration!
-
Gluten-Free Delight: Substitute all-purpose flour with your favorite gluten-free blend. This way, everyone can enjoy these delectable treats without compromising on taste!
-
Saucy Indulgence: Drizzle warm caramel or chocolate sauce over the top before serving for a melted treat that takes these cupcakes to another level of deliciousness.
Craving more fabulous ideas? Check out my Peppermint Kiss Chocolate Cookies for another festive treat that’s sure to please!
Make Ahead Options
These Chocolate Marble Cupcakes are a wonderful option for busy home cooks looking to save time! You can prepare the batter up to 24 hours in advance by mixing the vanilla and chocolate batters separately and storing them in airtight containers in the refrigerator. Just be sure to give the batter a gentle stir before using, as refrigeration can cause it to thicken slightly. Additionally, you can bake the cupcakes up to 3 days in advance; let them cool completely, then store them in an airtight container at room temperature. When ready to enjoy, simply frost your cupcakes and serve—they’ll be just as delicious and moist as if they were freshly baked!
What to Serve with Chocolate Marble Cupcakes
Elevate your dessert experience by pairing these delightful treats with complementary sides that enhance their flavor and presentation.
-
Creamy Vanilla Ice Cream: A scoop of vanilla ice cream adds a deliciously cool contrast to the warm cupcakes, making each bite heavenly.
-
Fresh Berries Medley: Juicy strawberries, blueberries, and raspberries offer a refreshing burst of flavor and vibrant color, balancing the sweetness of the cupcakes.
-
Chocolate Ganache Drizzle: A rich ganache pour over the cupcakes intensifies their chocolatey goodness and adds a luxurious touch.
-
Whipped Cream Topping: Light and airy whipped cream complements the dense texture of the cupcakes, providing a delightful contrast in both texture and flavor.
-
Coffee or Espresso: A cup of freshly brewed coffee or a bold espresso complements the chocolate, enhancing the depth of flavor in every bite.
-
Coconut Macaroons: These chewy, sweet treats create a unique texture contrast while the coconut’s subtle flavor harmonizes beautifully with chocolate.
-
Chocolate Hazelnut Spread: A spread of Nutella or similar chocolate-hazelnut mix aligns perfectly with the marbled flavors, creating a decadent treat.
-
Milkshake: A classic chocolate milkshake will take you back to nostalgic dessert moments and pairs perfectly with the rich cupcake experience.
Chocolate Marble Cupcakes Recipe FAQs
What is the best way to select ripe ingredients for my cupcakes?
Absolutely! For the best results, make sure your eggs and butter are at room temperature before starting the batter. This helps create a light, fluffy texture in your Chocolate Marble Cupcakes. When choosing vanilla extract, opt for pure vanilla rather than imitation for a richer flavor.
How should I store my Chocolate Marble Cupcakes?
You can store unfrosted Chocolate Marble Cupcakes in an airtight container at room temperature for up to 3 days. If you’ve decorated them with frosting, place them in the refrigerator, where they’ll stay fresh for about a week. Just ensure they’re covered to maintain that moist, delightful goodness!
Can I freeze Chocolate Marble Cupcakes, and how?
Absolutely! To freeze your Chocolate Marble Cupcakes, first, let them cool completely. Place them in a single layer on a baking sheet and freeze until solid. Then, transfer them to a freezer-safe container or a resealable freezer bag. They can be stored for up to 3 months. When you’re ready to enjoy them, thaw overnight in the fridge and bring to room temperature before serving.
What should I do if my batter is too thick after mixing?
If your batter is too thick, add a tablespoon of milk (or buttermilk) at a time until you reach the desired consistency. It’s also important to ensure that your baking powder is fresh, as a stale leavening agent can lead to dense cupcakes. Don’t forget that gentle mixing is key; overmixing can also cause a thick batter.
Are these Chocolate Marble Cupcakes suitable for people with allergies?
You can easily adapt this recipe for dietary considerations! For egg allergies, consider using an egg replacer or a flax egg (1 tablespoon ground flaxseed mixed with 2.5 tablespoons water). For dairy allergies, substitute regular milk with non-dairy alternatives like almond or oat milk, and use dairy-free butter for the best results.
Can I make these cupcakes mini-sized?
Very! To make mini Chocolate Marble Cupcakes, simply use a mini muffin tin and fill each liner about 1/2 full. Bake them for about 10-12 minutes, checking with a toothpick for doneness. Mini cupcakes are perfect for parties and offer a cute, bite-sized treat!
Decadent Chocolate Marble Cupcakes for Every Celebration
Ingredients
Equipment
Method
- Preheat your oven to 350°F (175°C) and line a muffin tin with cupcake liners.
- In a medium bowl, whisk together the all-purpose flour, baking powder, and salt until well combined.
- In a large mixing bowl, cream the softened unsalted butter and granulated sugar together using an electric mixer for about 3-5 minutes until light and fluffy.
- Add the eggs one at a time to the creamed mixture, mixing well after each addition, then add the vanilla extract.
- Gradually add the dry ingredient mixture and the milk to the wet ingredients, alternating between the two.
- In a small bowl, mix the cocoa powder with hot milk or hot water, then fold in half of the vanilla batter to create the chocolate batter.
- Spoon the vanilla batter into the lined muffin tin halfway, add a spoonful of chocolate batter on top, and swirl gently with a toothpick.
- Bake for 18-22 minutes until a toothpick inserted comes out clean, then cool in the tin for 5 minutes before transferring to a wire rack.
Leave a Reply