
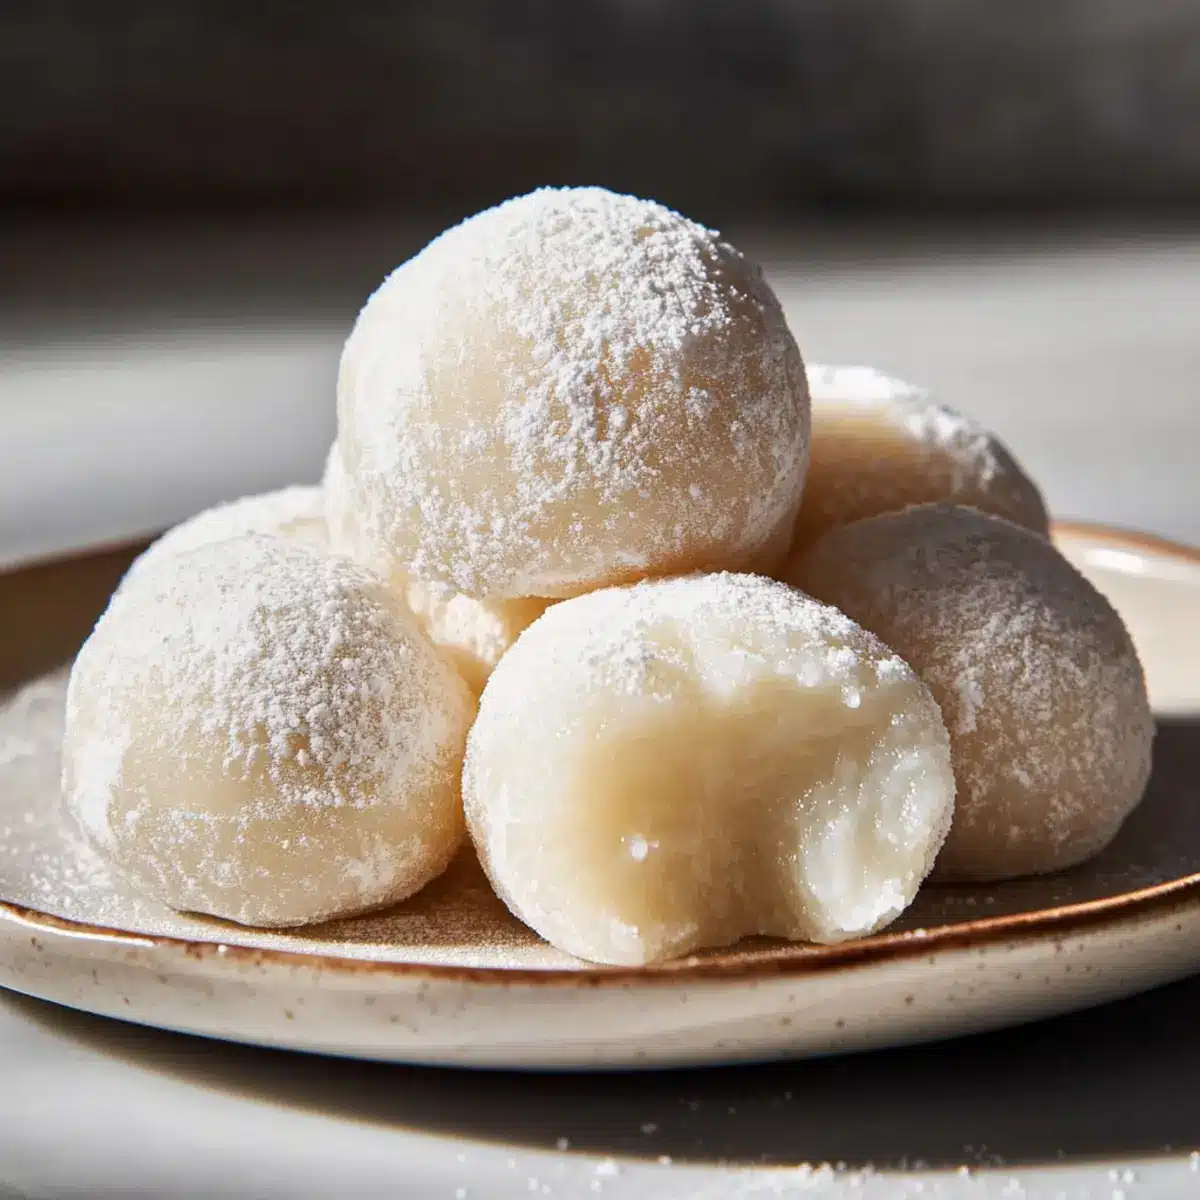
As the comforting aroma of warm milk wafts through my kitchen, I’m reminded of the simple joys of creating something delightful from scratch. This Milk Mochi Recipe captures the essence of traditional Japanese sweets, transforming a few basic ingredients into a treat that is both soft and chewy. In just 30 minutes, you can whip up this cloud-like delicacy, perfect for indulging in as a quick snack or impressing guests at your next gathering. Not only is this handmade dessert a fun project for home chefs of all levels, but it’s also gluten-free and low-fat, making it an ideal option for anyone looking to enjoy something sweet without the guilt. Are you ready to dive into this delightful world of texture and flavor? Let’s get cooking!
Why Is Milk Mochi So Irresistible?
Softness: The texture of milk mochi is simply unmatched—each bite is a tender, chewy experience that feels like a hug from the inside.
Quick Prep: With just 30 minutes to spare, you can transform basic pantry staples into a crowd-pleaser that’s both fun and easy to make.
Versatile Bases: Whether enjoyed plain or dressed up with sweetened condensed milk, the flavor possibilities are endless. Drizzle over this delightful treat for a rich twist!
Guilt-Free Indulgence: Being gluten-free and low-fat, this dessert is perfect for satisfying your sweet tooth without the usual regrets.
Cultural Experience: Get a taste of Japanese cuisine right in your kitchen where you can share this joyful experience with family and friends—like serving it with a warm drink for the perfect afternoon break!
Milk Mochi Ingredients
For the Mochi
• Glutinous Rice Flour – Provides the signature chewy texture of mochi; substitution: sweet rice flour can be used interchangeably.
• Whole Milk – Contributes creaminess and rich flavor; note: room temperature milk blends smoother than cold.
• Granulated Sugar – Adds sweetness that can be adjusted according to your taste; substitution: use a sugar alternative for a lower-calorie version.
• Cornstarch – Softens the texture and aids in dough consistency; note: can be replaced with additional glutinous rice flour if necessary.
• Water – Adjusts dough consistency as needed; note: use less for a thicker dough.
• Salt – Enhances the overall flavor of the mochi; no substitutions needed.
For Dusting
• Potato Starch or Cornstarch – For dusting and coating to prevent sticking; note: both can be absorbed by the mochi depending on thickness.
Optional Topping
• Sweetened Condensed Milk – Adds richness and sweetness when drizzled on top; substitution: omit for a lower-sugar version.
Delight in the joy of this Milk Mochi Recipe, crafted from simple ingredients yet packed with flavor!
Step‑by‑Step Instructions for Milk Mochi Recipe
Step 1: Combine Dry Ingredients
In a microwave-safe bowl, whisk together 1 cup of glutinous rice flour, ½ cup of granulated sugar, ¼ cup of cornstarch, and a pinch of salt until evenly mixed. This base forms the chewy texture of your Milk Mochi. Ensure there are no clumps for a smooth finish.
Step 2: Mix in Wet Ingredients
Gradually add 1 cup of room temperature whole milk and ¼ cup of water to the dry mixture. Stir continuously until you achieve a smooth batter, free of lumps. The goal is to create a creamy consistency that will yield tender mochi.
Step 3: Microwave the Mixture
Cover the bowl tightly with vented plastic wrap and microwave the mixture for 1 minute on high. After the time is up, check for early signs of cooking, such as slight bubbling. Remove it carefully, as steam will escape.
Step 4: Stir and Continue Cooking
Once stirred, return the mixture for two additional rounds of 1 minute each, stirring in between. Keep an eye out for the dough turning translucent and stretchy. This should take about 3 minutes total. The transformation indicates your Milk Mochi mixture is nearly ready.
Step 5: Cool the Dough Slightly
After microwaving, let the dough cool for 2–3 minutes. This waiting period is vital for the perfect texture, so resist the urge to touch it too soon. Be cautious as it may still be hot and sticky.
Step 6: Prepare Dusting Surface
While the dough cools, generously dust your work surface with potato starch or cornstarch to prevent sticking. This is essential for shaping your mochi later. By doing this, you’ll ensure smooth handling of the milk mochi dough.
Step 7: Transfer and Coat the Dough
Carefully transfer the warm mochi dough onto the dusted surface. Use a spatula if necessary to avoid burns. Dust the top of the dough lightly with more starch, which will help prevent it from sticking to your hands as you shape it.
Step 8: Shape the Mochi Balls
Divide the dough into 8–10 equal pieces, using a sharp knife or dough cutter. Roll each piece into a smooth ball, maintaining a gentle touch to keep the texture airy and light.
Step 9: Let the Mochi Cool
Once shaped, allow the mochi balls to cool for about 15 minutes at room temperature. This resting period allows them to firm up and develop their signature chewy texture, making them just right for serving.
Step 10: Final Dusting and Serving
After cooling, gently brush off any excess starch from the mochi balls. For an added touch, drizzle with sweetened condensed milk or dust with powdered sugar before serving. Your delightful Milk Mochi Recipe is now ready to be enjoyed!
Make Ahead Options
These Milk Mochi are perfect for busy weeknights! You can prepare the dough up to 24 hours in advance by following all the steps up to rolling the mochi balls. Once shaped, place them in an airtight container, with a light dusting of potato starch to prevent sticking, and refrigerate. When you’re ready to enjoy your milk mochi, simply let them sit at room temperature for about 15 minutes to soften, then drizzle with sweetened condensed milk or dust with powdered sugar before serving. This approach not only saves time but ensures your mochi taste just as delightful fresh, making them a fantastic option for meal prep or entertaining!
What to Serve with Milk Mochi
As you embrace the delightful, chewy textures of milk mochi, consider pairing this treat with lovely companions that enhance every bite!
-
Matcha Green Tea: Its earthy notes create a beautiful balance with the sweetness of the mochi, offering a delightful cultural experience.
-
Fresh Fruit Salad: A light, refreshing assortment of seasonal fruits adds a vibrant contrast and brightens each mouthful of mochi.
-
Sweetened Condensed Milk Drizzle: For a richer experience, drizzle condensed milk over the mochi—it’s a luxurious twist that amplifies the flavors.
-
Shaved Ice or Kakigori: Chill your palate by serving mochi atop a mound of shaved ice. The textures meld sweetly in a fun, festive dessert.
-
Coffee or Latte: Pair with a warm cup of coffee or latte for an inviting afternoon snack, contrasting the coolness of mochi with a cozy drink.
-
Red Bean Paste: This traditional Japanese accompaniment introduces a subtly sweet element that perfectly complements the soft texture of the mochi.
-
Coconut Sorbet: Serve with a scoop of coconut sorbet for a refreshing, tropical twist that enhances the dessert’s chewiness.
-
Jasmine or Earl Grey Tea: The floral or citrus notes in these teas provide an unexpected dimension, creating a delightful contrast to moist, sweet mochi.
How to Store and Freeze Milk Mochi
Room Temperature: Store milk mochi in an airtight container for up to 2 days. Keep it in a cool, dry place to maintain its soft texture.
Fridge: If you need to keep leftovers longer, place them in the fridge for up to 1 week. Just remember to let them come to room temperature before serving for the best experience.
Freezer: For extended storage, freeze milk mochi in a single layer on a baking sheet for about 2 hours before transferring to a freezer bag. They’ll last for up to 3 months.
Reheating: Thaw frozen mochi in the fridge overnight, and to enjoy the chewy texture, microwave for a few seconds until slightly warm.
Milk Mochi Recipe Variations
Feel free to get creative with your Milk Mochi recipe—let your culinary imagination run wild!
-
Matcha Magic: Add 1-2 tablespoons of matcha powder to the dry ingredients for a vibrant green tea flavor!
-
Cocoa Kick: Include 2 tablespoons of unsweetened cocoa powder to the dry mix for a rich chocolatey twist that cocoa lovers will adore.
-
Fruit-Flavored Delight: Incorporate ¼ cup of fruit puree—like strawberry or mango—into the batter for a refreshing fruity twist. Enjoy the explosion of flavor with each bite!
-
Nut Butter Bliss: Swirl in 2 tablespoons of almond or peanut butter for a creamy, nutty richness that pairs wonderfully with the chewy texture.
-
Coconut Variation: Substitute half of the milk with coconut milk to infuse your mochi with a tropical flair; it pairs beautifully with a drizzle of sweetened condensed milk.
-
Boba Fusion: Roll small tapioca pearls right into your mochi for a fun boba mochi. This adds a delightful chewiness for a unique twist on texture!
-
Flavorful Dusting: Instead of plain starch for dusting, use flavored starch, such as coconut or matcha-starch, for an exciting taste upgrade as you serve.
-
Cinnamon Sugar Dusting: After cooling, toss your mochi balls in a mix of cinnamon and granulated sugar for a warm, aromatic finish—perfect with a cup of warm tea!
These fun variations allow you to enjoy your homemade Milk Mochi in different ways. And if you’re still in the mood for more delightful recipes, why not try my comforting White Chicken Chili for a savory treat or whip up some Caramel Apple Cheesecake Dip later for dessert? Let your creativity flow—happy cooking!
Expert Tips for Milk Mochi Recipe
-
Perfect Texture: Allow the dough to rest for precisely 3 minutes after microwaving. This crucial step helps the starches set, ensuring ideal chewiness.
-
Gentle Handling: Remember, the dough will be hot and sticky. Use a spatula to prevent burns during the transfer and shaping process.
-
Dust Generously: Coat your work surface and the dough with plenty of potato starch or cornstarch to prevent sticking—this is key for a smooth mochi experience.
-
Microwave Timing: Stir between cooking intervals. This promotes even heating, helping the Milk Mochi become stretchy and translucent without lumps.
-
Customization Magic: Feel free to add flavors before microwaving! Incorporating matcha or cocoa powder gives your Milk Mochi a delicious twist.
-
Sweet Drizzle: For a richer flavor, drizzle sweetened condensed milk on your mochi balls before serving. This adds both sweetness and a beautiful finish!
Milk Mochi Recipe FAQs
What type of glutinous rice flour should I use?
You should use glutinous rice flour, which is essential for achieving the characteristic chewy texture of milk mochi. Sweet rice flour is also a great alternative, as it has a similar composition that works well in this recipe.
How should I store leftover milk mochi?
Absolutely! Store milk mochi in an airtight container at room temperature for up to 2 days to preserve its softness. If you want to keep it for longer, refrigerate it for up to 1 week. Just let it rest at room temperature before serving to regain its delightful texture.
Can I freeze milk mochi?
Yes, you can! To freeze milk mochi, lay them in a single layer on a baking sheet and freeze for about 2 hours. Once firm, transfer them to a freezer bag. They will stay good for up to 3 months. When you’re ready to enjoy, thaw them in the fridge overnight, and then microwave for a few seconds to warm them slightly.
What are some common issues when making milk mochi?
If your mochi turns out too sticky or doesn’t hold its shape, it might be due to insufficient dusting with potato or cornstarch. Be generous when coating your work surface and the dough itself. Additionally, ensure that you are stirring well between microwave intervals for even cooking, which helps achieve that lovely stretchy texture.
Is this milk mochi recipe suitable for those with dietary restrictions?
Yes, indeed! This milk mochi recipe is gluten-free, making it accessible for individuals with gluten intolerances. However, do keep in mind any allergies related to milk or sugar alternatives if you decide to substitute. It’s always a great idea to check ingredient labels to ensure they meet your dietary needs.
How can I customize the flavor of my milk mochi?
Very easily! You can infuse flavors into your milk mochi by adding ingredients like matcha powder, cocoa, or fruit puree directly into the dough before microwaving. This allows for endless creativity in your desserts, giving each batch a unique twist that complements your tastes!
Delightful Milk Mochi Recipe: Soft, Chewy, & Irresistible!
Ingredients
Equipment
Method
- In a microwave-safe bowl, whisk together glutinous rice flour, granulated sugar, cornstarch, and salt until evenly mixed.
- Gradually add whole milk and water to the dry mixture, stirring continuously to create a smooth batter.
- Cover the bowl with vented plastic wrap and microwave for 1 minute on high.
- Stir and return for two additional rounds of 1 minute each, stirring in between.
- Allow the dough to cool for 2–3 minutes after microwaving.
- Generously dust your work surface with potato starch or cornstarch to prevent sticking.
- Transfer the warm mochi dough onto the dusted surface and dust the top lightly with more starch.
- Divide the dough into 8–10 equal pieces and roll each piece into a smooth ball.
- Let the mochi balls cool for about 15 minutes at room temperature.
- Gently brush off any excess starch from the mochi balls and serve, optionally drizzling with sweetened condensed milk.
Leave a Reply