
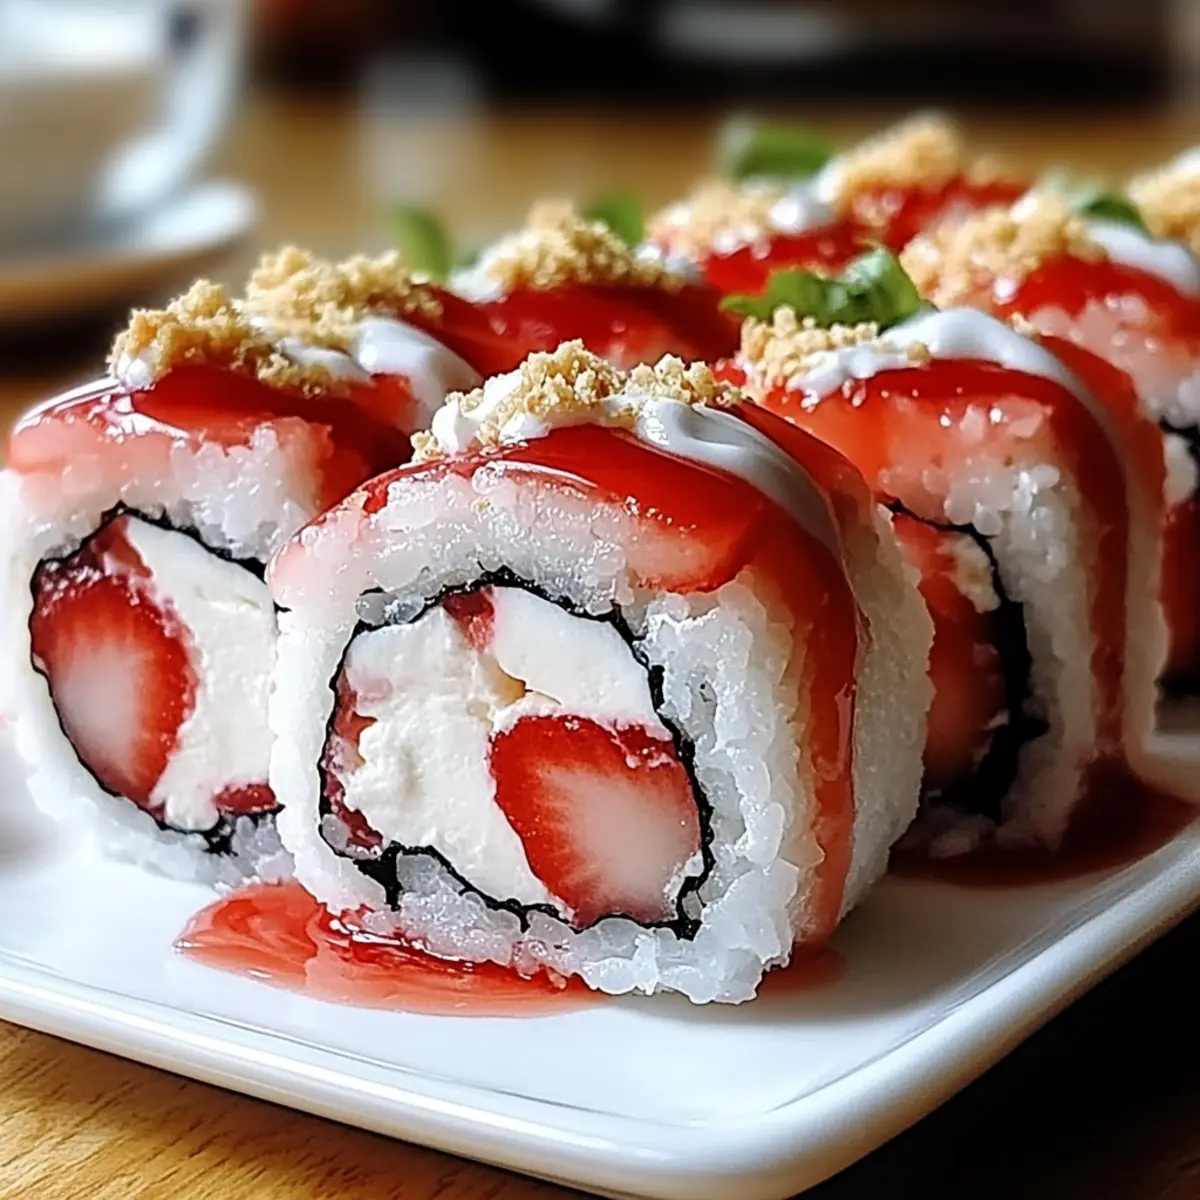
As I sat at a bustling café one sunny afternoon, I stumbled upon a mouthwatering dessert—a fusion of playful flavors wrapped in a creative presentation. That’s when I had my eureka moment: why not combine the classic strawberry shortcake with the eye-catching format of sushi? Enter the Strawberry Shortcake Sushi Roll, where you can enjoy creamy cheesecake filling and fresh strawberries rolled in a fluffy sponge cake. This no-bake delight not only looks stunning on any party table but also offers an easy way to bring gourmet dessert vibes to your next gathering. Flex your culinary creativity while making this vegetarian treat that’s bound to impress friends and family alike! Ready to roll up some fun? Let’s get started!

Why will you adore this sushi roll?
Delightful Visuals: The Strawberry Shortcake Sushi Roll is a feast for the eyes, creating visual appeal that elevates any dessert table.
Easy Preparation: This no-bake recipe simplifies dessert-making, requiring just a few steps that are fun and engaging for all skill levels.
Crowd-Pleasing Flavors: Combining fresh strawberries with creamy cheesecake filling, it balances sweetness and tang, making it a sure hit at parties.
Versatile Ingredients: Feel free to adapt this recipe! Swap in different fruit preserves or even flavored whipped cream for a unique twist that personalizes the experience.
Dazzling Presentation: Serve these pinwheels on a wooden sushi board for added elegance; they make entertaining effortless and stylish.
Quick Make-Ahead: With a storage life of up to 3 days in the fridge, you can prepare them ahead of time, leaving you free to enjoy your gathering!
Strawberry Shortcake Sushi Roll Ingredients
For the Cake
• Sponge Cake – Provides airy structure. Substitute with a store-bought sheet cake for convenience.
For the Filling
• Cream Cheese – Adds creaminess and tang. Can replace with mascarpone cheese for a different flavor.
• Powdered Sugar – Sweetens and smooths the filling. No direct substitutions noted.
• Vanilla Extract – Enhances overall flavor. Use almond extract for a twist.
• Whipped Cream – Contributes lightness to the filling. Can use flavored whipped cream for extra flair.
• Strawberry Preserves – Adds sweetness and fruit flavor. Fresh strawberries can be used in place, but preserves ensure moisture.
For the Finish
• Fresh Strawberries – Provides freshness and juiciness. Thawed, drained frozen strawberries can be used if needed.
• White Chocolate (optional) – Adds a sweet drizzle for extra indulgence. Melted white chocolate can elevate the dessert’s visual appeal.
• Mint Leaves (optional) – Provides a pop of color and freshness to your presentation. Add these for an elegant touch.
Step‑by‑Step Instructions for Strawberry Shortcake Sushi Roll
Step 1: Prepare the Sponge Cake
If you’re making the sponge cake from scratch, preheat your oven to 350°F (175°C). Grease a jelly roll pan and line it with parchment paper. Pour in the batter and spread evenly. Bake for about 12-15 minutes or until the edges are golden and a toothpick inserted in the center comes out clean. Let it cool completely on a wire rack.
Step 2: Set Up Your Work Area
Once your sponge cake has cooled, lay it flat on a clean sheet of parchment paper or a rolling mat, ensuring the smooth side is facing up. This setup will assist in rolling your Strawberry Shortcake Sushi Roll evenly. It’s essential that the cake is at room temperature to avoid cracking during rolling.
Step 3: Make the Cream Cheese Filling
In a mixing bowl, beat together 8 oz of cream cheese, 1 cup of powdered sugar, and 1 teaspoon of vanilla extract until smooth and creamy, about 2 minutes using an electric mixer. Gently fold in 1 cup of whipped cream until blended. This creates a luscious filling that brings the dessert to life, ensuring each bite is delightful.
Step 4: Spread Strawberry Preserves
After your filling is prepared, spread a thin layer of strawberry preserves over the entire surface of the sponge cake, leaving about half an inch from the edges. This layer adds sweetness and moisture, enhancing your Strawberry Shortcake Sushi Roll. Ensure an even distribution to maintain balance in flavor as you roll.
Step 5: Add the Cream Cheese Mixture
Now, spread an even layer of the cream cheese mixture on top of the strawberry preserves, smoothing it out with a spatula. Sprinkle diced fresh strawberries over the cream cheese layer, adding vibrant flavor and texture. Be careful not to overfill; this will help with a tighter roll and a beautiful presentation.
Step 6: Roll the Cake
Starting from one edge of the cake, carefully roll it up using the parchment or rolling mat to guide you. Apply gentle pressure to ensure a tight roll without squeezing out the filling. Roll until you reach the edge of the cake, then press to seal the roll. This step creates the sushi-like pinwheel structure that makes this dessert so fun!
Step 7: Chill the Roll
Wrap the rolled cake tightly in the parchment paper and place it seam side down on a plate. Refrigerate for about 20-30 minutes to allow the roll to set. Chilling helps the strawberry shortcake sushi roll hold its shape, making it easier to slice later while keeping the filling intact.
Step 8: Slice and Serve
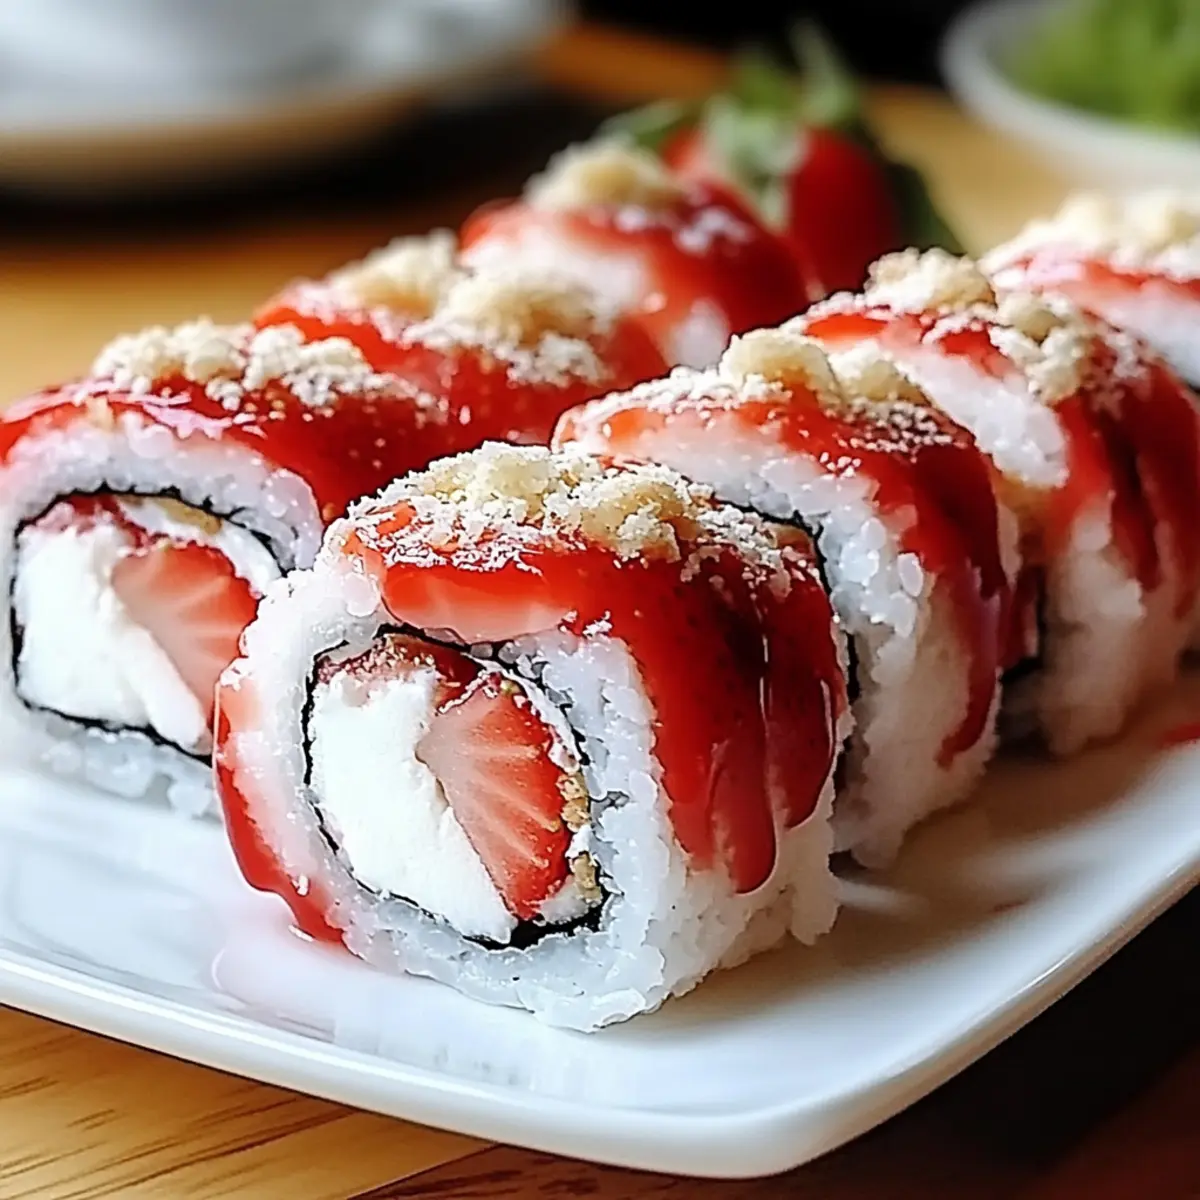
After chilling, use a sharp knife to slice the roll into 1-inch pieces for a neat presentation, wiping the knife between cuts for clean slices. Arrange the slices on a platter to showcase their beautiful pinwheel design. The contrast of colors will make your Strawberry Shortcake Sushi Roll irresistible to guests.
Step 9: Add Final Touches
For an extra touch of indulgence, drizzle melted white chocolate over the sliced rolls and garnish with fresh mint leaves for a pop of color. Optionally, add a dollop of whipped cream on the platter for an inviting presentation. Your creative Strawberry Shortcake Sushi Roll is now ready to delight at any gathering!
Strawberry Shortcake Sushi Roll Variations
Feel free to let your creativity shine with these delightful twists on the classic Strawberry Shortcake Sushi Roll!
-
Coconut Bliss: Substitute regular whipped cream with coconut whipped topping for a tropical flair. Let the coconut flavor embrace your strawberries for a heavenly dessert experience.
-
Zesty Surprise: Add a splash of lemon juice to the cream filling for an unexpected zesty kick. The tartness pairs beautifully with the sweetness of strawberries, creating a refreshing contrast.
-
Berry Medley: Instead of sticking to just strawberries, try using a mix of berries—such as blueberries and raspberries—in your rolls. Each bite will be a burst of diverse fruity flavors.
-
Chocolate Lover’s Delight: Incorporate chocolate pudding into the filling for a rich and creamy surprise. Pairing chocolate with strawberry creates a classic flavor duo that everyone loves.
-
Almond Dream: Swap vanilla extract for almond extract to introduce a nutty flavor to your filling. This simple switch can transform the taste and offer a new dimension of flavor.
-
Nutty Crunch: Add chopped nuts, like almonds or pecans, into the filling for a delightful crunch. The added texture enhances the creamy and smooth layers, making every bite more interesting.
-
Berry Jam: Experiment with different fruit preserves, such as raspberry or peach, for a unique twist on flavor. Each jam brings its own sweetness, making your rolls tailor-made to your taste.
-
Festive Red, White, and Blue: For a patriotic touch, incorporate blueberries along with strawberries in the roll, ideal for summer gatherings. It not only tastes delicious but looks stunning too!
Feel free to mix and match these variations or make your own! You can also explore our delicious crowd-pleasing desserts or check out refreshing beverages to serve alongside, like our vanilla raspberry iced latte. Your strawberry shortcake sushi rolls are sure to impress!
Make Ahead Options
These Strawberry Shortcake Sushi Rolls are perfect for meal prep enthusiasts! You can prepare the sponge cake and filling up to 24 hours in advance. Simply bake and cool the sponge cake, then wrap it tightly in plastic wrap and store in the refrigerator. The cream cheese mixture can also be made ahead and kept in an airtight container in the fridge for 2-3 days. When you’re ready to serve, roll the cake with the filling, refrigerate for an additional 20-30 minutes to set, and slice into pinwheels. With these make-ahead tips, you’ll have a delightful dessert ready with minimal effort, just as delicious and beautiful as if made fresh!
What to Serve with Strawberry Shortcake Sushi Roll
There’s nothing quite like a vibrant dessert spread to complement your delightful sushi roll creation!
-
Creamy Vanilla Ice Cream: This classic pairing adds an extra layer of creaminess that melds beautifully with the fresh flavors of your sushi roll. You can serve a scoop alongside for a refreshing contrast.
-
Zesty Lemon Sorbet: The bright and tangy notes of lemon sorbet pair perfectly with the sweetness of strawberries, cutting through the richness of the cheesecake filling. Guests will adore this refreshing combination!
-
Chocolate Drizzle: A simple melted dark chocolate drizzle enhances the dessert with depth. The bittersweet notes balance the sweetness, adding a luscious touch to each bite.
-
Fresh Mint Leaves: Use as a garnish for both color and a hint of aromatics. The mint’s coolness elevates the presentation, making each piece even more enticing.
-
Sparkling Water with Citrus: Offer guests a light and refreshing drink option, like sparkling water with lemon or lime wedges, which cleanses the palate between bites of the rich dessert.
-
Fruit Platter: Serve with a colorful selection of seasonal fruits, such as blueberries, kiwi, or orange slices. The freshness brightens up the table and adds another layer of flavor to enjoy alongside your sushi roll.
Elevate the experience by creating a dessert table that invites guests to explore flavors and textures, making every gathering memorable!
Expert Tips for Strawberry Shortcake Sushi Roll
Balanced Filling: Don’t overfill the cake; keeping filling modest ensures an easier roll and beautiful presentation.
Chill Well: Allow the roll to chill for at least 20-30 minutes; this step is crucial for maintaining the structure of your Strawberry Shortcake Sushi Roll.
Sharp Knives Only: Use a sharp, non-serrated knife for slicing. A clean cut helps maintain the aesthetic of your sushi roll and prevents squishing.
Customize Flavors: Don’t hesitate to swap in different fruit preserves or extracts; a little creativity elevates your dessert experience.
Check Consistency: Make sure your cream cheese mixture is smooth and not too runny, as this will help the filling stay put when rolling.
Present with Style: Enhance the visual appeal by serving on a platter, drizzling with white chocolate, and garnishing with mint leaves for that gourmet touch!
How to Store and Freeze Strawberry Shortcake Sushi Roll
Fridge: Store any leftover sushi rolls in an airtight container in the refrigerator for up to 3 days, ensuring they remain fresh and delicious.
Freezer: For longer storage, freeze slices in a single layer on a baking sheet before transferring them to a freezer-safe bag or container, lasting up to 1 month.
Thawing: When ready to enjoy, thaw the rolls in the fridge overnight to maintain their creamy texture.
Reheating: Reheating is not recommended, as the roll is best served cold to preserve the delicate layers and freshness of the strawberries.

Strawberry Shortcake Sushi Roll Recipe FAQs
How do I select ripe strawberries?
Absolutely! Choose strawberries that are bright red, plump, and firm for the best flavor. Avoid those with dark spots or a dull color, as they may be overripe. If possible, look for berries with fresh, green caps, as that indicates freshness.
What is the best way to store leftover sushi rolls?
For sure! Store any leftover Strawberry Shortcake Sushi Rolls in an airtight container in the refrigerator for up to 3 days. To keep them fresh, make sure they are sealed tightly to prevent any air exposure that could dry them out.
Can I freeze the Strawberry Shortcake Sushi Roll?
Definitely! To freeze, slice the sushi roll into pieces and place them in a single layer on a baking sheet. Once frozen, transfer the slices to a freezer-safe bag or container. They can be stored for up to 1 month. When you’re ready to enjoy, simply thaw them in the fridge overnight.
What should I do if my filling is too runny?
If your cream cheese mixture is too runny, chill it in the fridge for about 30 minutes to help thicken it up. You can also add a bit more powdered sugar or a tablespoon of the cream cheese to help balance the consistency. If you still have trouble, consider using a little less whipped cream next time.
Is this dessert suitable for people with dietary restrictions?
Absolutely! The Strawberry Shortcake Sushi Roll is vegetarian-friendly and can easily be adapted to be gluten-free by using a gluten-free sponge cake. If you’re catering to allergies, always double-check your ingredients, especially for the cream cheese and any flavored components.
What is the secret to making clean slices?
Very! To achieve beautiful, clean slices, use a sharp, non-serrated knife. Wipe the knife with a damp cloth between cuts; this prevents the filling from sticking and keeps the aesthetic of your sushi roll intact. Aim for gentle pressure rather than forcing the knife through.
Strawberry Shortcake Sushi Roll
Ingredients
Equipment
Method
- Preheat your oven to 350°F (175°C). Grease a jelly roll pan and line it with parchment paper. Pour in the batter and spread evenly. Bake for about 12-15 minutes or until the edges are golden and a toothpick inserted in the center comes out clean. Let it cool completely on a wire rack.
- Once your sponge cake has cooled, lay it flat on a clean sheet of parchment paper or a rolling mat, ensuring the smooth side is facing up.
- In a mixing bowl, beat together 8 oz of cream cheese, 1 cup of powdered sugar, and 1 teaspoon of vanilla extract until smooth and creamy.
- Spread a thin layer of strawberry preserves over the surface of the sponge cake, leaving about half an inch from the edges.
- Now, spread an even layer of the cream cheese mixture on top of the strawberry preserves and sprinkle diced fresh strawberries over it.
- Starting from one edge of the cake, carefully roll it up using the parchment or rolling mat to guide you. Press to seal the roll.
- Wrap the rolled cake tightly in parchment paper and refrigerate for about 20-30 minutes to allow the roll to set.
- After chilling, use a sharp knife to slice the roll into 1-inch pieces for a neat presentation.
- Drizzle melted white chocolate over the sliced rolls and garnish with fresh mint leaves for a pop of color.
Leave a Reply